
How to make a floor plan on microsoft word.If you need to design a floor plan and do not want to work with software, you can use Word as an efficient tool to do this type of work.In fact, Microsoft Word is very profitable in our daily work. As an example when making a floor plan for various purposes. Here’s how to make a floor plan in Microsoft Word.
How to make a floor plan in Microsoft Word/11 Steps
The floor plan is a description of an image. You can indicate a location with a floor plan. We can find a location accurately. Usually the placement plan is often on the back of the invitation letter, seminar brochure, meeting letter, etc.To make a floor plan, we can use Microsoft Word. Using Microsoft Word, making a location plan will feel very easy and simple. The following is a tutorial for making a location plan with Microsoft Word.
1 To create a location plan in Microsoft Word, you must first open the Microdoft Word application on your computer. If so, then the first step you need to do is to form a road image according to the location plan. The trick is to click on the menu. Insert then enter the Shapes menu . In the Shapes menu you must choose a rectangular 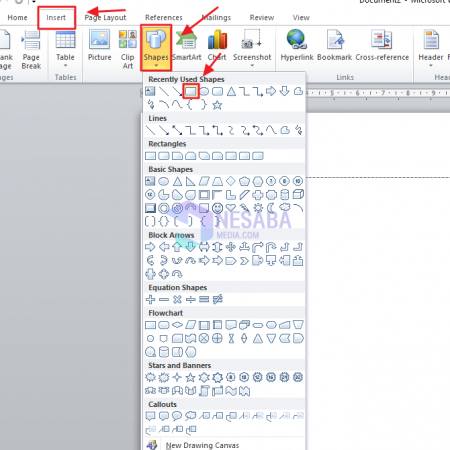
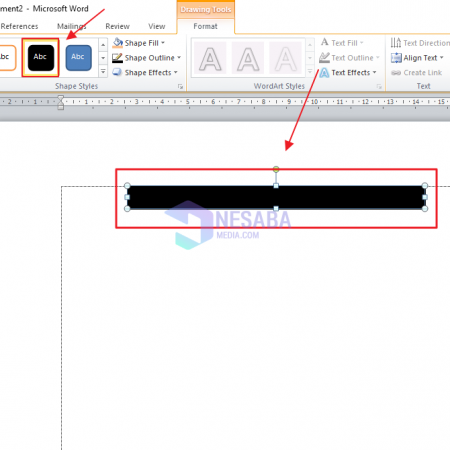
2 After that, you can draw the size of the rectangle by clicking the left mouse button and then holding it until it forms the size of the rectangle you want. Then you need to choose the style of black shapes as shown below. The rectangle is the shape of the road.
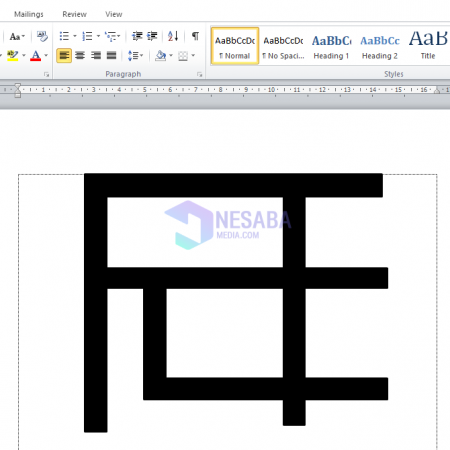
3 You need to arrange the road shape for the location on your floor plan according to what you want and also according to the actual location. You can repeat the steps above to form a plant image. And here are the results of the roadmap that I have drawn with Microsoft Word.
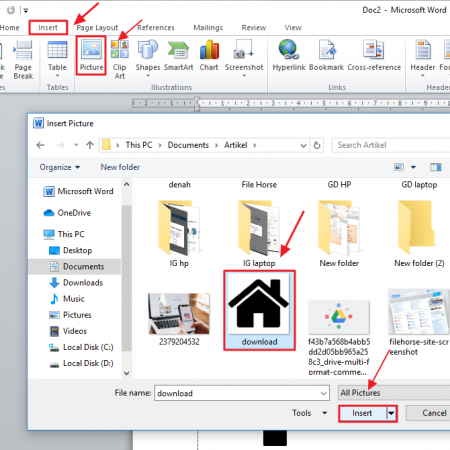
4 4 The next step is to provide the house and mosque icon as a road marker to get to the location. For pictures of houses and mosques, you can google them. You choose the image of the icon that suits your taste. In this tutorial, I use the home icon as shown below.

5. To enter an image of the home icon, you can enter the Insert menu and then click Image . After that, a file box will appear on our computer. Find the saved image and click Insert .
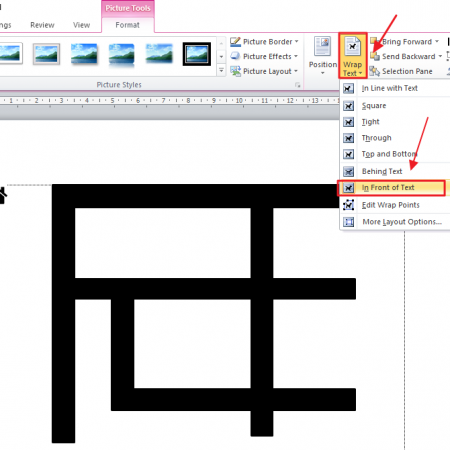
6. Then you need to move the icon according to its place. To move it, you need to click Wrap Text then choose In Front of Text .

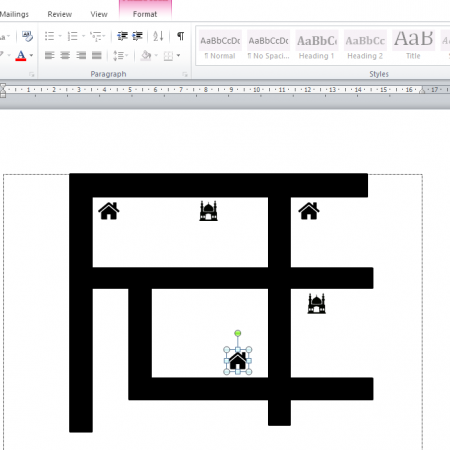
7. You can do the same to insert the icon image in a place that becomes a bookmark. This is the result of the floor plan that I managed to do.
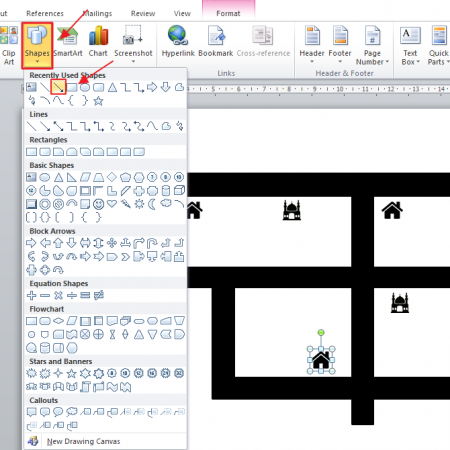
8. Then you must enter an arrow to show the direction of the road to reach the destination location. To enter a terrestrial image, you can enter the Insert menu , then click Shapes . Then choose the corduroy image icon as shown below.
9. You can aim the arrow. Then you need to change the color of the arrow to white. The trick is to double click the arrow and then click Outline Shape and choose white.

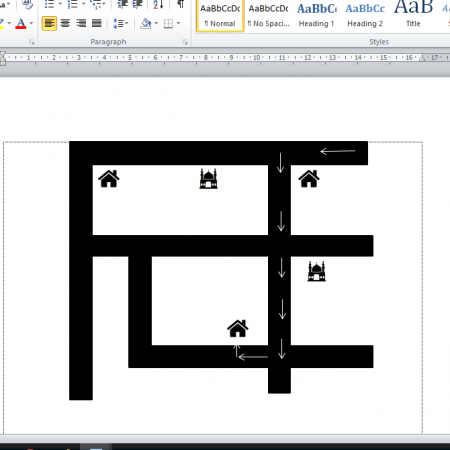
10. These are the results of the directions I made using the arrows to the destination location.
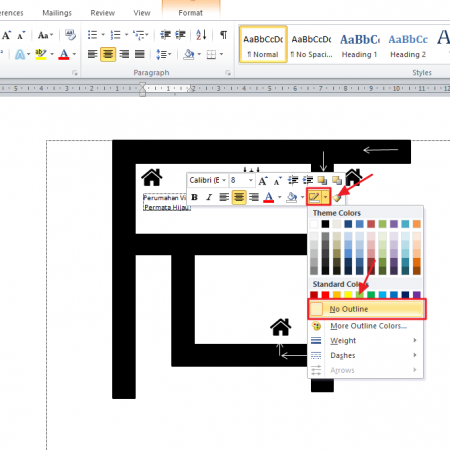
11. The next step is to give a name to the icon that marks the path. the way is to click the Insert menu and then click Text Box . Then choose Simple Text Box .
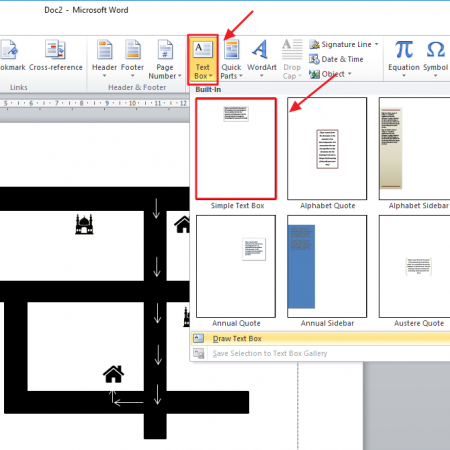
12. After typing the name of the bookmark in the icon, you must delete the outline in the text box. The trick is to right click on the text box and then select outline icon like below and choose No outline .
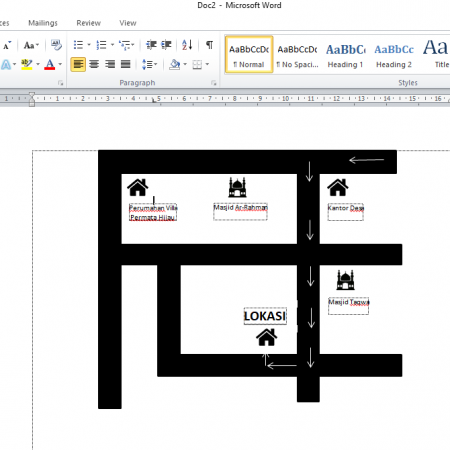
13. This is the result of the design of the location plan that I managed to create using Microsoft Word.
Hence, the tutorial article on How To Make A Floor Plan On Microsoft Word Hopefully this article can be useful to you and broaden your horizons.