
A detailed guide to all story missions in the Phantom Liberty add-on.In short, you can start playing the Cyberpunk 2077: Phantom Freedom expansion in three ways:
- The first option is to click on the “New Game” option in the main menu and then select the “Start with the events of Phantom Freedom” option. In this case, you will immediately begin exploring the DLC, finding yourself in Dog City – a separate district of Pacifica in Night City. V will get some leveling up, you will have to choose the difficulty level, his background and appearance. In addition, Johnny will tell you in more detail about what events preceded the current situation (and these are plot points from the start of the game until the completion of the “Human Factor” task).
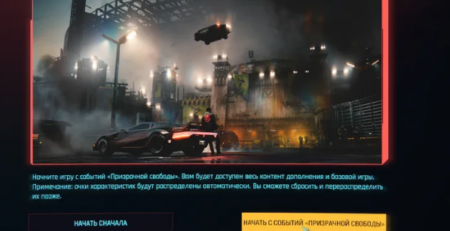
- The second option is that you already have a save in which you completed the game beyond the “Human Factor” task. In this case, after loading, go to V’s apartment to relax. After sleep, Jay, a netrunner from Dog City, will contact you and you will receive a quest marker.
- The third option is to select the New Game option from the main menu and actually start a new game. Go through the storyline of the original, complete the task “Human Factor” and Jay will contact you. Then everything is the same as in the second case.
Unknown land
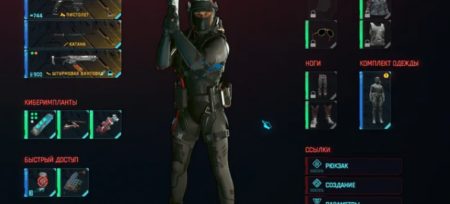
Chat with Jay as soon as she contacts you. Your answers do not affect anything, since you will agree to visit the Dog City in any case. Get on any transport and go to the marked place. Go forward, but you won’t be able to get into the city through the main entrance. Turn right to trigger a cutscene. Jay will replace Johnny on your biochip. In addition, a new branch in the skill tree will be unlocked, which is called “Biochip”. Open the character menu, go to this thread and invest the first 3 skill points wherever you want.
Move through the dumpster into the restricted parking area. If enemies see you, they will immediately open fire. You can easily deal with each of the six enemies in the location by sneaking up behind them and using lethal or non-lethal techniques. And then search them. Or you can immediately run forward through the parking area and climb inside the garage under the raised roller blinds.
Anyway, once inside, make your way into the next room through the hole in the wall and move the sheet of metal (there will be a sign calling for interaction). Make your way through the room. At the very end, around the corner, there is equipment that, when interacted with, will turn on the power. Return to the beginning of the room and look for an access point near the transparent window on the left. Connect to it and return to the previous room to stand on the platform with Jay.
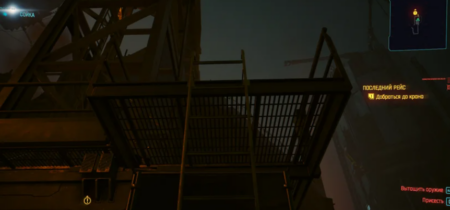
You will find yourself in a parking lot. Walk along the left side. There’s no point in going up, so jump down and go into the next room. Climb up the ramp, climb higher using the beam and the white van. Stand on the freight elevator platform where the marker points. When the platform stops, get off it so that V will fall down. Climb higher up the pile of car wreckage ahead and wait for the platform to arrive. Cross the makeshift bridge and climb higher using the blue van. Keep going higher and higher, moving along the platforms. The jay will highlight the correct path (the next platform you must stand on will be illuminated).
Once you reach the corridor, follow Jay, who will open the door. Get to the elevator and go up to the stadium. Raise the big gate by force, go out to the black market and look around. Follow the marker to leave the black market and chat with Jay again. Run further, go outside and go up the stairs. When the elevator gets stuck, find the electrical panel to the left of it and interact with it. Regardless of the choice, V will repair the generator. Climb higher and higher until you meet Jay. Wait for the plane to crash and then roll down the marked garbage chute. The task will be completed.
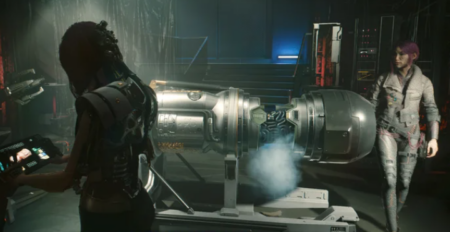
Last flight
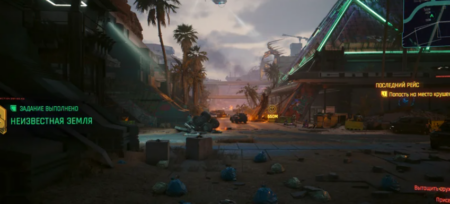
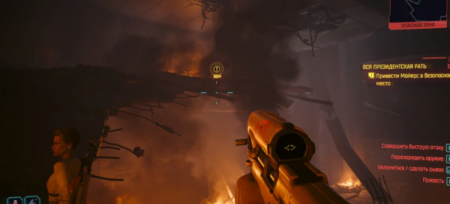
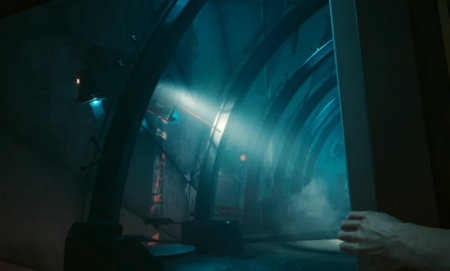
In this mission, you need to quietly sneak into the crash site past Hansen’s soldiers and meet with President Rosalind Myers.
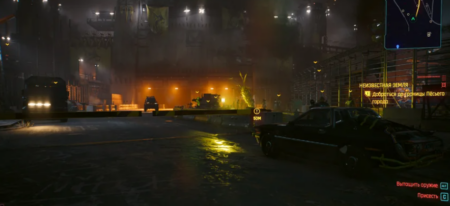
Get into any car and follow the marker to the crash site. The path there is blocked by Kurt Hansen’s soldiers, so you will have to either fight them (which is very difficult) or sneak to the desired point secretly. When you reach the entry point, turn to the left of the soldiers. A danger zone will begin near the truck. If you can’t get here unnoticed, hide behind the boxes near the building on the left.

The indicated point is in the far right corner of the area. It is dangerous to go there directly. Instead, continue along the left side. Follow the road and hide behind the broken minibus. Wait for two opponents to go down the slope and pass by the minibus. Climb up and you will see another couple. Just wait until they go deeper into the location, and then walk along the fence to the right of the boutique. There will be two more opponents, you will have to wait a little for them to turn away. Follow along. The last enemy is not dangerous in any way, just go behind him to the marker. In general, the mini-map shows “cones” indicating the field of view and the direction of view of opponents.
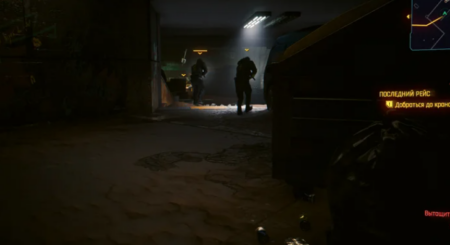
Once you reach the marker, climb up the metal structures, ledges and ladders until you find yourself inside the crane cabin. Run along the arrow and jump down through the open hatch. Unfortunately, you won’t be able to avoid combat, although you can still operate stealthily for a while. After falling from the arrow, quietly eliminate the nearest enemy, and then move along the right edge of the location. If you’re lucky, you’ll be able to walk further through the rubble, but after the next rubble you’ll have to kill several of Hansen’s soldiers fighting the robots.
Go even further and you will find a shuttle surrounded by enemies. Go through the buildings on the right side, eliminating various enemies, until you get out and find yourself near the shuttle. It’s difficult to get around the enemies and get into the shuttle, although you can do it and immediately run inside. Or you can clear the location of all enemies by positioning yourself on top (almost none of them will follow you). Use firearms and aim at the enemies’ heads.
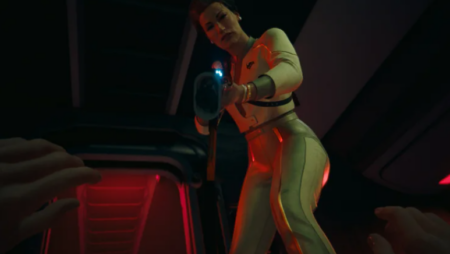
Go inside the shuttle, look at various objects on the sides. Hold TAB to scan objects highlighted with a yellow “magnifying glass”. Open the door at the end. You can hit Myers back or remain silent, since it will not affect anything. In any case, Hansen’s soldiers will appear, and you will have to fight off another attack.
There will be three waves in total. During the first battle, use cover and gradually shoot ordinary enemies. The robot’s right shoulder is its vulnerable part. If you chose a Biochip improvement that shows vulnerable spots, it will be marked with a red diamond, making it easier for you to aim at the right point. After destroying the first wave, get ready for the second one to appear. It consists of ordinary soldiers. You can go to the back of the plane and open the door to flank the enemies. If you do this, you can pick up the KKP-31 machine gun that fell from the robot. With its help you can quickly eliminate all enemies, but do not play too hard, because at the very end three powerful opponents with the same machine guns will appear. Your best bet is to retreat (or tank one while hiding in cover from the others). After winning, the current task will be completed.
The entire presidential army
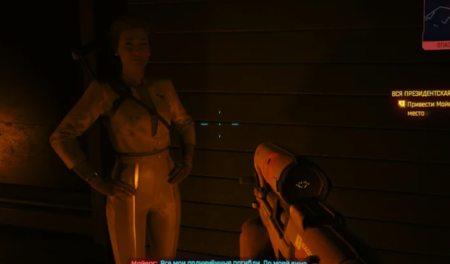
Immediately after completing the mission “The Last Voyage” a new mission will begin, most of which you will devote to accompanying and protecting Rosalind Myers, as well as trying to get to safety. You’ll have to walk a lot, use stealth and stick to cover. Go through the hole in the plane, talk to the President, follow the debris up to the right of the shuttle and lift the grate to get inside the building.
Continue following Myers, who seems to know where to go (or pretends to). Thus, Kurt Hansen is behind the attack on the shuttle. Then the president will remember the sensor in his neck, which allows him to be tracked. It doesn’t matter what you choose at this time, since you can remove the sensor either way. When this happens, Myers will ask you to hide. Crouch down and hide to the side of the window.

After another conversation with Myers and Jays, you will be ordered to go to the top of the building. Unlike other companions, the President can fight back against enemies. Apparently, she does not have a health bar, which means that even without your help she will not die. Go through the hall into the next room to find a broken elevator. Listen to Jay, go back through the door and turn left. Go downstairs and go inside through the window. Walk along the corridor and up the stairs to the desired room. Along the way, collect various resources. There will be a shield in the corner that you must interact with to take over control. Once done, exit through the doorway and return to the elevator (the door and elevator will be open). Click on the panel to go up to the restaurant floor.
Exit the elevator and go through the glass door. The same drone will appear that will patrol the corridor of the restaurant. Follow forward and hide behind the counters. In this way, make your way to the access point marked with a marker. It’s not difficult to do this. Make sure the drone has flown away and is not shining in the direction of the access point, then connect to it. Jay will send all the drones on the wrong trail, and you will be free to search the location and leave the restaurant.
There will be a whole group of Barghest soldiers at the exit, and you can attack them immediately or try to act covertly. An additional goal is to steal the Barghest car, but it is completely optional, and there are two reasons for this: firstly, if you don’t have to steal the car, you can get out of the building through the right wing, covertly eliminating only part of the opponents, and then leave location without ever fighting in open combat. Secondly, there are Barghest patrols on the roads, and they recognize your car. Third, I haven’t tested this, but at the very end of the mission, when you find yourself in the exhibition hall, you will be hunted down by Barghest soldiers and the battle will begin again (before the Chimera is activated). When asked how you were tracked, Jay will suggest that the soldiers could have been following a stolen car. I’m not sure if I can avoid fighting against them,
So first let’s talk about stealth. Go down and eliminate the nearest enemy (when another one moves away from him). Moreover, the president will repeat after you and get rid of the target on the right. Then go back upstairs and go to the balcony on the right. One enemy squats, and the other periodically approaches and moves away from him. When he moves away, eliminate the enemy on his haunches, and then the distant one. Most likely, the president will do this for you. Find the steps and go down. Kill two more targets (one enemy will be in the room on the right, and the other will come outside). After this, you will be able to leave the building without causing a direct confrontation with the soldiers. But if you still want to complete an additional task, you will have to kill 3-4 more opponents in the main hall (it will no longer be possible to act covertly).
Once in any car, drive along the marker. Blue dots will appear on the mini-map. If possible, turn off the road so that the Barghest patrols do not detect you. When you reach your goal, before you drive or enter the underground parking lot, you will have to get rid of the tail – that is, kill all the enemies who have become aggravated and are chasing you.
Once in the parking lot, take the elevator, walk through the exhibit hall, and go to the door. When you open it with Myers, you will find yourself in another room, where Hansen set up a military warehouse. Search the location, collect ammunition and go to the elevator. When you try to activate it, Hansen’s soldiers will appear. Shoot back at the enemies until Jay launches the Chimera. At first, the Chimera will help destroy all opponents, but later it will turn on you.

Leave the hall by picking up the gate that Myers is standing near (and which is marked with a yellow marker). Continue running away from the Chimera and then call the elevator. Hide behind the columns, and when the elevator arrives, try to go inside. You won’t succeed. Press the F key as many times as the game prompts, trying to neutralize the Chimera. If you fail even one keystroke, you will have to start over. Eventually, Myers will return and then the real boss fight will begin.
How to defeat the Chimera?
The battle with the Chimera in Cyberpunk 2077: Phantom Liberty consists of two stages. If on the first the enemy is a little less dangerous, then on the second he turns on at full power, causing damage with turrets, lasers and missiles.
At the first stage of the battle with the Chimera, you need to destroy a sufficient number of vulnerable spots, highlighted in yellow and located in different parts of the robot. Eventually, this will temporarily incapacitate the Chimera. Weak points are colored bright orange (or yellow) and there are about 20 of them in total. Destroying one of the Chimera’s weak points takes away approximately 2% of its maximum HP. This is a special limitation of the first stage, which is associated with the transition to the second. The Chimera’s armor at the first stage will be too strong, so it will not be possible to inflict additional damage on the robot. Focus only on hitting weak spots.
In addition, take the time to study the boss’s not so numerous, but very deadly attacks:
- A volley of multiple missiles that, when approaching, will cause you to see many bright red dots located on the floor/ground (and indicating where they will land).
- A queue of turrets. As a protective measure, you need to constantly move, keeping to cover. If you just stay in cover, the turret will destroy it and damage V.
- A huge laser beam covering the entire first or second floor (moves in a circle). You can take cover behind thick walls or columns, while thinner walls or open spaces leave you vulnerable. However, if the laser beam moves along the upper floor, just run to the lower one, or vice versa.
I recommend immediately going up to the upper level of the arena, as there is more cover and space for maneuvering. And don’t linger behind thin walls, which the Chimera can easily destroy. In addition, on the second floor there are boxes of ammunition placed in the corners, so you can always replenish your arsenal.
Once you destroy enough weak points to bring the Chimera down to 70% health, most of its external armor will fall away. After this, you can attack any part of the monster to deal enough damage. It’s best to aim for the joints on your legs or any remaining weak spots you shot at earlier. Unfortunately, there will be no hints on the interface that indicate the enemy’s weak points, since you have already shot them. But you can spot these spots by exposed wiring and visible internal components.
Use everything you have to remove the remaining 70% of the durability with any weapon. No need to use katanas, melee weapons, throwing daggers. If you get too close to the Chimera, it will soon jump up and literally smash you to the ground. The boss himself will not have new attacks at the second stage, but there is one nuance. At the beginning of the second phase, the Chimera will summon about a dozen attack drones that will circle around the robot and constantly attack you. To make matters worse, two repair drones will appear along with them. If you do nothing, they will simply restore the Chimera’s full health.

Destroy the repair drones as soon as possible, and then deal with the combat vehicles. By doing this, you will force the Chimera to rise and continue the fight, using the arsenal you are already familiar with. Keep attacking until the Chimera’s health drops to 2%. When the boss has 2% of his maximum health left, run up, climb up and interact with the hatch. Complete the final QTE actions, and then finally destroy the boss.
Pick up the Chimera Core from the floor, collect any supplies and open the container located on the first floor, to the right of the steps. The path to the exit from the location is hidden behind the doors of the container. The task will be completed.
Sleeper agent
Try to open the door, but nothing will work. Look up and slide the grate to the side to climb out through the roof of the carriage. Continue forward and talk to Myers. Get out of the car, go up the stairs and, together with the president, push the trolley with the cargo. The path forward is blocked by a grate at which the camera is pointed. If you stand under it, enemies will be warned. The grate can be broken by force or another characteristic, but there is an alternative option. Go back along the yellow pipe with steam coming out of it. The valve is behind the barricade. Climb onto the bridges using the trolley with sleepers, which was pushed along with Myers a minute earlier. This will reveal the hole and allow you to get to the valve. By turning it, you will block the flow of steam and be able to bypass the grate.
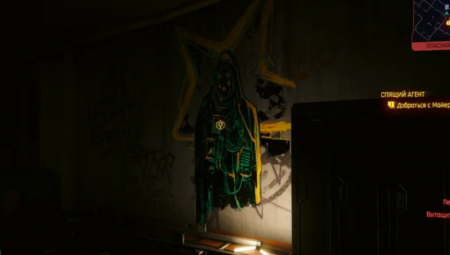
Enter the elevator and go up to the apartment floor. In the corridor, on the wall to the right there is strange graffiti. Scan it while holding TAB to receive the “King of Performances” tarot card. Having done this, you will receive the side quest “Trail of Kings”, as part of which you need to find all the graffiti with tarot arcana in Dog City. Continue forward and enter the apartment. Use the scanner to study different things. Talk to Myers and go to the right. There is a generator in the room on the right. Try to launch it, and then talk to Johnny. Examine the battery compartment on the right. You need a working battery.
Return to the previous room, to the door on the left through which you came here, and scan the drone on the table located opposite the door.
Take the battery and install it in the slot to the right of the generator. Start the generator, go to Myers and sit on the chair. After a while, Jacob and Taylor will appear at the apartment. Be sure to press the F key to start negotiations. If you get too close, a battle will begin.
If you try to scare them (with a phrase about the dead), a battle will begin. But it is still possible to avoid a battle. You can choose a phrase for a nomad if you follow their path, or the second option that they can stay alive. Otherwise, everything is clear – answer with less aggressive phrases, and soon you will come to an agreement with the guys. If you wish, you can talk to each of them individually, and then return to Myers. Sit on the mattress and talk to the president.
When you wake up, talk to Taylor and Myers standing on the balcony. If you refuse to take an oath, Johnny will approve it a little later, but in principle the decision does not affect anything. Follow the marker and find the Capitan Caliente Diner.” The main door will be locked, requiring significant skill checks (such as strength) to break it. Instead, use the scanner and note the cables leading away from the building to the right of the door. Scan devices and cables until a marker appears that indicates an additional task. Walk in the opposite direction from the door and climb the scaffolding and yellow stairs. Run southeast to find steps leading up. At the top you can reach a closed building. Go around it along the metal bridge, and when you find the shield, take over control.
Go back and go inside the diner. Look around, collect notes and supplies. In the small corridor on the right, scan the scratches on the floor – someone moved the shelving. Move the cabinet to the side and interact with the corded phone. Dial 0931 and wait.
After talking to Reed on the phone, follow the marker. A basketball court is nearby. Make sure you do this during the day, otherwise you need to go back to V’s apartment and rest. After talking with Reed, pay attention to the wall near the basketball court. There’s graffiti on it. Scan it to receive the King of Wands tarot card and progress through the Path of Kings quest.
Advice . When you approach Reed’s car, Black Thorton, notice that there is a white Biochip marker nearby. Go to it and interact with the live data terminal. By downloading the data, you will receive 1 ability point for the Biochip branch.
As you move toward your goal, you will be attacked by Hansen’s men. Go outside and kill all enemies. Under no circumstances should you run forward headlong. Take your time, use cover and, if possible, shoot at the enemy’s vulnerable spots. When you win, get back into Reed’s car and after a few seconds the option to skip the ride will appear.
Get out of the car and carefully enter the building. There are four enemies and you can stun them all without firing a single shot. Move through the left passage and neutralize the nearest couple. Reed will help with the second enemy. When one of the enemies of the second couple goes to the vending machine, neutralize the closest one, and Reed will take care of the one further away. In addition, an enemy with a powerful body kit will come out of the elevator, so hide and sneak up behind him.
Go to the apartment floor, go to the shelter and listen to Myers and Reed. During communication, you will be able to refuse to complete the task, in which case the main storyline of the add-on will simply be canceled. Why would anyone do this – I have no idea. In general, you will agree and from now on you will be able to use the apartment as a Shelter (your home). Here you can sleep, use a wardrobe, and so on. Also, I didn’t notice this right away, but from the Chimera core you can create a modification for a standard, electromagnetic, smart or melee weapon. Also against the wall next to the cache is the iconic level 3 “Hawk” rifle. When you’re ready, take the elevator out of the building.
In order for Reed to get in touch, you can rest for two days or spend time completing additional tasks, which are covered in a separate guide. Once Reed contacts you, this task will end and a new mission will begin.
Old wounds
Go to the Moth Bar, marked with a marker, and sit on a chair to wait for the right time of day. Go inside the bar and sit on the marked chair at the bar counter. Talk to the barmaid, then talk to Reed and Alex. It doesn’t matter what you choose during the dialogue, since Alex will agree anyway. You need a netrunner, Figure Skater, who lives near the Luxor Peak SPA complex. Outside, talk to Johnny, then use the terminal to move closer to your destination. Sit on the bench marked with a marker.

Once inside, you can chat with the voodooists, but despite the choice of phrase, no one will let you through. It’s better to move away. The room to the side has a door leading to a vent, but it requires high stats to break it. Instead, go outside and turn left. Climb the scaffolding and jump behind the rubble to that very door. You can open it from the inside without any problems. But, one way or another, when you move through the ventilation, the grate will fall under you and you will find yourself in a trap. Reed will blow up the server and open the door. Finish off all enemies, periodically shooting the servers when the voodooists try to download their demon into you.

After winning, go along the only corridor and chat with the Skater. It doesn’t matter what you say to him, because you will have to connect and communicate with Jay. After the death of the Skater, get out of the building. We’ll have to destroy another enemy group. Outside, talk to Solomon Reed, after which the task will be completed.
Hand washes hand
Hold down the T key and call Mr. Hands. He’ll figure out how to get into the Black Sapphire, but he’ll have to wait a few hours. Either return to the shelter and rest, or do other things. Hands will send a message and point him to the Heavy Hearts club. Go to the marked location. Somewhere at this moment Alan from Network Watch called. Because I allowed him to continue, the organization was able to track down the customer. Alan chipped in an additional 8,000 Eurodollars.
Go inside the club, go to the elevator and enter code 2589. Go to the floor with numbers, knock on the door and talk to Hands. Leave the building, take out your phone (hold T) and call Reed. Travel to the Moth Bar to meet Reed. Follow him into the elevator and go down to the boiler room. Talk to Reed and Alex, take out the iconic “Her Majesty” pistol belonging to Alex from the small case. Take the army wetsuit from the box, after which the task will be completed.
Black or red
When you’re ready, take the elevator out of the Boiler Room and head to the Golden Pacific Boulevard Terminal. Follow the marker, enter the tunnels and follow the door. Put on the army wetsuit that you took from the box in the boiler room of the Moth bar. Swim through the flooded tunnel. Defuse mines. First open the grille, then the van doors, then lift the gate. When you find yourself in a dead-end room, dive into the water and look on the right for a passage leading to a yellow staircase. After going up the stairs and opening the hatch, activate the control panel. The platform with the van will lower. Move to it and jump higher to the other button. By clicking on it, bend down and make your way to the ventilation.
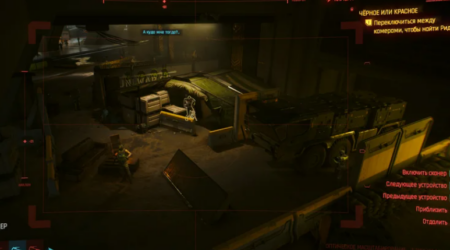
Follow the path to the right and go down the steps. Distract the enemy from above by hacking the device, finish off the enemy from below and hide the corpse. Climb up and destroy another enemy. Then connect to the computer and security cameras, switch to the fourth camera to see the yard and Solomon Reed. When he neutralizes the enemy, find the gate on the right and hack it by choosing any combination. Disconnect from the cameras, kill three enemies and use the elevator to get to the technical floor.
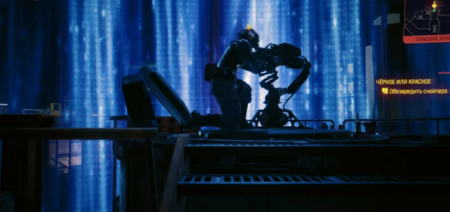
Go forward and take out the sniper to connect to his rifle. You need to inspect the location. First, hold down RMB and TAB to zoom in and scan the area. Scan from right to left Reed, the mine located around the corner from Reed, any guard, the main elevator in the middle of the location (guarded by several people), any security camera and containers hanging on the left. Each time you need to inform Reed about this (a hint will appear on the screen). When you scan the container, Reed will begin the task.
Let’s do everything covertly, because if you even shoot at someone in front of another enemy, a shootout will begin. Tell Reed to go (making sure you report the mine). When he stops at the corner, wait for the guards to come through the red alarm gate. Just aim at the patrolmen so that Reed can hide from them. When they pass by, Reed will go down to the gate with an alarm. Use a scanner to trace the wires leading up from the gate. After scanning several wires, you will find a generator. Shoot him to open the path further.
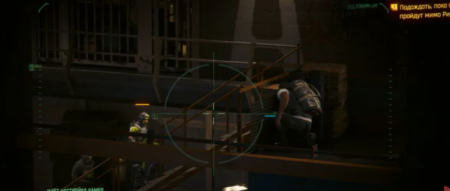
Next time, Reed will stop in front of two enemies. He is ready to finish off the enemy around the corner, while you have to shoot the other one. Press F and Reed will start counting down. Target the enemies that come down the main elevator and Reed will hide behind cover. A red marker will appear – shoot the sniper as soon as possible! Switch to the security camera above Reed, aim at the enemy, then press C to switch to the view from the nest and shoot the enemy’s head directly through the column. Quickly finish off the two enemies who spot Reed. Don’t worry, the alarm won’t be raised. Immediately after this, the mission will end. If you suddenly raise the alarm, you will have to destroy several dozen enemies, including snipers and flying drones. Regardless of the outcome, V will take the iconic Rasetsu sniper rifle with him.
If you do everything without mistakes, Solomon Reed will praise V. Enter the elevator and go to the laundry floor. Take a stylish suit from your bag, open your inventory and put it on. You can stroll around the room or immediately join Reed at the bar. Tell him you’re going to look for Jay.
Use the scanner to find people highlighted in green. A man who looks like Takemura is sitting at the bar. There are two guests standing on the balcony, a little further, gangsters are sitting under a canopy. Eavesdrop on them all, report to Reed, but soon Jay will send a message and offer to look up. Go up and talk to Jay. Take the chip from the glass and go down to the bar and Reed. Chat with him. Everything will fall into place, since Jay, who is looking for the medicine hidden by Hansen, is guilty of the assassination attempt on the president. It doesn’t matter what you say to Reed, because you’ll have to steal the identities of two netrunners, the red-haired twins.

Your task is to buy chips for playing in the casino for at least 80,000 eurodollars. Don’t worry, Alex will transfer the money. You can buy a little more chips, for 100,000 eurodollars. Then go to the gaming table and bet on red or black. I don’t know if random works here, but the more you guess, the more you earn. I guessed right four times and earned over 40,000 Eurodollars. If, apparently, for each time you get 10,000. Random or not, but here is the sequence that came out in my case – red, red, red, black, red, red, black, red. And at the very end there was red. While you’re chatting, order the twins a drink and scan them. Then talk to Hansen, cash out your winnings (if you win) and go down the elevator. If you resist, you will have to fight a huge enemy group. So just follow the guards to the exit. Talk to Reed to complete the quest.
PS After completing the task, you will receive a message from Alex, who “left something in Little China in memory of her visit to Black Sapphire.” Travel to your Atrium hideout from the original game and you will find a chip highlighted in yellow. Read it. Alex left the braindance with a recording of Lizzie Wizzy’s performance. Play a chip with a fan recording. In fact, all there is on the record is a corny Lizzie Wizzy performance.
Rules of the game
To continue the plot you will have to wait two days while Reed and Alex search for information. New orders will appear, so you can put the story aside and spend time completing them (if you complete the side quests as they appear, there will be three new missions right now).
When the task is updated, go to the Moth bar and take the elevator down to the boiler room. Talk to Reed and Alex, go up and listen to the plan. Take the transmitter from Alex and leave the boiler room. Move to the Chapel where the marker is located, climb to the roof of the building and kill all the enemies. After this, connect to the transmitter. Move to the next location where the second transmitter is located. As in the previous case, you need to climb the stairs and other objects to the roof, but there will be no enemies. Connect to the transmitter, but it will not work. Listen to the girl Luca, who asks for 1000 eurodollars for information about the transmitter. You don’t have to pay. The required panel is located at the other end of the roof, behind the solar panels.
Listen to Jay who wants to chat face to face. Move to the indicated place and sit on the bench. Listen to Jay before she leaves. You will learn about her plan. You can then open your phone and complete the optional goal of replying to Alex’s message. If you agree to have a drink, go to the Moth Bar before calling Reed. You can have a heart-to-heart talk with Alex and even dance. After leaving the bar, call Reed. Move to the ripper clinic and chat with the girl. Say a phrase about things from the United War. Talk to Reed and sit in Farida’s chair.
Identity crisis
Call Reed, go up to the bridge and wait. Start scanning cars until you find netrunners. Follow the red marker and talk to Reed. Get into the trunk. Wait as long as possible, and then take control. This will put you much closer to the parking lot where Reed and Alex are waiting. Once inside the parking lot, chat with Reed and Alex, connect to Aurora. If you listened to a conversation between a brother and sister, you heard it as a Dead Blind Man. And then you can download information about the location of the cache and the code combination. Thus begins the spin-off “The Skater’s Legacy.” Then remove the netrunner costume from the hanger and equip it in your inventory. Get in the car. Activate Emeric Cassel’s Identity Imprint.
Judgment Day

Drive to the indicated location, inside the parking lot, wait until the scanning is completed and park at the marked point. Throughout the task you need to behave just like Emeric Cassel. Hold down the V key and see important information about the character. Follow Murphy into the elevator and hand over your weapons. Talk to Hansen. Say you lost at the casino. Ask why he didn’t leave Night City. Say that you wanted to buy a Porsche 911. Don’t take the glass and say that Hansen has a lot of friends. Say that you don’t remember how you stopped working for Petrochem. Follow Jay and wait. You have an important decision to make.
Option 1 – help Jay
Select the option “Help Jay escape. | I’m with you”. After the cutscene, go with Jay to the door. Be sure to pick up any weapons along the way, since you left yours in the locker. When Jay opens the door, you can command her to activate the robots or start the propeller. Perhaps the option with robots is better, since they will continue to fight for you until they are destroyed. Clear the location and go up the steps. Take your time, there are a lot of enemies, there are snipers and it is very easy to die.
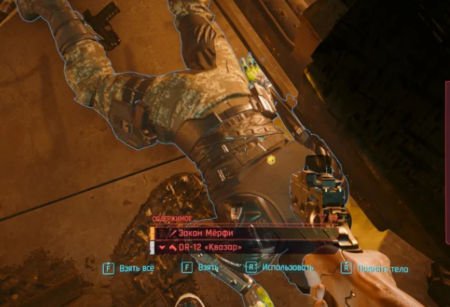
At the top, grab your gear from the locker. Unfortunately, you will have to re-arrange weapons in the quick access slots. Murphy will be in the next room. This is a dangerous fighter. When Jay offers, ask her to start the car engines. If you’re lucky, the car will crash into Murphy, causing an explosion and killing him immediately. At the very least, Murphy will take significant damage. Again, don’t rush, there will be even more enemies and less cover. Opponents will constantly press you, so try to shoot them methodically. After the victory, pick up the dropped iconic one-handed Murphy’s baton.
Continue through the next rooms and corridors. Don’t rush, the main thing is to stick to cover and methodically shoot your opponents. When Jay opens the far door, move through the technical tunnels, clear the other tunnel from drones and knock out the grate. Leave the homeless camp and Jay will get into the car. The task will be completed and the mission “Fading Star” will begin.
Option 2 – help Reed
Having chosen this option, wait a little until Jay declassifies you. After this, Hansen will finish off Alex, and Jay will escape. As in the first case, you will have to go through several rooms, but this time Jay will not help you. In addition, in the hall with the machines, where Murphy was in the first case, he will no longer be there. On the other hand, a much more severe test awaits you in the form of Hansen. In the last room, in addition to the usual enemies, a colonel will appear. At first he will use firearms, and when his health drops to approximately 70%, he will approach you and attack you at close range. At such moments, use a dash, jumping away and shooting away from Hansen. It’s actually easier than it seems at first glance. At the end of the fight, you can finish off Hansen or do nothing. However, the colonel will die in any case, even if you do nothing.
And while Murphy only dropped one iconic weapon, Hansen has three of them – the iconic standard Bald Eagle revolver, the iconic Ripper knife, and the iconic standard Stray Dog light machine gun. Go down to the parking lot and get into Reed’s car. At the end of the mission, the back “Hour of Confusion” will begin.
If you decide to help Jay
Fading Star
Just wait. Eventually, you will be contacted by Reed, who will warn you of a future meeting. Jay will then contact you. Read the message from her, drive to the marked location and get into the trunk of the van. When the car stops, after chatting, get behind the wheel and get to the spaceport.
Leave your weapon, go outside, talk to Jay and go inside. Go through security. When asked to look at the camera, look away and choose any phrase. Once the download process is complete, still look at the camera. Go downstairs to see inscriptions on the floor – blue and red. The blue line leads to the Tycho terminal. But first the task will be updated. Turn around, go to the baggage claim terminal and enter the code 930604. A suitcase will appear on the conveyor on the left. Look inside to get the Corp-Bad form. It will allow you to disguise yourself and avoid detection by the spaceport security service (guys in blue uniforms and caps).
Find a secluded place and put on your uniform. Actually, I equipped it right next to my luggage, and nothing happened. Climb up, in the far left corner there are two large robots and there is a grate. You can open it if you have 9 units of Equipment. Follow the technical tunnel and move through several rooms. If you’re wearing a uniform, the guys in blue won’t recognize you. True, at the end there will be a room with robots. They can be walked around the perimeter by moving clockwise along the walls. Don’t forget to turn off your surveillance cameras. On the roof, go down to the balcony on the right and look for a fire hose in the wall. Lower it for Jay. She will return your weapon. Again you will have to manually arrange it into slots.
Follow Jay, hide behind the bars near which she will stand. Stop the fan and eavesdrop on the conversation between Myers and Reed. When Jay says, move on, otherwise you will be discovered. Move further along the tunnels until you get out. Get into the elevator and go to the main hall. Spaceport security will fight with US soldiers. You can try to pass unnoticed, but in reality you will be detected and you will still have to fight. What does it have to do with both those and those. You need to get to the lower right corner. Having done this, clear the corridors, another technical room and use the elevator. Talk to Jay in the store, then run from cover to cover until the helicopter fires. At the very beginning you need to run up the steps. In addition, in one of the places you can turn to the elevator on the right and go down to the parking lot, but Reed will be waiting for you at the exit, who will shoot V.
After a long corridor you can approach the control tower, but be careful as you will fall into a trap. Continue fighting the enemies, take your time, and when everyone is destroyed, be sure to collect ammo! The thing is that you will have another difficult battle after you talk to Jay in the control tower. That’s why ammunition is needed. So, win the second fight and run inside to Jay. Connect to the Black Barrier, watch the video and go outside. While you’re on your way to the train, use the Black Barrier to destroy the enemies.
Arriving at the station, you will be able to make a choice again – call Reed or raise Jay.
Raise Jay
Pick up the girl and carry her to the shuttle. On the way you will meet Reed. You can use the first phrases and try to convince him, but he will refuse. Eventually, you will have to lower or draw your weapon. Take out your weapon and shoot Reed in the head in slow motion. Take Jay inside and fasten your seat belts. Go back and talk to Johnny. Watch the rocket fly to the moon. Also be sure to pick up the iconic Pariah electromagnetic pistol that dropped from Reed. After the end credits, talk to Johnny to complete the quest.
The result? Eventually, V’s phone will receive a message from Jay. Visit the place where she took you earlier (there will be a marker) and look on the side of the sofa for a metal badge from the Moon and the iconic “Quantum Regulator” cyber implant.
Call Reed or put Jay down
You can call Reed immediately upon arrival at the station with the shuttle, or take Jay out and lower her to the ground. Even if you call Reed, you still have to bring Jay down to the ground. And then you can take the opportunity to remove the biochip. Read the thread description below.
The girl’s name is Jay
If you helped Jay fly to the moon, Alex will contact you after a while. Visit the Moth Bar and have one last conversation with Alex as she leaves Night City.
If you decide to help Reed
Hour of Confusion
Optionally, take out your phone and call Mr. Hands to ask for his help. You will have to pay 15,000 Eurodollars to hire a netrunner. Fast forward 10 hours and go to Kabuki. Visit Yoko’s shop and talk to the woman. You can agree to an additional request in order to later recoup the money spent. Neither Reed nor anyone else will be upset about you leaking the convoy’s location. Send Reed a message, then move to the specified location.
Enter the abandoned hotel, talk to Reed and the others, and when you’re ready, stop at the indicated point. Kill all the cops and then try to open the van. Four enemies will appear. These are powerful fighters, and you need to attack the one Reed is aiming at (guide by the red laser beam) to gain maximum benefit and deal more damage. After winning, Jay will disappear, and you can go up and talk to Reed. Drive to the marked location to find a hole in the wall.
Looking into the abyss
Start going down into the hole where Jay fell through. Inspect the truck, examine other active places with a red glow (signs of the Black Barrier). Continue down, you won’t be able to open the gate by force, so look in the floor opposite for a grate that you can lift. Swim through the flooded tunnels, talk to Johnny and jump into the flooded room. Continue along the only path until you find yourself in the Kinosura complex.
Listen to Jay, follow further and ride down on the platform. Once at the bottom, continue moving until you hit a locked gate. Scan them. Jay must say that she controls everything here. Turn around, walk back a little and enter the room on the left. Open the hatch at the end of the room and move along the technical ventilation to get around the gate.
Eavesdrop on the conversation between Jay and Hansen (memory), try to catch up with the girl, but the gate will close. To open them, use the terminal on the left. You will learn that you need to disable the Alpha and Bravo terminals. Go in the opposite direction, on the right there will be a passage leading to roller blinds, which you can lift with the help of force (3 units in total). Examine the Alpha terminal opposite the entrance, connect to it and perform a standard hack. Repeat the action twice.
In the same room, a hatch will open, and you can jump down into the service corridors. Do so, go up the stairs at the end and hack the Bravo terminal. When you catch a glitch, duck down and sneak under the terminal (scan parts of it if necessary). Disconnect the cables and watch the cut scene.
A dangerous robot will appear. You can’t kill him, and if he catches you, he’ll kill you right away. Just hide somewhere in a dark corner or service tunnels and wait. The robot will disappear, but will appear periodically. Go through the rooms where Jay had surgery.
Go back to the door with the terminal through which Jay left. Enter the block on the left side, go to the next room, and if a robot appears, jump into the window on the left to hide from it. Get to the Victor terminal and hack it using the usual methods. Go to the main intersection of this place, turn towards the sign “Engine Room”. Go into the room with the equipment and terminal on the right side. Hack the Sierra terminal. Even if a robot appears here, you can hide from it behind the fence on the right along the steps. After breaking in, go back and open the gate. Run away from the robot until you can open the airlock.
Go through several doors until you see a huge cannonball in front of you. Talk to Jay and try to activate the computer to start the kernel shutdown procedure. Go through the doorway opposite the control panel. Listen to the conversation between Jay and Reed and turn right.
Turn left to find the door to the Neural Network Management department. Go inside and scan the terminal. Then disconnect the four cables, but be aware that the robot will appear again. Hide from him by squatting around the equipment in the center. When it disappears, quit.
Exit into the corridor and turn left to the observation point. Enter the door on the left to the digital fortress control room. Try to disable the terminal manually, but nothing will work. Scan it to see six blue lines. Each of them points to a part of the server that needs to be physically destroyed. In this room there are four stands in the corner that you must destroy, and two more to be found in the previous room. If something happens, you can always use a scanner on your terminal to see the blue lines. If a robot appears, hide from it behind the fences around the perimeter of the room.
Go to the temperature control and inspect the terminal. Try to disable it to make it crash. Run away from the room, because a robot will now appear in it. Wait for him to disappear and return to the department. Scan the terminal, trace where the cable goes (to the window in the same corner). Raise the shutters and get outside. Manually turn off the electrical panel.
Once you disable the terminals in all rooms, when you try to return to the core, you will find yourself locked in the hall. Don’t rush and don’t run away. Hide from the robot behind the walls, going around the columns. He’s not that sharp, so it won’t be difficult for you to hold out for a couple of minutes. Eventually the robot will disappear and you can return to the core and use the terminal. Watch the cut-scene with Soyka, talk to the girl, turn on the gramophone and see Soyka preparing something. Continue the conversation, listen to Reed and Jay. Then you have to make an important decision.
You can:
- Kill Somi. Which is what the girl asks for. Reed will be unhappy, Myers will be equally unhappy. Together with Reed, you will take Jay to the landing site of US helicopters. Myers won’t give any medicine. A little later you can meet Reed on the basketball court.
- Don’t kill Somi. In this case, you will take the living Somi to the US helicopters, then you will also meet with Reed, and then he will call and offer help. Go to the roof of Misty’s Esoterics and talk to Johnny. You can refuse and not call Reed. Johnny will be grateful, and you can continue completing the remaining tasks. If you agree, an NUS helicopter will arrive, then you will be taken to the clinic, the biochip will be removed, but from that moment on, V will not be able to use combat implants.
Homecoming
This is a short task that you will receive if you help Reed (it does not matter whether you kill Somi or not in the Kinosura core). Talk to Reed in the car, then take Somi, alive or dead, from the back seat and place her on the gurney. Talk to Myers, Reed, and then Johnny in your apartment.
End of the game
This is a short task that you will receive if you help Reed (it does not matter whether you kill Somi or not in the Kinosura core). Just reply to the message and meet Reed at the basketball court.
Quiet life
This task will begin in two cases – you helped Reed and did not kill Somi, or you helped Somi, but at the end of the Fading Star task you decided to turn her over to Reed. When Reed contacts you a few days later (after his “End Game” quest), you will have to visit the rooftop of Misty’s Esoterics and agree to the operation in Langley. If you refuse, the task will not go anywhere, but you will be able to continue the main storyline. And Johnny will be happy. If you agree, the air will arrive. Get on board until you get your sleeping pills.
Having woken up, V learns from Reed that he can no longer use combat implants, which means he will have to forget about his career as a mercenary. He also lay in a coma for two years. The biochip has been removed, Johnny has disappeared, and V decides to return to Night City. Depending on the number of missions completed, you will be able to choose who to meet. At a minimum, there will be an option with Victor, who, as it turned out, began working for Zetatech. Then Misty will appear, you can guide her, and at the very end V will disappear into the crowd of ordinary people.
No one is waiting for a mercenary
This task will begin after the quest “A Quiet Life”. You will meet the person you choose when you try to leave the Langley clinic. If you visit Victor, you will also meet Misty.
Closing the circle
If you decided to help Jay, but then handed her over to Reed, he will offer to meet at a gas station. Talk to him, and after a few days you will receive an offer to undergo treatment in Langley. In general, if you wish, you can start the task “A Quiet Life”.