Light is the most important aspect that makes up the overall impression of the picture. With it, you can set the mood and style of the image.
The Blender 3D graphics editor is very popular today. The system combines simplicity well with powerful professional tools. This editor is taught in computer lessons for children. At the same time, professional 3D modelers are switching to Blender. For example, it was with the help of this program that graphics were made for the movie “Spider-Man 2” and a number of other sensational projects.
Read this article to the end and you will learn how to work with lighting in the popular 3D graphics editor – Blender. We will learn how to apply shading and find out what it is. We will understand how to turn off natural light and create our own, as well as master the ability to move the light source. A beginner will be able to radically improve the quality of their works.
(If you prefer the video format, you can watch a video on lighting in Blender – ed.).
Blender shading, or How to show a shadow with areas of light and dark color on a 3D model
We will try to tell about shading as simply as possible, as they do in Blender courses for children. Darkness levels of color on different parts of a 3D model is what shading is all about in 3D graphics.
In nature, light, falling at different angles and with different intensities, not only makes objects cast a shadow, but also visually hides sharp edges and contours, making unlit areas look darker and open areas brighter.
Shading is also responsible for the so-called depth of objects: depending on the light source, parts of the object seem to us closer or farther, more convex or distant.
In Blender, lighting can be fine-tuned using so-called nodes. They allow you to edit the shading depending on the texture and material of the model: metal, wood, stone. There is even a separate large shader editor that can be opened by going to the Editor Type tab in the Shader Editor item. We will not dwell on this now, since the material is for beginners.
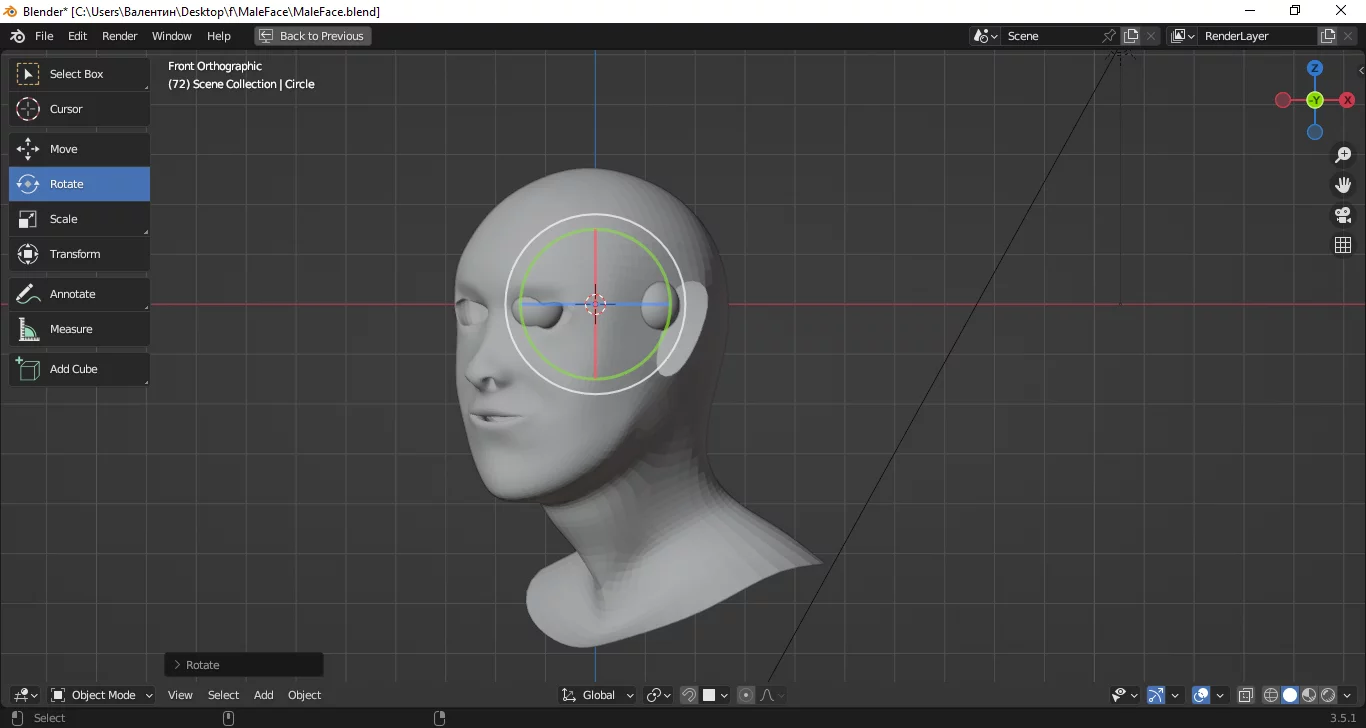
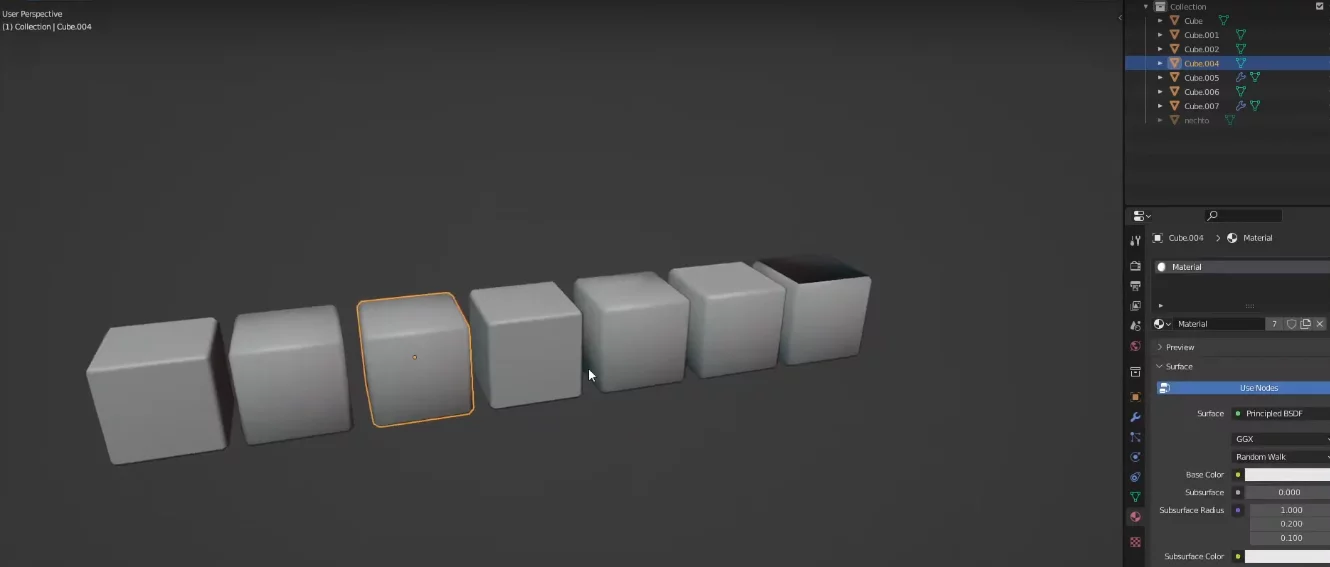
Let’s talk about the fact that from the point of view of shading in Blender there are two most important global settings that affect the display of the model as a whole: flat shading (flat shading) and smooth shading (can be translated as smooth shading or anti-aliasing). Shading can be selected by right-clicking on the model. If you have selected any tool in the tool palette that blocks this option, then the shading mode is switched from the main menu.
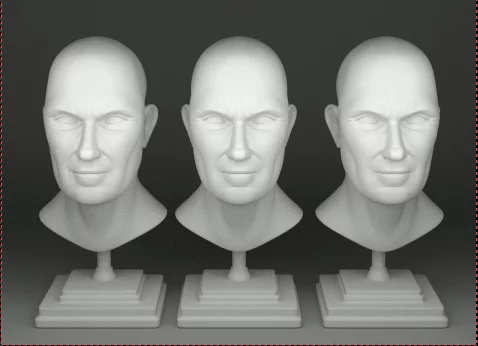
When teaching 3d modeling, children are often simply shown what effect one shading and another has on an image. Here’s what happens if you choose the flat option:
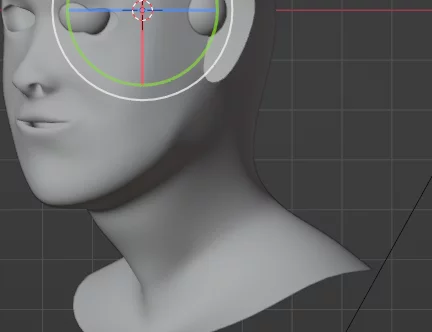
When anti-aliasing is applied to the same model instead, the result is completely different:
One of the two ways to create 3D models that Blender supports is polygonal modeling. In teaching 3D for children, it is usually loved.
This is a method in which a three-dimensional complex figure, for example, a human head, is created using polygons connected to each other – flat polygons. On pictures with flat shading, they are perfectly visible. This is the peculiarity of this type of shadow overlay. Light and color are calculated for each polygon separately and ignoring the physical laws of natural light.
The advantage of this is that this type of shading is loaded and calculated by computers very quickly. Perhaps that is why there are a lot of 3D games and graphics in the market in the style when polygons are visible.
Minus, as is clear, in the unnaturalness and rudeness of any image. Usually, if there is a need to improve the quality of the image, it is enough to increase the number of polygons. With a huge number of them, the eye is not able to understand that the image consists of many planes. But due to the mechanics of calculating flat shading, even this does not affect the display of faces and edges. Here are shapes with a lot of polygons in flat and smooth shading (on the right):
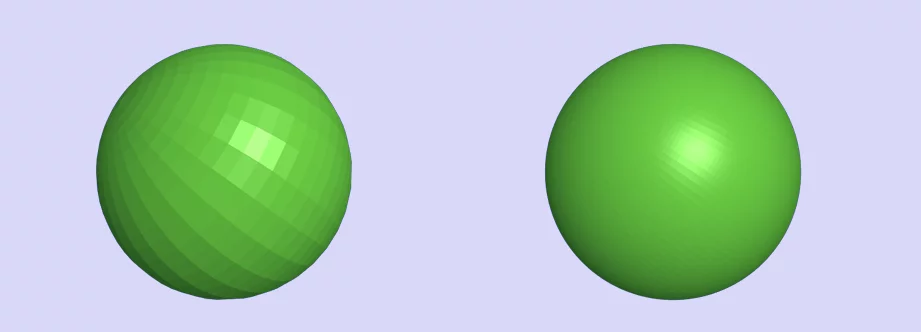
The difference between flat shading and smooth shading is that anti-aliasing just shows the appearance of a polygonal model in natural light. This is where online 3d modeling courses for kids and beginners stop in detail.
Lighting is calculated not for each polygon, but for the whole model. Sharp edges and “normals” (plane joints) look the way they do in natural light. Flat shading, due to its peculiarities, is rarely used anywhere today. Mostly in multimedia and design projects, where it is desirable to show faces and edges of planes to create a certain style, and even in visual 3D editors. There, the mode is necessary to study the model being created.
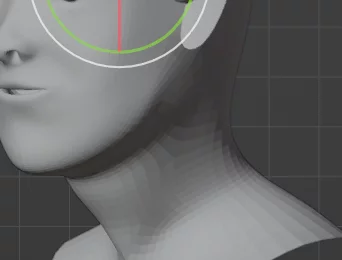
Be careful with smoothing. To make a polygonal model look good with it, you need a really large number of polygons. Otherwise, from certain angles, the 3D object may look unnatural. Sometimes it happens that when you switch shading, part of the image starts to appear incorrectly, although you have not applied any additional effects. Here is an example of a shading error:
Usually this happens if the polygonal mesh was formed with the so-called self-intersection. To fix this, switch to a mode where the mesh is visible and you can edit the bad part of it.
- Switch to Edit Mode, select everything;
- in the render, activate Freestyle;
- F3 key, start writing make free in the window that appears, click on Mark Freestyle Edge;
- in the visualization that opens, click on Edge Types;
- We mark the Edge Mark with a “bird” and render the image.
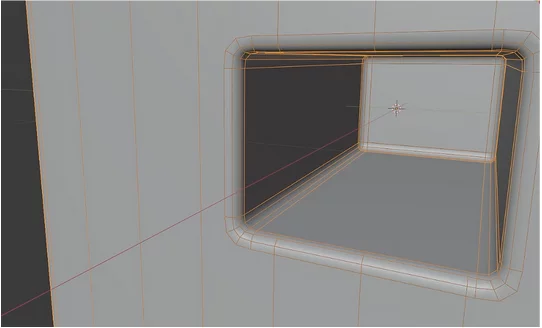
In this case, the erroneous element is indicated by a red straight line.
Blender: stage lighting
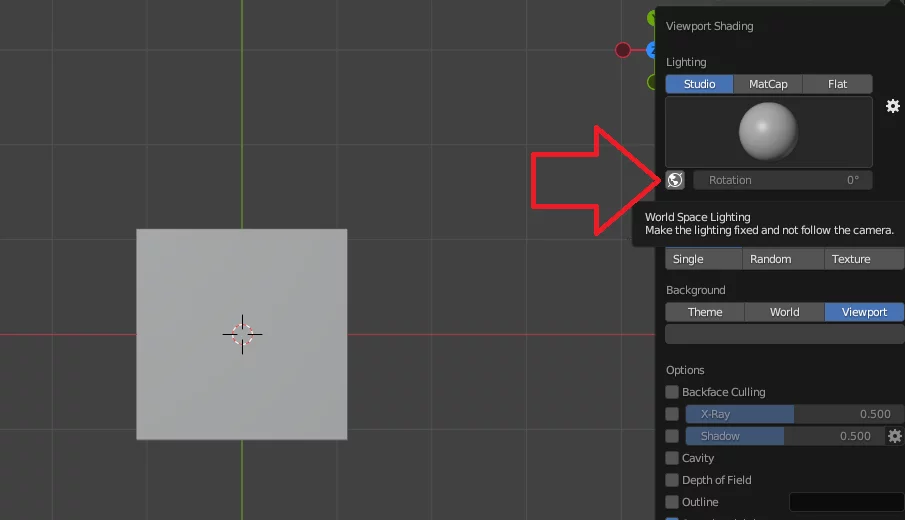
How to add lighting in Blender? By default, Blender is set to “world light”. As if natural light was shining on the object. To set the lighting to custom, which creates your style and mood in the image, you need to turn off the default mode. To do this, you need to render the image and go to the Viewport section. In the toolbar, world lighting can be turned off.
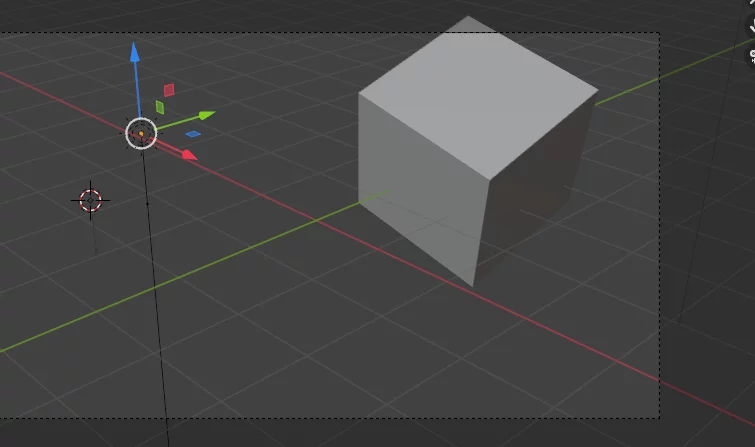
Next, we can choose from almost a dozen light sources that create the color surroundings of our scene. The simplest is a point of light.
We set a point in the right place, and it illuminates the object from the side. The light source in Blender has a number of parameters: color, size, strength. By changing them, you can achieve that the subject was almost in the dark or vice versa.
Since the shadow changes the perception of the color of the object, with the help of light you can control the color. Shadows with a bright light source are soft, while at the same time, in the case of high brightness, the lighting has a weak intensity. Everything is very simple, not without reason Blender is sometimes called a 3d modeling program for children.
There can be several light sources. The option of their shift and change of location is supported.
Also, to understand how to make lighting in Blender, we need to know that with the help of light and shadow, you can create a mood in an image. For example, lighting and the angle of the light source have a great influence on the human face. They can give either a more sinister expression, or an open, benevolent one.
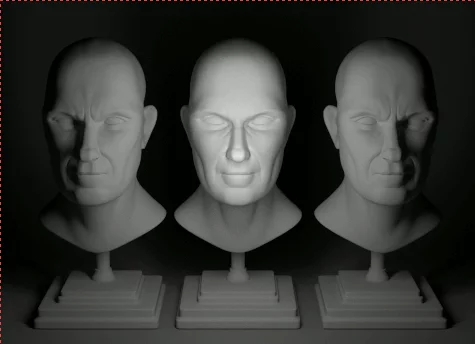
World illumination gives us only white day. If we create our own source, then we can render twilight or night in the 3D model. A light source can be thrown, as it were, a “spotlight” on a certain detail or object and thereby draw attention to them.
Lighting and various 3D modeling programs
Blender is very popular. Versatility and a large number of functions speak in its favor. But there are programs specifically designed to simulate the lighting of 3D objects. Who knows, maybe a niche editing environment will suit your task better:
- Lightscape : Designed for landscape and indoor design. You can adjust artificial and natural light finer than Blender, there is a photometric analysis function;
- IKEA Home Planner : Also software for interior designers. There’s a handy tool to see how different lights affect the look of a room;
- 3ds Max : The professional, paid software that many people switch from to Blender. Nevertheless, it has some advantages over it, for example, complex shaders and lighting effects are loaded several times faster on 3ds Max;
- Realizzer 3D : A program focused on creating shows. It has many unique light control features;
- Dialux : specialized software for lighting designers and lighting systems.
However, all these programs are both specific and elitist. For kids and adults who are just starting out in 3D modeling, Blender is the best choice.
3D modeling for children and beginners, or Where to find answers to your questions
You don’t have to pay to dive into the realm of 3D modeling. For almost any operation that a beginner fails to do in Blender, you can find free video tutorials and answers to questions. There is a wide and active pool of interested professionals, so the forums for riggers, 3D modellers, CG artists and texture artists can also be consulted. Many of them work in Blender now.
If the interest in 3d modeling is more serious, then you can sign up for special courses for children . Teenagers from 13 years of age are accepted for such classes.
Wisdom of three-dimensional graphics available. Offline and online education for children and adults is popular and inexpensive. Aren’t you bored? Do you want to try something new?