 Shared Photo Library is one of the great new features of iOS 16.1, iPadOS 16.1, and macOS Ventura. We tell you what it is for and everything you can do with it on your iPhone, iPad and Mac.
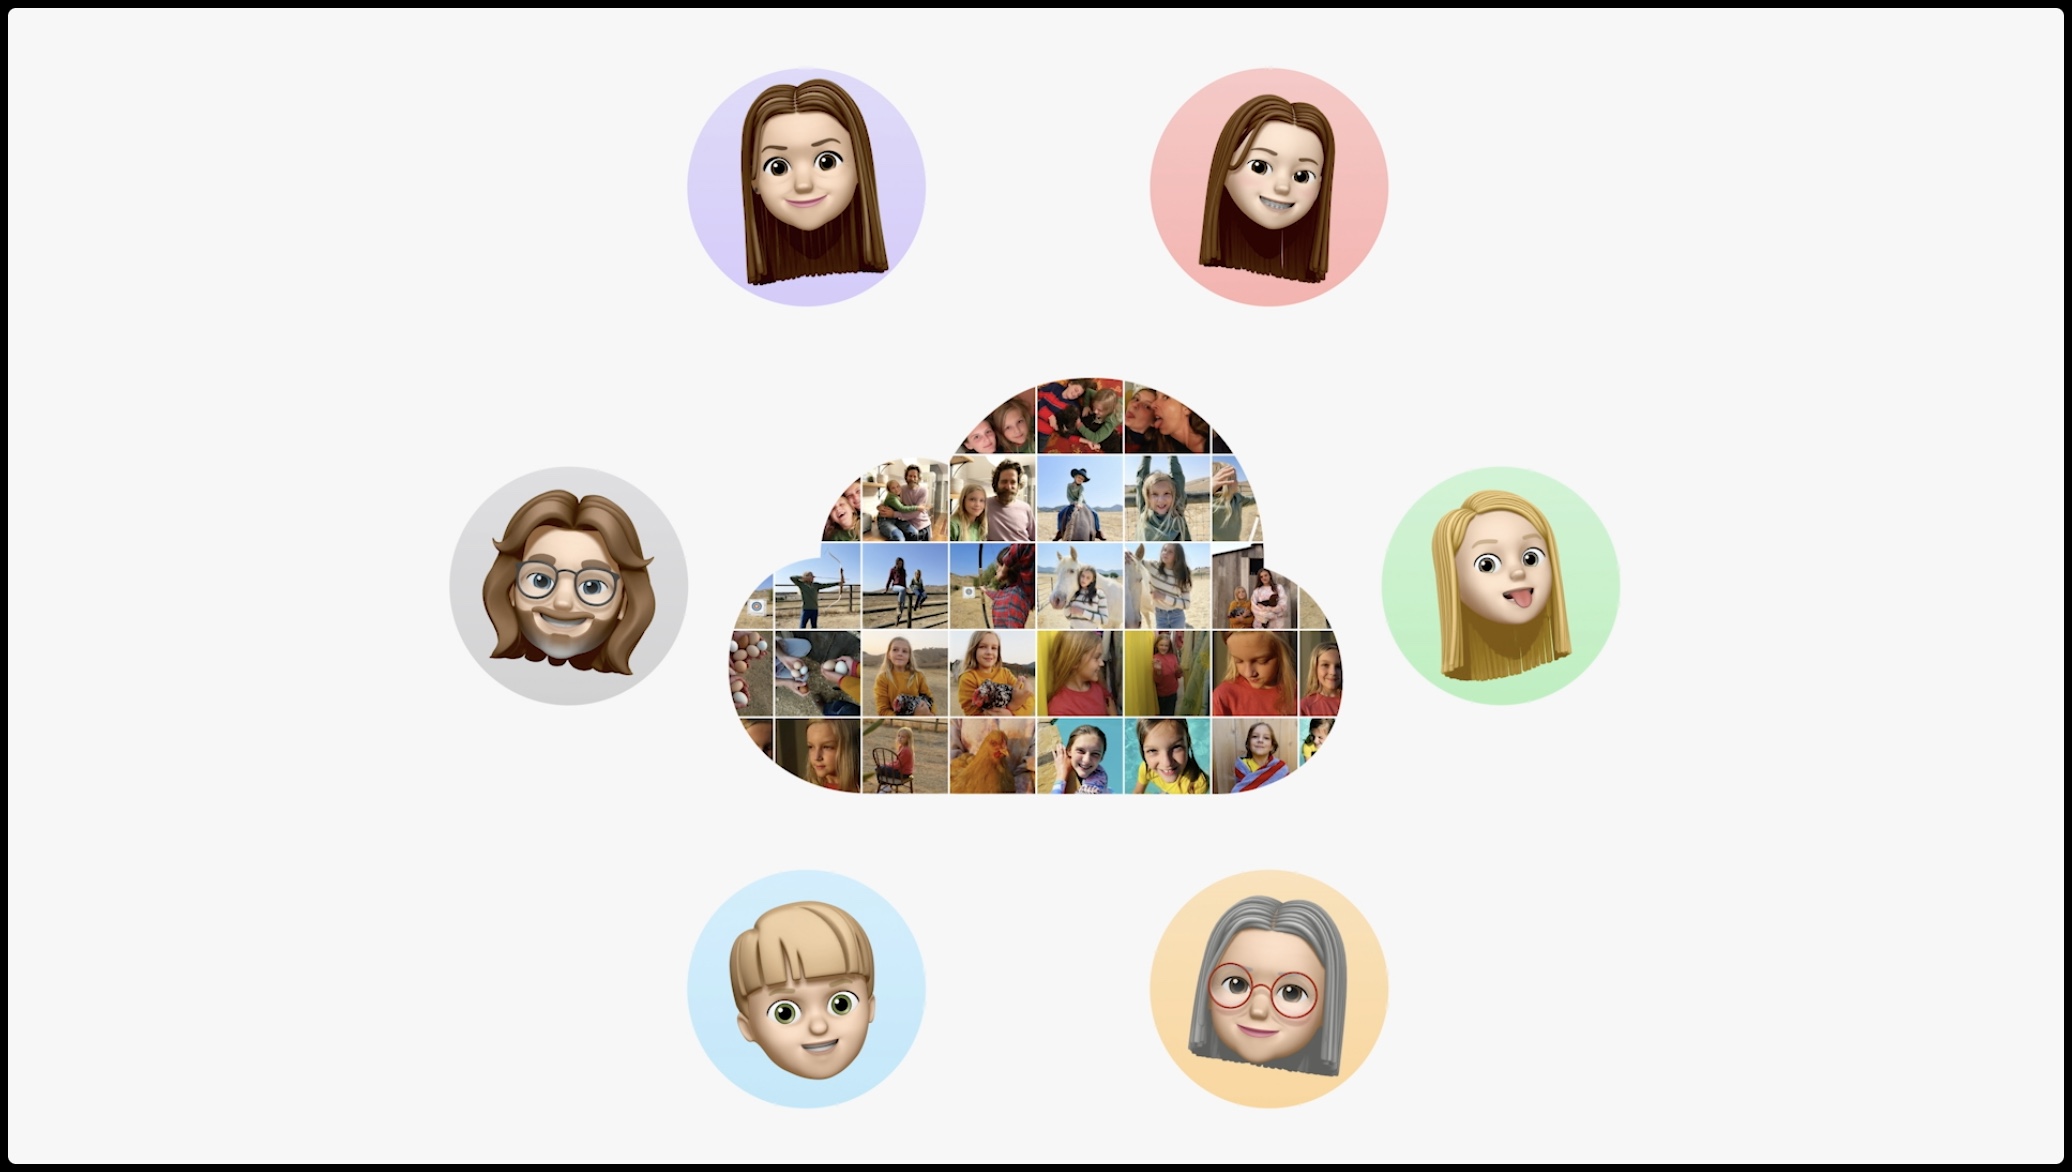
One of the most anticipated new features of iOS 16.1 was the shared photo library . The Photos app receives changes and improvements with each new update. And this time it could not be otherwise. From now on you can share photos and videos with friends and family without leaving Photos. So you can gather memories from here and there in the same place in the cloud thanks to iCloud.
Thanks to this iCloud feature, starting with iOS 16.1, iPadOS 16.1, and macOS Ventura, it’s possible to create a shared space between you and up to five friends or family. You can only belong to one shared library at a time. For now. And in that space you can upload photos and videos but also edit that content directly from the Photos application. Or, if necessary, delete it.
Before you can create one, you’ll need to turn on iCloud Photos . It is the one that synchronizes your photos and videos with your private iCloud space in the Apple cloud. Check if it’s turned on by going to Settings by tapping on your username and then going to iCloud > Photos . Finally, activate the Sync this device option . You can do it from an iPhone, an iPad or a Mac.
Please note that to use the Shared Photo Library you need iOS 16.1, iPadOS 16.1, and macOS Ventura. In previous versions you will not have access to the photo library or shared content.
Create your own iCloud Shared Photo Library
Once we have iCloud Photos activated , we can start our first photo library. First and only. Since, for now , you can only share a photo library . We assume that, in the future, it will be possible to be part of more photo libraries.
When you create it, you will be the organizer of it. That is, whoever has all the controls available. Creating it is as simple as going to Settings on your iPhone or iPad, entering your username, and then iCloud> Photos . Finally, click on Shared Photo Library and follow the instructions of the wizard.
Basically you will have to add members to your photo library who are surely in your contact list. And then add photos and videos to it. You can do it during setup or whenever you want. In this sense, there are no limits. You can choose all your personal photos and videos, only those that match certain people or dates , or finally manually select the photos and videos that will be part of your iCloud Photo Library.
To avoid surprises, before sending the invitation to the future members of your shared photo library, you will be able to preview those photos and videos. This way you will be sure of what you are going to share. Then the invitations will be sent through the Messages app , with a web link.
Join a shared photo library
If someone in your circle of friends or family has created an iCloud Shared Photo Library, you’ll need an invitation from that person to join . When you receive the invitation in Messages, all you have to do is click on the link and then on the Start button on the invitation.
Once inside the photo library you will see its content and you can start adding comments, editing photos and videos, uploading more photos and videos, etc. The same thing you can do in your personal photo library. But the result will be seen by everyone who is part of that shared photo library.
Upload content to a shared photo library
By creating your own shared photo library, you can choose what content to share from your personal photos and videos. But the fun is in uploading more photos and videos as you take them with your iPhone. You and those who are part of the shared photo library.
One thing to note is that content added to a shared library is counted in the library organizer ‘s iCloud storage space . So you probably have to expand your iCloud space .
There are several ways to add content to the Shared Photo Library:
- By hand, from your personal photo library
- Automatically savephotos and videos taken with the iPhone or iPad camera
- Share photos when other members are around
- Share photos and videos when you’re at home
Manually, go to Photos or Camera to view the photo or video. Open it in full screen and then tap on the More menu (three horizontal dots) and Move to shared library . You can also select several photos or videos, click on the same button and send to the shared photo library.
To turn on auto save , go to Settings > Photos > Shared Photo Library and turn on Share from Camera . When you get tired of this option, turn it off right there.
The other two options are activated from Settings> Photos> Shared photo library> Share from the camera . In one case, you will have to tap on Automatic sharing and activate the Bluetooth of your iPhone or iPad. To share content created at home, you’ll need to go to Settings > Photos > Shared library > Share from camera , then turn on Share when I’m home .
Change the views of the photo library
A detail that should be taken into account is the way to access the content that you have shared in the shared photo library. From the Photos app, you’ll see both your personal and shared photo libraries. Yes indeed. You can see both contents at the same time or only one of them.
To configure this photo library view you will have to enter Photos and click on the More menu in the upper right corner. To differentiate which photo library you are viewing, the library icon will be different in each case.
You will have to choose between:
- both photo libraries
- personal photo library
- shared photo library
Edit, change or comment on photos and videos in the photo library
In addition to uploading your own photos and videos, the great advantage of the shared photo library is that it allows you to edit the content uploaded by others. You can simply add comments , make adjustments related to the information of a photo or video, remove content and/or edit it. Every action you do will be public.
And if it’s about deleting content, other members of the photo library will see a notification . For the rest, if you delete a photo or video it happens as with the personal photo library. You have 30 days to recover that content from the Trash or Deleted album .
As for the editing process , it works like the rest of photos and videos. Simply, instead of just staying on your iPhone or iPad and your iCloud, it will also be in the shared photo library.
And of course, you can search for photos and videos instead of doing it manually. For that, the search box is always available within the Photos app. You can search by contact or person, place or item that appears in the content to search. You can also search for photos and videos that a certain member of the photo library has uploaded.
Add more members to your photo library
As an organizer, you can add and remove members or participants from the library you’ve shared. If you didn’t add everyone when you created the library, you can add them later. From iPhone, iPad or Mac.
As we have seen before, the limit is six participants. You and five others. To add more people, you will have to go to Settings> Photos> Shared photo library and then click on Add participants .
Get out of a photo library
As with anything shared, such as a WhatsApp group, we are not always interested in staying there. If we talk about shared photo libraries, you surely want to leave it if you were invited .
From your iPhone or iPad, go to Settings > Photos > Shared Library , then tap Quit Shared Library . You will have the possibility to copy the content of that photo library to your personal photo library. You can copy everything or just the one you have uploaded.
Delete the shared library
Everything comes to an end. And if you get tired of your photo library you can stop sharing it. It can only be deleted by the person who created it. To do this you will have to go to Settings> Photos> Shared photo library and click on Delete shared photo library .
What will happen to the shared content ? Those photos and videos will be available for those who were part of the photo library to copy to their personal photo libraries. Yes indeed. They will need to have been on the membership list for more than seven days. If you stayed less than seven days, you will only be able to copy content that you uploaded yourself.