Before starting the game, you will be asked to choose a difficulty level. For the first time, the maximum level of “Nightmare” will be blocked – it will open only for replaying Immortals: Fenyx Rising . “High” and “Normal” difficulty levels differ little, and “Story” is more suitable for completely newcomers to the genre. In addition, Immortals: Fenyx Rising has a rather complex combat system and many difficult enemies.
Based on all this, we recommend playing at either the “Low” or “High” difficulty level. On “Low” you will be able to enjoy the plot in the entourage of ancient Greek myths with a pleasant difficulty of the battles, and on “High” you will have to train a lot to gradually clear the world of evil.
Walkthrough Immortals: Fenyx Rising – On a Foreign Shore

Find a weapon
Run forward along the stairs and then climb the rock. To do this, you have to climb – just run up close to the rock and keep pushing forward (Phoenix can climb almost any steep surface in the game). When you climb up, run forward a little more to pick up the brother’s sword.
Defeat enemies
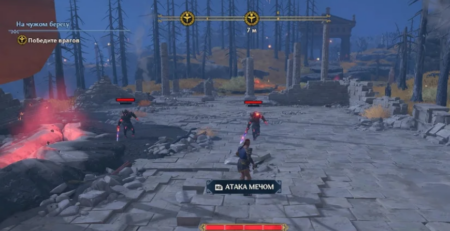
The first fight won’t be too hard. Enemies will attack in pairs. Press the sword strike button rhythmically to make combinations. When the dodge button appears, try to learn how to avoid enemy attacks. If you are attacked by two at once, then it is better to inflict 2-3 blows, first one, and then the other.
Look around from a good vantage point
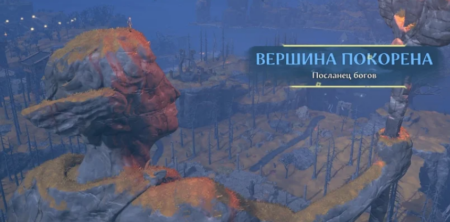
As in most Ubisoft games, in order to open a terrain on the map, you need to climb the highest point of this terrain or a tower. In Immortals: Fenyx Rising, giant statues of gods serve as towers.
Inspect and climb the statue in the same way as you climbed the rock before. To prevent endurance from running out too quickly, try to climb in stages and rest.
Jump into the pond below
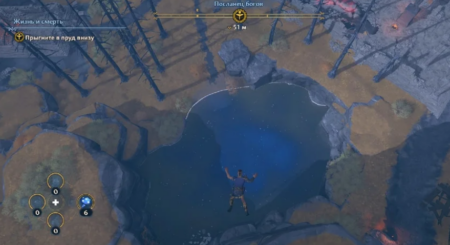
Phoenix is not an assassin, so instead of taking a leap of faith, he will be able to dive into the pond under the statue as gracefully as an axe. To surface, press the jump key, and then swim to the shore by pressing forward. This is where the first part of the task will end.
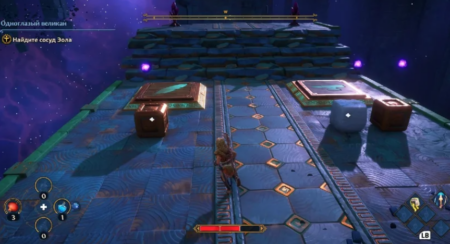
Find out what this strange glow is on the island
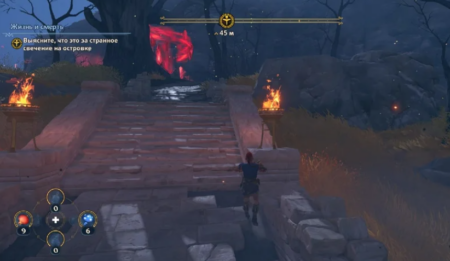
Finally, you’ll need a compass! Turn towards the mission goal (the round black and gold marker on the stripe at the top) and run along the road. You should come to the shore, but there are still about 150 meters left to the goal.
You will be attacked on the shore – try to cope with the enemies, switching between them in time and dodging attacks. After the battle, swim across the river to the other side and run further towards the marker.
You will find yourself near a rift that is highlighted in red. A two-handed ax will fly there – your second weapon. But first he will have to be returned from the abyss of Tartarus, into which the rift leads.
Walkthrough Immortals: Fenyx Rising – Path to the Abyss
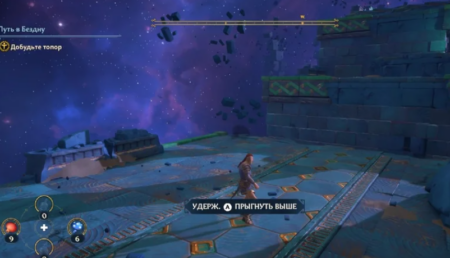
After the comic credits, it turns out that the game is not over yet. Phoenix will come to his senses in one of the locations of Tartarus. Run forward, jumping over the abyss. Press the jump button longer to jump higher. Soon you will come across a round phoenix sign on the floor – it will flash, which will fix the checkpoint in this place (after death, the character will be reborn at the last phoenix sign).
The first abyss of Tartarus shouldn’t cause any particular problems in terms of platforming or puzzles – run forward, jump over the abyss, pull the switches. Sometimes you have to wait for the platform to drive up, and then jump over to the other side when she returns with Phoenix.
Daedalus’s broken wings will meet before the exit. They will allow you to perform a double jump – just press the corresponding key twice in a row (with a second pause between presses, so that Phoenix is at the highest point of the first jump before the second).
Closer to the end of the abyss you will encounter enemies with shields – hit them with an ax, and then finish off with a sword. If the enemy does not die after the first combination, then bounce and repeat again.
To get to Zeus’s lightning bolt and get out of the dungeon, you will have to stand on the circle with the helmet and wait for the platform to drive up. Then jump on her and wait for her to come back with Phoenix.
Golden chance
At this stage of the passage, you are not yet released into the entire open world, but they are allowed to freely explore the first island. And it’s pretty big. However, many of the enemies are strong enough here, and the area of a number of small islands to the south is even for high-level heroes. Therefore, immediately running on the main mission would be a perfectly reasonable decision.
Follow the compass to the black and gold marker until you reach a large stone bridge. Double jumps will help to overcome the gaps – the main thing is to press the key a second time after about a second.
Save the one who called for help
Wild boars will come across almost immediately after the bridge. At the beginning of the game, this is a fairly serious opponent. Dodge their ramming attacks and strike while they catch their breath. Using an ax will quickly fill the blue bar under the health bar in order to stun the enemy, and then quickly finish off with a sword.
The objective of the quest is on a hill in a destroyed village. Run there, sometimes being distracted by gathering resources or skirmishing with enemies (but it’s better to bypass the bear for now).
Defeat the Gorgon
Here you will be taught how to use stealth. Press the button to start sneaking and move through the bushes to the gorgon. When a prompt appears, click the appropriate button. The first sneak hit will knock out a significant portion of the enemy’s health. In a fight with a gorgon, dodge her shots and blows, and try to stun her with an ax as soon as possible. After that, the gorgon will be easy to finish off with swift sword attacks.
After the battle, you will be given Hercules’ bracers – they allow you to pull or lift heavy objects such as stones or boxes.
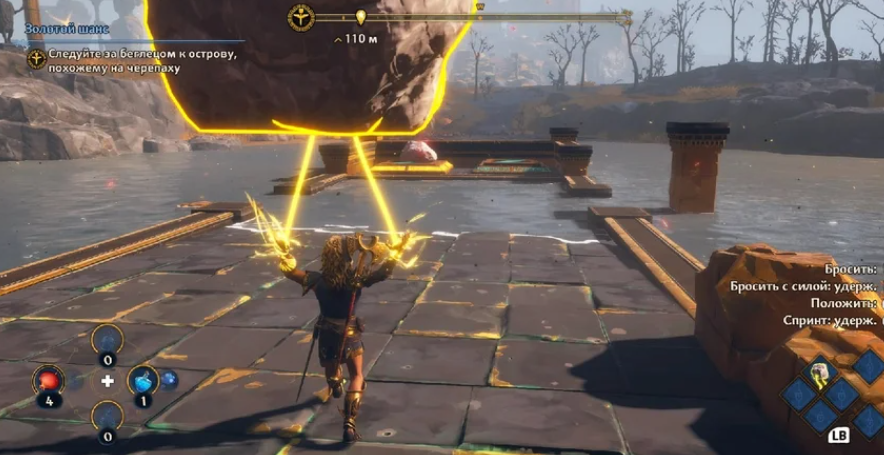
Follow the fugitive to the turtle-like island

Despite the fact that Phoenix threatened a bunch of enemies right under the rock, you don’t have to go to them right away – you will have time to farm resources to destroy monsters after completing the prologue. And now your hero is still weak for large concentrations of enemies.
Run towards the marker, avoiding most of the enemies. Cross the river and climb to the platform in front of the stone turtle. Here you need to solve a puzzle to get into the cave. Find a couple of rocks or heavy cubes nearby. They need to be lifted with the help of Hercules’ bracers (or pulled from afar) and installed on two plates with a feather icon. The gates will open and you can enter the cave.
Inside there will be another rift leading to the abyss of Tartarus.
Odyssey’s Struggle
Collect a bow
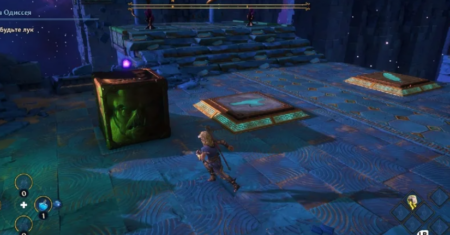
Run forward, jumping over pits, until you reach a pedestal with a button. Press the button – two cubes will appear. The left large and heavy one must be installed on the plate with the anvil icon (in the future, you can get by with 2-4 small objects). And the right one is small and light – on a stove with a feather icon (it is enough to install any object on such stoves – there is enough weight).
Then you will come across another pedestal with a button. He will summon a fragile cube from the planks. It must be carefully pulled with the help of Hercules’ bracers and placed (see tips with buttons in the interface) in front of the wall. And then climb onto it and make a double jump – now it is enough to climb the wall.
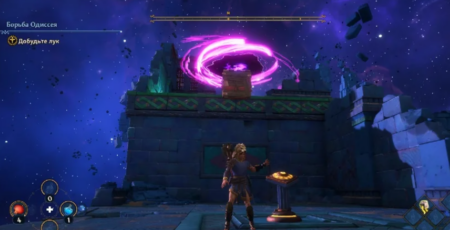
Next, the button calls up two more small cubes. They need to be picked up with the help of Hercules’ bracers and thrown (by holding the button) across the chasm towards the pressure plates – the fragments of the walls will not allow the cubes to fall.
Run forward until you reach Odysseus’s bow. Then you will need to shoot at targets. Nothing fancy – aim by pressing the button (see the hint on the screen below) and release to fire. If you do not hold the button, then the Phoenix will shoot without aiming, but the arrow will fly very close (sometimes it helps to bring down the enemy’s attack). You will also be taught how to control an arrow in flight – useful for hitting a target along a difficult path or through cracks in gratings.
In the end, it will remain to knock down a large stone cube from a chain with a bow. It will fall apart into two small ones – set them on the plates with the feather next to it. We pass to the next stage of the passage of “Immortal Phoenix Rising”.
Vague vision
Get to the Temple of Apollo
As you leave the cave, the temple will be very close – 150 meters. Turn around on the compass and run towards it.
Before entering the temple, you will have to fight with three infantry and a gorgon. Run in the opposite direction so that the enemies line up across the bridge – the gorgon will fall behind and will not be able to attack. And you can destroy the infantry one by one. Then it won’t be so difficult to deal with one gorgon: try to block its shots to reflect back, and also hit it with an ax every few seconds to stun it as soon as possible.
Get to the oracle
In the temple, stand on the circular platform with a helmet icon and shoot an arrow through the fire to set fire to the brazier before entering the next room. After that, the entrance will open.
Find the vessel of Aeolus in the dungeon of Tartarus
This dungeon is not too difficult. The first obstacle will be the familiar slabs – with a feather and an anvil. Put any of the three boxes on the first one (they will appear again if you press the button on the pedestal nearby), and on the second – the other two. Next, the required cubes will be mixed up: the wooden one must be set to the “Feather”, and the bronze one – to the “Anvil”.
Next, there will be a fight with two gorgons at once. Try to keep them in line to block the rear shots (her ranged attacks will also hurt the front one). The tactics are the same as before – we run up, make a couple of quick blows with a sword, one with an ax, and run back.
Run to the next button that calls the box. It will need to be carefully pulled with the help of Hercules’ bracers and installed on the stove with a feather (using the “Put” button). The platform will arrive – jump until it goes back.
Next, you need to pull another wooden box from afar – it is to the right of the beginning of the platform with the button. On the next platform, you need to roll two balls into the holes. The hole for the first one is very close – behind the destroyed wall. And the second will have to be rolled from a distance inside the cage, capturing, as they used to grab a box from afar.
Climb the platforms and after the cutscene you will find yourself in front of the Cyclops. He loves to throw stones – catch them with the bracers of Hercules and throw them back. In addition, the Cyclops is very slow – while he wanders to the next stone, turning his back, run up and deliver a combination of blows with a sword (stones are enough to stun, so it is better not to use a slow ax).
After the fight with the Cyclops, you will only have to run forward to pick up the vessel, and then the lightning. After that, Phoenix will return to the surface.
Obtain a Wing Fragment by completing the Constellation Challenge in the Heavenly Tower.
Exit the temple and turn left. Walk across the bridge and climb the stairs. Harpies will meet along the way – dodge attacks until they descend closer to the ground. And when they come down – hit with an ax.
Climb higher. The first test of the constellation will come across. You need to find four more blue glowing balls nearby and install them in the plate with grooves according to the diagram in front.
The third ball is located to the right of the constellation diagram. You just need to stand on a round platform with a helmet and pass an arrow through the fire to light one of the braziers in front. The passage will open and allow you to pick up the ball.
The last ball is to the northwest of the constellation diagram, in a columned building. You need to go around the building and break through the wall with the nearest stone or ax. Inside you will find a ball on a cube – move the cube forward and take the ball.
Find the youth at the top of the Heavenly Tower
Run to the top of the Heavenly Tower on the marker – you will have to climb rocks or climb a sheer wall. Talk to the young man at the top.
Walkthrough of Immortals: Fenyx Rising – Gods and Monsters
Get to the Hall of the Gods
Finally you can fly! More precisely, to soar on the restored wings of Daedalus. You are offered to immediately go to the main island, but you can return for now and better explore the initial location. However, immediately running towards the Hall of the Gods will also be a good idea – then it will become the main fast travel point in the first major region of the Golden Island.
There will be a lot of resources around the gilded statue at the entrance to the Valley of Eternal Spring – collect them to later use for making potions. Further go down the road and you will immediately come across a small detachment of infantrymen guarding the chest. Try not to let yourself be surrounded and deal with those without shields first. And if the others still approach, then use the ax more often.
Then run directly to the Hall of the Gods. Along the way, try to tame a deer or a horse (you may encounter different animals). To do this, you need to sneak up to one of them and press the interact button. The horse has its own stamina bar and moves slightly faster than the Phoenix, even at a walk.
On the east side, in front of the Hall of the Gods, you will meet a red cyclops. You have already defeated this one in the dungeon of Tartarus. Try not to get close to him – it’s better to throw stones at him until you stun him. Then run up and hit him a lot with your sword. Then you will need to repeat the algorithm.
After this, all that remains is to climb the rock, on top of which stands the Hall of the Gods.
Beauty born of pain
Explore the area next to the Aphrodite statue
Of course, the game from Ubisoft is not without towers. But you already opened one at the very beginning – there are only 4 more left. Each will completely open its large region on the map. Since you are already in Aphrodite’s domain, the Valley of Eternal Spring, it would be logical to open her region first (the neighboring ones still have too strong monsters).
Open the map (Tab key on the keyboard or Back key on the gamepad) and select the task with the apple in the round marker. Jump off the cliff and float towards the Aphrodite statue. Most likely you only have enough stamina to reach the bridge. Change to a horse or run further on foot. At one point it will be more convenient to turn off the road and run straight. Along the way you may come across a broken bridge – with wings it’s not a problem to overcome it. Climb onto the statue (or use the cauldron underneath it first).
Almost at the very top you will meet a fairy. Release her – she will become one of two that will later open access to treasure.
First you have to climb on your head, and then run along your arm – that’s where the vantage point is
Examine the apple tree
Jump and fly towards the new task. If you stocked up on stamina potions, then one is enough to fly straight to the desired location.
Throw a pearl into the sea
You will have to run for a whole kilometer over rough terrain, and then climb the mountains. When you get there, you will encounter a sleeping red cyclops. Try to crouch down to reach the nearest stone and throw it at his head. Then fight him with the same method as the previous two times – do not come close, stun him with stones, hit him with a sword many times until he comes to his senses. Don’t forget also that you can intercept the projectiles he throws.
The pearl will have to be rolled with your hands (reinforced by the bracers of Hercules) almost the entire way. A couple of times you will meet not very strong enemies – harpies and gorgons. If you catch them by surprise, it will be easier to deal with.
Before the finish line you will encounter a pile of stones – destroy it with an axe. And at the very end of the path, the gate can be opened by shooting from a bow at three targets around.
Collect divine sea foam
Dive down from the cliff, spread your wings and immediately go into dive mode (holding the wings button). Hover in front of the surface and pick up the foam. After this, get ashore.
Return to Aphrodite with divine sea foam
You can look around and look for resources (there are a lot of blue mushrooms here) or immediately teleport to the Aphrodite statue and then fly to it.
Survive the Fury of Typhon (How to Defeat the Ghost of Achilles)
You will have to defeat the ghost of Achilles himself – one of the oldest and strongest ancient Greek heroes, who fought in the Trojan War more than a thousand years before the birth of Christ. He is armed with a spear and sword. Try to block all his blows – he hits with whole combinations. If you successfully block two combinations in a row entirely, Achilles will be stunned. Only after this is it worth attacking and striking as many blows as possible with the sword. After the next stun, the ghost will grin and disappear.
Bitter tears
Find the tears of Aphrodite in the dungeons of Tartarus
Return to the Hall of the Gods, brew some new potions, visit the forge, and then fly towards the closest of the three markers (to the south).
In the forest, collect more grenades from the trees – just hit them with an axe. Uncorrupted boars may also be encountered. There is no reward for destroying them, and they themselves do not attack, so it is better not to touch the animals.
But at the mission site, around the statue, you will already encounter desecrated boars. Block their ramming attacks and use the ax more often. Then, with the same ax, you will need to destroy the statue so that it opens a passage to the dungeon of Tartarus.
Fall of Adonis
This dungeon is not difficult to figure out. You just need to throw the stone balls many times with the help of the wind, which is activated by the levers. When you break the barrier, the ball will fly where you want it and then roll back where you want it. After this, the path to the exit will be laid. You’ll pick up a tear along the way.
Head to the next dungeon – north of the Hall of the Gods.
How to get to the dungeon with Aphrodite’s tear in the north of the Hall of the Gods
The entrance to the dungeon will first have to be unlocked in a crevice between the mountains.
Find the golden room and go upstairs in front of the red doorway. Stand on the circular platform to unlock the brazier opposite. You need to shoot a burning, controlled arrow at it. Then go down to the floor and jump into the hole nearby. There you will find a pedestal with a button. Then use your ax to break through the wall next to the red opening and pull the cube onto the platform. After this, all that remains is to take off on the activated air flow and press the last button.
Return to the opening – now it will lead to the dungeon.
Calliope’s Despair
In this dungeon you need to activate the platforms in the correct order. Walls with hints nearby will help you do this – dark squares represent the necessary platforms. Study them and then repeat the pattern on the floor.
Starting from the second, the walls with hints will be turned away from the platforms – screen them or take a photo.
The last dungeon with a tear remains – to the west of the Hall of the Gods.
How to get to the dungeon with Aphrodite’s tear in the west of the Hall of the Gods
The dungeon is located inside the rock temple in front of the town. To open the entrance to the dungeon, you just need to bring cabbage heads from the roofs of the houses and place them on pedestals in the hall in front of the entrance.
Aphrodite’s Confusion
Here you need to constantly drag wooden boxes behind you in order to move forward. In the middle of the path you need to be careful – two gargoyles spitting fire will interfere with dragging the box. To avoid losing the box, speed up your run as soon as the fireball flies past (and if you lose it, go back and get a new one).
At the very end, you will need to throw two small metal cubes to place them on the platform with the anvil. One will first have to be transferred to the adjacent one, and then summon the second there.
Enter Aphrodite’s dungeon
Run towards the dungeon. To get there faster, use the teleport to the statue of Aphrodite. The right place is in a cave under a huge tree.
Immortals: Fenyx Rising Walkthrough – Rotten Apple
Find Aphrodite
Aphrodite turned out to be not so simple, and now we will have to persuade her to let her into the dungeon. At least you will have to look for it nearby – you need an apple tree on the river bank.
Find the Apple of Discord
The apple is located in Aphrodite’s Palace, at the highest point of the location. Go straight there, and then run along the paved road to the top.
At Yabloko you will meet a detachment of infantrymen. Use your ax often as they will try to surround you. Yes, and it’s easier to break through shield bearers.
The apple will be blocked – you need to place two ordinary (but rather large) fruits on pedestals next to each other. You will find the first apple in the shell at the top, and the second – in the western side, on the adjacent platform.
When you unlock the apple, push it down the road to the red opening. To open the opening, shoot with a bow at the two targets above.
Return to Aphrodite
Use the pillar icon labeled “Spirit of Gaia” to fast travel, then run towards Aphrodite.
TIP: Return to the Hall of the Gods and purchase the Hercules Leap ability with Charon’s coins. It will greatly help in the upcoming battle with the boss and other flying enemies. If you don’t have enough Charon coins (you need 8), then run around the Hall of the Gods and complete mythical challenges or look for chests.
Capricious goddesses
Free Aphrodite’s essence from prison
Return to the cave under the huge tree and jump into the abyss of Tartarus.
How to get through Aphrodite’s dungeon
Here you need to light braziers and destroy large seeds with fire. If you don’t see where to shoot, shoot the arrow up and then lower it down. Or shoot a couple of arrows first to look around.
Difficulties await on the western and eastern edges of the dungeon. In the West, you burn the seeds to get rid of the poison in the air, and then roll the balls into the holes. Then you will need to shoot the ignited arrow along a long path through a series of opened openings and set fire to one of the two large seeds.
A labyrinth awaits in the east. No need to go inside! Run from above and pull the ball with Hercules’ bracers from afar. The seeds can be burned with a lighted ball if you first pull it towards the broiler. Try to intercept the ball in time so that it does not roll into one of the gaps. After completing the maze, you will need to stand on the platform and set fire to the last large seed.
Then run to the top, where the boss is waiting – Ozomena Hurricane.
How to defeat Ozomena Hurricane
She’s not that hard to defeat if you have the Hercules Leap ability – just pull yourself up and hit her with the ax until she’s stunned. Then deal with the harpy backup and return to Ozomena.
And if there is no such ability, then you will have to do a lot of dodging and concentrate on destroying the harpies, which Ozomena regularly calls for help. After each death of a harpy, Ozomenu accumulates stun. After being stunned, she will collapse to the ground – it’s time to run up and stab with your sword. The algorithm will have to be repeated several times.
After winning Ozomena, all that remains is to pick up the bottle with the essence of Aphrodite and get out of the dungeon.
Break the spell that turned Aphrodite into a tree
Return to the Hall of the Gods and talk to Aphrodite. After this, the mission will be completed, and you will receive the third blessing from the goddess.
Lightning in a clear sky
Teleport to the Aphrodite statue and fly towards the marker with the bird (select the task on the map if you have not already chosen it). The right place is on one of the rocks (use distant vision to see which one). When you get there, a cutscene will immediately begin.
The Grain of Death will have to be obtained in the neighboring region – the Lair of War (Ares’s domain). This is one of the regular tasks that pushes you to go to the next area. In it, the monsters are already an order of magnitude stronger and it might be better to avoid them for now – use a horse for this.
Fortunately, no one is guarding the Grain – take it and return to the fallen bird.
Further passage of the branch can be postponed for now – Phosphorus is initially quite strong. It’s better to get busy with tasks in the current region for now.
Walkthrough of Immortals: Fenyx Rising – Mouth of War
Explore the area near the Ares statue
You will have to run 1500 meters to the next marker. But the terrain is rugged: there are many hills and high ruins. You can fly from height to height.
The statue itself will have many strong monsters. They will fall behind if you run to the statue.
Meet a majestic creature
The desired location is located in a ruined fortress nearby (follow the marker). Talk to the bear.
Defeat Typhon’s warriors
A pair of blue (2nd level) infantrymen with shields will attack. Keep them at a distance with your ax and defeat them.
Free the essence of Ares from prison
The dungeon will be very close. But you will need to go down into the dungeon of Tartarus again.
How to complete the Dungeon of Ares
Orichalcum cubes can be propelled forward using the Hammer of Hephaestus. Or attract them to you when they float (hit the cube or shoot from a bow).
You just need to activate the first cube and then fly on the wings.
Next you will encounter a bunch of cubes, but you will only need two, which are called by the button. Drag one cube on top of the other using the Bracers of Hercules and climb up. Then hit the two cubes guarding the entrance and go through.
Break the first corruption that holds the chain, and then climb the cubes to the west. Many enemies can be bypassed from above using floating cubes. Or drop them on their heads. Look for a slab with an anvil in the eastern part of the location at the top after the maze. You need to drag one of the large cubes there and put it on the slab with a blow.
A little further to the east, a room will open with a chain held by Typhon’s corruption – break it with an ax. After this, return along the cubes to the central hall with the multi-armed statue. Summon the cubes with the button to the west and go up to the northwest.
Call the first cube with the button and hit it – it will fly in the right direction on its own. Follow him until he hits the wall. After that, hit it so that it falls, and then again so that the wind catches it. Immediately climb onto it and hit it exactly above the slab. If it doesn’t fall quite accurately, hit it and pull it with your bracers, and then drop it again.
The button is activated, which needs to call another cube. He will appear right in front of the wind currents. Hit him and jump up. You will need to hit him in time so that he falls onto the slab with the wind, and then make him float again.
Continue these manipulations until you fly on the cube to the plate with the anvil. The stove will open the next room with a chain – free it and return to the central hall.
There are two locations left – to the north and east of the statue. In the north, you just need to place the cube called by the button into the gap in front so that the ball rolls successfully. And in the east – pull the cubes up to fly over the abyss, and then from the highest point launch the floating cube to the west, towards the red opening. He will hit the wall and can be pulled towards the stove.
When you release all the chains, the monster will come to life. The tactics of fighting him are approximately the same as with the Cyclops – don’t get too close and try to stun him with cubes or an axe.
After defeating the monster, all that remains is to pick up the bottle and get out of the dungeon.
Talk to Ares
Someone stole the bottle right under your nose. Return to Ares.
The first rooster in the hen house
Make your way into the dungeon and find the song of submission to Typhon
Near the entrance to the dungeon there will be a bunch of strong enemies. You can simply sneak through the bushes and jump into the rift. Or fight them.
Find the notes of the song of submission to Typhon
In the dungeon you will need to overcome a number of traps and defeat several groups of strong enemies. After the last battle, parts of the column will be easy to find and repair. This way you will get the song you need – get out of the dungeon.
Take salpinx from the defender’s mouth
Find the dragon skeleton using the marker and go to its head. On the spot you will need to defeat strong enemies, and then smash all the filth nearby – missing teeth will be revealed. Replace the teeth, take the salpinx and return to Ares.
Stash
Open the gates of Ares’ fortress
Follow the marker. Phoenix will play the salpinx and the gate will open.
Activate the fortress’s mechanisms to enter Ares’s treasury
In the eastern and western parts of the fortress there are large rooms with puzzles.
The mechanism is in the east of the fortress. You need to find all the cubes, and then drag them up to the button to place them on the plate with the anvil. The first cube is on the floor of the room on the first floor. The second one is waiting upstairs in the room opposite the button. In another part of the building you need to get another cube by dragging it with Hercules’ bracers through the grate onto the slab. After this it can be picked up.
Mechanism in the west of the fortress. Press the button on the right when you enter the room. Then you will need to stand on the round slabs with a helmet in the correct order – from lower to higher. Look around carefully before moving to the next slab.
Explore Ares’s treasury
Follow the marker to the treasury. Monsters, as always, can be bypassed. Moreover, you will still need potions for the upcoming battle inside.
Defeat Warlord Typhon
The Typhon Warlord is a pumped-up enemy of the “officer” variety (see our enemy guide ). Only he summons not weak infantry, but a bunch of powerful monsters. Destroy the most dangerous of them, and then immediately take on the military leader and try to quickly stun him with an ax and gifts of the gods.
After victory, return to Ares.
Immortals: Fenyx Rising Walkthrough – Tell Me What You’re From
Find out where these sounds are coming from
The desired location is in a cave under the hill on which stands the statue of Hephaestus.
Find the automaton’s hands
You just need to run to your hands and pick it up. In both places there will be strong enemies nearby, but you can take your hand and run away.
Light my fire
Head to the 4 forges around the giant forge in the northeast of the region. The forges are guarded by automatons and other enemies. Please note that automata attacks (especially projectiles) cannot be blocked – dodge more often and use the Gifts of the Gods.
Near each of the forges you need to find a portion of coal (a ball), throw it into the oven and set it on fire with an arrow passed through the brazier. One of the portions will not be found next to the furnace – run to the west and get it from the shaft below.
Tidy up the forge exhaust pipes
You need to cleanse the ventilation slabs on the floor from contamination and destroy the surrounding enemies in two places. After this, press the button in the center of the octagonal area.
The second exhaust pipe will be a little more difficult to put in order. You will also have to drag the cubes onto the slabs. Place one cube on the slab with an anvil inside the ruins, and pull the other cube out from the middle and place it on another slab. Block the rays with other cubes and switch them while shooting at the target.
Free the water wheels
You need to fly up to the three water wheels and swing your ax right in the air to knock off all the filth. Sometimes harpies will appear – shoot them with a bow, pull yourself up to them (“Hercules Leap”), or ignore them.
Heart of Fire
Light the forges to make the forge work
In the room to the left of the anvil, you just need to pull the lever and quickly light 3 onion braziers. And in the right room you will have to combine the signs with those outside and light 3 braziers out of 6 in the correct order: horseshoe – ax – sword with pickaxe.
After this, all that remains is to throw two portions of coal into the stove.
How to defeat the Clanking Automaton Foreman
It differs from other automatons in its size, increased health and explosive attack after leaving the stun. Try to land most of your air strikes on the head and use Gifts of the Gods more often to stun him faster. After being stunned, use swords rather than axes to deal more damage.
Dark art
How to pass the Dungeon of Hephaestus
In this dungeon, much is subject to controlled air flows. They can be redirected using a weather vane – shoot at it and turn it in the desired direction.
To begin, get to the first ball and, before grabbing it, deploy the nearest weather vane. After this, the ball will not escape from your hands and you can calmly roll it with the help of the bracers of Hercules to the coal exchanger (the booth opposite the lever). When you get the coal, throw it into the blast furnace in front and set it on fire with an arrow.
Next, turn south and get to a room with a button and three statues:
Call the cubes button. Two wooden cubes and one metal cube will appear. You need to switch the passages on the left and right with a lever and redirect the wind so that the wooden cubes end up on the slabs. But this can only be done if you press one of the wooden cubes with a metal one.
The next room will be a little more difficult. You need to carefully adjust the wind so that one wooden cube is in the middle, and the other two are on the edges. You will have to clamp the near one first, then the far ones.
In the next room you need to build a path for the ball to roll it into the hole in front of the passage. The ability to break wooden cubes so that the others move on and the broken one comes back is very useful here. Also, at the end you will have to remove the distant cube from the slab, when the ball has already passed along the columns.
The last ball just needs to be lowered down and rolled into the coal exchanger booth. If the wind gets in the way, switch it with the nearest weather vane. Then all that remains is to throw the coal into the blast furnace and set it on fire.
To get the third ball, you will have to climb to the top of the tower, overcoming various obstacles. Direct the wind in the right direction and choose the right moment to jump. You can climb onto the gargoyles from above. At the top you will need to roll the ball onto the platform and launch the descent with a lever nearby. After this, all that remains is to roll the ball into the coal exchanger, and then ignite the blast furnace with the resulting coal.
Fly into the room at the top and look for the lever. After turning it on, immediately fly up and turn on the first button (counting from the bottom), then the third, then the second and finally the fourth. A passage will open at the top and you will face a boss:
How to defeat Polyphemus the Enraged
His main weak point is the space between his legs. You can almost hit him with impunity from there with an ax until you stun him. But sometimes he will still attack in an area – run back and come back. You can also try to hit the head with an ax from the air. But it’s better to finish off with sword combinations.
After defeating the boss, return to Hephaestus.
Immortals: Fenyx Rising Walkthrough – The Good, the Bad, the Little
Explore the area next to the Athena statue
Run to the statue and climb up. In Athena’s domain, enemies are common, but there is also a lot of cover, so for now you can just run or sneak past everyone.
Explore the archives
Fly towards the archives using the compass. You will find Athena in the courtyard.
Kill the legendary Hydra
North of the archives there is a cave under a giant statue of the Lernaean Hydra. Fly there. In the cave there will be an entrance to the dungeon of Tartarus – jump into it.
Monstrous Serpent
Get the Hydra Fang (How to Defeat the Hydra)
Don’t be afraid – the heads won’t grow back forever. The boss has only three stages: one head, two and four. You need to get rid of each of the heads as soon as possible. You can use a bow (if you’ve upgraded it well), use the Phoenix attack, or be pulled by Hercules’ Leap. In any case, try to stun each head as quickly as possible, and then finish it off on the ground with swords.
As the battle progresses, Hydra will call upon foot soldiers. But they can be ignored if you have almost finished off the boss in the second or third stage. Find tips on fighting infantrymen of different types in our separate material .
After defeating Hydra, return to Athena in the archives.
Go ahead and be a hero!
Find Atalanta’s Stele – Track down Atalanta’s loot
In this and the following tasks you need to repeat the exploits of the legendary heroes of Greece. Atalanta’s feat was killing a ferocious boar with a bow. He will be waiting for you right under the rock (but you can kill him in close combat).
Find the Stele of Achilles – Restore the Statue of Achilles
Deal with the enemies and pick up a leg from the statue of Achilles a little to the south. Drag her using the Bracers of Hercules to the statue itself. After this, go to the Tartarus Dungeon in the cave nearby.
Complete the Test of Achilles
You need to deal with three waves of enemies. These will mainly be foot soldiers, and will also be joined by harpies and cyclops. It is better to destroy the infantrymen first. The “Hercules Leap” works well against harpies, and against the Cyclops, the Phoenix attack and the return of the stones thrown by the Cyclops back.
Find the Stele of Odysseus – Bring Odysseus’s ship home
There is a toy boat next to the stele, but it is not the one you need. Climb onto the Trojan Horse statue nearby and throw the ship from there to the other side. A very strong cyclops awaits you there (fortunately there are a lot of bushes on the island and you can sneak past with a ship). The boat itself needs to be placed on the stand in front of the statue near the stairs.
Find the Stele of Hercules – Remember the labors of Hercules
In fact, it is enough to repeat only the last 12th feat – to cope with Cerberus (but you won’t have to take him out). Find the tablet with the number XII and place the stones on the slabs nearby. After that, go into the cave and jump into the dungeon.
The Hound of Hades (How to Defeat Cerberus)
The three-headed dog will have to be killed. Try to get behind him and hit him with an axe. And stay away when it’s about to spew fire.
After defeating Cerberus, Athena will meet you at the exit of the dungeon.
Find a door with a shield in the temple
You just need to follow the marker. The door is located in front of the southern gate to the temple. There is no need to solve the riddle in the temple itself.
After talking with the oracle, return to Athena.
Walkthrough of Immortals: Fenyx Rising – Judgment Day
Cleanse the temple of Athena of filth
Go around to the left of the temple entrance. Break the corruption and pick up the brazier in the room. Drag it to the entrance and place it on the free pedestal. Another brazier will appear to the right of the entrance. Place it on the pedestal in front of the statue opposite the entrance. After this, light all the braziers using arrows passed through the fire, and then run inside the temple.
Inside you need to deal with the enemies, break all the fel crystals, and then solve the puzzle. The latter can be solved simply – light two braziers at the top left and right of the statue, and then go up to the statue itself and press the interaction button near the pedestal.
After this, follow the marker to the task “Find the Essence of Athena” .
How to get through the dungeon of Athena
Inside, four areas with statues await, each of which must be moved towards the large statue of Athena in the center of the dungeon. But to do this, you will have to solve puzzles in each of the zones.
First you need to learn how to master related objects. Grab the smaller cube with Hercules’ bracers and the larger one will trail after you. The golden dot in front of you will indicate where the large cube will fall if you place the small one. The cubes on the right are easier to get, but you will have to carefully jump over the gap. And the cubes on the left must first be dragged to the right to get around the columns. Place both large cubes on the slabs and move on.
Only now you will find yourself at the Southern Statue. Drag the cubes from the west and east in the same way as you did before. Be careful when jumping over gaps. When you place the cubes on the slabs, all that remains is to move all the metal cubes that appear near the statue forward.
How to defeat Medusa the Arrogant
She will be encountered 4 times during the passage of the dungeon and will become stronger each time. The best way to fight it is with a pumped-up bow and Phosphorus attack. Dodge most projectiles, but blue balls can be launched back by parrying. Also try to be attracted to her with the “Hercules Leap” and hit her with an axe.
How to solve the puzzles in the western part of the Athena dungeon
Clear three arrow paths from the cubes. Just move the metal cubes onto the nearest spikes, and the wooden cubes onto the nearest free square platforms. Of course, you need to carry the cubes with the help of the bracers of Hercules.
When all the paths are clear, light the three braziers by shooting flaming arrows through the rings. You need to start on the left.
Then all that remains is to move the statue using the cubes, as you already did in the southern part of the dungeon.
How to solve the puzzles in the northern part of the Athena dungeon
You need to climb higher and press three buttons – the last one is at the very top. Cubes and boxes will help with this. Place the metal ones on the spikes, and place one or two nearby wooden ones on top. Such structures need to be installed on lifting mechanisms with spikes in order to climb onto the cubes and then jump higher.
How to solve the puzzles in the western part of the Athena dungeon
You need to carefully drag three cubes, past chasms and laser traps, to place them on three slabs with an anvil. There are no special difficulties or forks at this stage.
After the last fight with Medusa, return to Athena in the Hall of the Gods, and then talk to Hermes.
Family circumstances
Climb the mountain before Ligiron
Head to Tsarsky Peak. You need to climb to the top, but there is no need to rush (despite the name of the task). If you have few elixirs left, then collect more resources in the green part of the Golden Island and process them at the cauldron.
It’s a long way to the top. Follow the mountain path with lit torches on the sides. Sometimes it will seem that you are going down, but in fact, further on the road will rise higher again and go around the mountain several times. Along the way you will encounter 3 mandatory puzzles. They light torches on the mountain path further down to warm the air so you can pass.
1st compulsory test. Take out the enemies near the Kronos statue, and then take the cube from his hand. Take the cube to the feather slab in the southwest. Stand on the round slab with the helmet in front and quickly dash through the doorway (the door can then be opened again with the switch nearby). Inside you need to pull the cubes onto the slabs. Two are behind bars on top (the wall can be destroyed), and another one can be pulled up from the outside while inside the room. When you install the cubes on all the slabs, take the stone baby from the bath and place the titanium statue in the hand.
2nd compulsory test. You need to shoot a bow and shoot an arrow along a long and very winding path. Upgrading the Gift of the Gods “Apollo’s Arrow” to level 2 will greatly help with this so that you can control the speed of the arrow’s flight.
3rd compulsory test. You need to find 4 pearls and install them according to the diagram ahead. All the pearls will be found in the rooms around, but getting them will not be very easy. To get the first one, place stones on all the slabs in the room on the left. To get the second one, take two pearls and go down the inclined surface in the booths on the left and right, clicking on the round plates that will open the gate. The third will be found a little to the east, in the ice hole. And for the fourth one you will have to swim underwater in another ice hole, a little further to the east.
Defeat Ligiron
You will have to fight your own brothers. You need to knock out half of his life bar twice, and then knock out almost all of it. He will only become truly dangerous in the third stage – run as far as possible when he prepares an explosion of red energy (but don’t fall off the cliff!). However, Ligiron is not very agile, so most of his attacks will not be difficult to avoid or block.
After defeating Ligiron, climb Mount Typhon and jump inside the chasm.
Web
How to defeat Typhon the Defiler
The fight will be surprisingly not difficult. Try to stay behind the boss and hit him in the air with your axe. Phosphorus attacks and sometimes a bow will also help a lot. Please note that Typhon cannot be stunned (however, his life bar disappears quite quickly).
Walkthrough of Immortals: Fenyx Rising – Typhon’s Lair (Final)
After the first battle with Typhon, it turns out that this was not entirely real. You’ve been thrown into the final puzzle dungeon. Most of them are already familiar to you and are easier than those you have encountered before.
To open the first gate, you need to solve four simple riddles. Let’s start with the near left and end with the far right.
First puzzle. Switch the weather vane, then call the ball with the button and roll it forward, then switch the weather vane back and roll the ball to the hole.
Second puzzle. You just need to push the large cube to the slab with the help of a small one on a magic rope.
Third puzzle. Summon a floating cube, hit it with your weapon, pick it up with Hercules’ bracers, throw it forward to the slab, then shoot at it with a bow so that it falls onto the slab.
Fourth puzzle. Burn the seed using an arrow set on fire in the brazier, and then push the cube summoned by the button to the stove.
Next you will find yourself in the main part of the dungeon. Here you need to solve four more puzzles, but more difficult. Let’s start in the same order: from the near left to the far right.
First puzzle
Block the beam with the metal cube so that the wooden one reaches the plate with the feather, and then move the metal one onto the plate with the anvil.
Next, run to the platform that has arrived and get over to the other side. Switch the weather vane so that the wind carries you to the platform far ahead (you need to jump and spread your wings). A similar puzzle awaits you there, but with two rays. Block the high beam first, and then the low beam. Do this closer to the right side.
Second puzzle
Summon a floating cube with the button and climb onto it. Switch the weather vane so the wind blows forward. Hit the cube and fly forward on it, shooting at the targets above the lasers. When you reach the wall, hit the cube so that it falls to the floor. After that, hit again to lift him into the air and drag him to the slab, and then drop him with a blow.
Third puzzle
The first part of the puzzle requires you to press a button, drag the ball from afar past the fryer, and then drag it to the seed and leave it in the hole. Interfering cubes need to be moved.
About the same thing needs to be done in the second part of the puzzle, but the wind will interfere. Move the cubes on both sides opposite and switch the weather vane. Immediately after this, grab the ball near the frying pan and pull it towards it. Then make the ball hit the distant cubes, move them to the opposite wall, then switch the weather vane and move the cubes back. The burning ball will first roll towards the seed, and then it will be pushed out by a stream of air towards the hole.
Fourth puzzle
You need to break through two walls of stones with a floating cube. To break through the left wall, the wind must blow to the left, and to break through the right wall, to the right. Summon a floating cube, hit it, pick it up, and then launch it into the walls. After this, you will need to stand on the round platform with a helmet and shoot a burning arrow through the rings on the left and right to burn the two seeds.
After this, you will need to fly forward, go up, then fly with the wind to the lever in the room and pull it.
All puzzles are solved – return to the central room, and then go up to the exit.
How to finally defeat Typhon the Defiler
This time the enemy’s life bar will decrease noticeably more slowly. However, approximately every 20% you will be helped by previously disenchanted gods. But the most important thing for a successful victory is to try to stay in the air and hit the heads or wings. To do this, use “Hercules Leap” more often. But don’t take stamina potions too often – after each attack from your allies, your hero will have time to catch his breath (but not replenish his health!).
After winning, watch the final video and the game’s plot will be completed. Unfortunately, you can only return to the open world by loading an old save or starting a new game+.