
Learn how to install Plex on QNAP NAS in a few simple steps. Enjoy seamless streaming of your favorite movies, TV shows, and music with this comprehensive guide.
Are you looking to enhance your home media experience by streaming your favorite movies, TV shows, and music? Look no further than Plex, a powerful media server application that allows you to organize and stream your media files effortlessly. In this article, we will specifically focus on how to install Plex on QNAP NAS, ensuring a seamless and convenient media streaming experience. So, let’s dive right in!
To install Plex Media Server on a QNAP NAS, you can follow these steps in a tabular form:
| Step | Action | Details |
|---|---|---|
| 1 | Check Compatibility | Ensure your QNAP NAS model is compatible with Plex. Visit the Plex website for a list of compatible models. |
| 2 | Update QNAP Firmware | Ensure your QNAP NAS firmware is up-to-date. Update it through the QNAP control panel if necessary. |
| 3 | Download Plex Media Server | Download the Plex Media Server package for QNAP from the Plex website. Choose the right package for your NAS model. |
| 4 | Access QNAP NAS Control Panel | Log into your QNAP NAS through its web interface. |
| 5 | Open App Center | In the QNAP control panel, find and open the ‘App Center’. |
| 6 | Install Plex Media Server | Click ‘Install Manually’ at the top right of the App Center, then browse to and select the downloaded Plex package. |
| 7 | Configure Plex Media Server | Once installed, open Plex from the App Center and sign in to your Plex account to configure your media library. |
| 8 | Adjust Network Settings (Optional) | Adjust your NAS network settings for optimal streaming, if necessary. |
| 9 | Create Libraries and Add Media | In Plex, create libraries (e.g., Movies, TV Shows) and add the paths to your media folders on the NAS. |
| 10 | Configure Plex Settings | Customize settings like transcoding options, remote access, user accounts, and other preferences in Plex. |
| 11 | Access Plex from Devices | Access your Plex Media Server from compatible devices using the Plex app. |
Remember, the exact steps might vary slightly based on the specific model of your QNAP NAS and the version of the firmware it’s running. Always refer to the latest instructions and documentation provided by QNAP and Plex for the most accurate guidance.
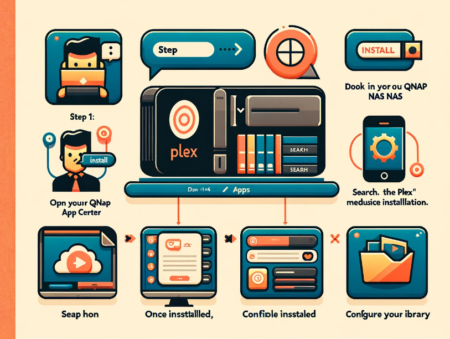
Step 1: Prepare Your QNAP NAS
Before we get started with the Plex installation, make sure your QNAP NAS is up to date with the latest firmware. This ensures compatibility and a smooth installation process.
Step 2: Access the QNAP App Center
To install Plex, we will be utilizing the QNAP App Center, an online store that provides various applications for your QNAP NAS. Follow these simple steps to access the App Center:
- Log in to your QNAP NAS web interface.
- Click on the “App Center” icon to open it.
- You will find a wide range of applications available for installation in the App Center.
Step 3: Search and Install Plex
Once you are in the QNAP App Center, follow these steps to search for and install Plex:
- In the search bar located at the top-right corner of the App Center, type “Plex” and hit “Enter”.
- The search results will display the Plex Media Server application. Click on it to open the installation page.
- Review the application details, including the version and size, to ensure it meets your requirements.
- Click on the “Install” button to begin the installation process.
- Wait for the installation to complete. This may take a few moments.
Step 4: Configure Plex Media Server
Once the installation is complete, it’s time to configure Plex Media Server to get your media streaming up and running. Follow these steps:
- Launch the Plex Media Server application from the QNAP NAS web interface or open it from the “Main Menu” in the App Center.
- You will be prompted to sign in or create a new Plex account. If you already have an account, sign in; otherwise, create a new account. This account allows you to access your media remotely and sync your media library across multiple devices.
- After signing in, you will be guided through a series of steps to set up your media library. This includes naming your server, selecting language preferences, and adding media folders.
- Once you have completed the setup, Plex will automatically scan and organize your media files. Depending on the size of your library, this process may take some time.
Step 5: Accessing Plex
Now that Plex is successfully installed and configured on your QNAP NAS, you can start enjoying your media from a wide range of devices. Here’s how:
- On your desired device, download and install the Plex app from the respective app store. Plex is available on platforms such as Windows, macOS, iOS, Android, Roku, and more.
- Launch the Plex app and sign in using your Plex account credentials.
- Once signed in, you should see your QNAP NAS server listed. Simply select it and start exploring your media library.
- Enjoy seamless streaming of your favorite movies, TV shows, and music, whether at home or on the go!
In Conclusion
By following these simple steps, you can easily install Plex on your QNAP NAS and revolutionize your media streaming experience. Plex offers a user-friendly interface, powerful features, and the ability to access your media library from anywhere, making it a must-have addition to your home entertainment setup. So why wait? Start exploring Plex today and take your media streaming to the next level!