How to create an audio file.You need to provide information to an acquaintance on how to perform a certain operation and, to do this first, you would like to send him one or more audio containing all the necessary information. You would like to know how to create an audio file that you can keep in the future and send, if necessary, using the system that seems most appropriate to you.
Take a few minutes of free time for yourself and put into practice everything I have to explain to you on the subject. I guarantee that, in a short time, you will be able to reach the goal you set for yourself Happy reading!
How To Create An Audio File; 5 Steps
- How to create an audio file on the PC
- Audacity
- Other solutions to create an audio file on the PC
- How to create an online audio file
- How to create an audio file on smartphones and tablets
- Integrated audio recorder
- App to create audio files
- How to convert audio files
How to create an audio file on the PC/How To Create An Audio File
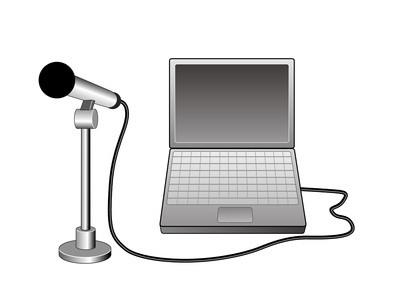
Are you thinking of creating an audio file on your PC in order to acquire your voice or, again, the sounds coming from a program you are using? In this case, you have several solutions that you can rely on. Let me show you some of the most interesting.
Audacity/ How To Create An Audio File; 5 Steps
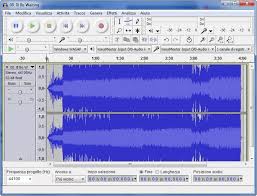
Let’s start with Audacity if you had never heard of it, it is a program completely dedicated to the manipulation of audio, suitable for both beginners and the more experienced. Among the many features of the software, which is open source and freely available for Windows , macOS and Linux , is the ability to create an MP3 audio file and in numerous other formats.
To get the program, connected first to its home page , click on the Download Audacity button and then on the most appropriate item for the operating system you are using. For example, if yours is a Windows PC , click on the Audacity for Windows box , then on the Audacity xyz installer link , and then on Audacity Windows installer .
Once the download is complete, again if you are using Windows , open the .exe file you obtained, press the Yes button and, after selecting the language to use, press the OK button . Subsequently, click on the Next button four consecutive times, then on Install and wait a few seconds for the necessary files to be copied to the most appropriate folders; to finish, press the Next and Finish buttons and wait for the software to open automatically.
If, on the other hand, yours is a Mac , after visiting the Audacity website and clicking on the Download Audacity button, click on the Audacity for macOS box , select the Audacity xyz dmg file link which resides in the new page that opens and then on the Audacity macOS dmg entry , in order to start the download of the program setup file.
After getting Audacity, run it and Benefit from support for the proposal that comes window, drag the ‘ program icon in the folder Applications Mac; once this step is also completed, you can open the software, recalling it from the Launchpad or using the icon just copied to the Applications folder . At the first start, you will then have to click on the Allow button , in order to authorize the start of a program from developers not certified by Apple ( more info here ).file.dmg
From this moment on, the steps to be taken are the same on both operating systems: to start, choose the microphone to use to capture the audio, using the drop-down menu next to the Microphone icon . For example, if you intend to record sounds external to your computer and coming from the microphone, you should choose the Integrated Microphone option ; if, on the other hand, you are interested in recording the sounds played by the computer (option available only on Windows; to have it also on macOS you must install a special software, as explained in my guide on how to record the Mac screen with internal audio ), select, always from the menu seen a little while ago, the Microsoft Sound Mapper item , orLoudspeakers (Loopback) .
To start creating the audio, click on the Rec button (the one with a red dot ); to temporarily stop the recording, click on the Pause button (the one with two vertical lines ) and, to stop it, press the Stop button instead .
When you are satisfied with the result, click on the File menu located at the top left, select the Export audio item from within it and, once you reach the screen dedicated to the saving settings, indicate a name to assign to the audio, the output format ( eg MP3 or WAV if you want to create a WAV audio file ) and the folder in which to store it. When you are done, click on the Save button and, if you wish, enter the metadata tags to be associated with the file; finally, press the OK button and that’s it!
As I already mentioned at the beginning of this section, Audacity is a very powerful software that allows, in addition to recording audio from the PC and external sources, also to manipulate existing songs, to merge them together and to perform a large number of adjustments on speed, transitions and much more: to find out more, I suggest you read my guide on how to use Audacity , in which I showed you the most useful and important aspects of the program.
Other solutions to create an audio file on the PC
Do you believe that the solution illustrated above is absolutely valid, but do you still consider it unsuitable for your current needs? In this case, you could consider using some alternative software, each with its own peculiarities and suitable for different scenarios.
- Voice Recorder (Windows)and Voice Memos (macOS) : these are two integrated programs, respectively, in Windows and macOS through which it is possible to record voice notes in an extremely simple way, using the computer microphone or any external microphone. I told you about it in detail in my guide on how to record an audio .
- Wavosaur( Windows ) – free audio recorder and editor, in its basic version, with a spartan interface but many interesting functions.
- Audio Hijack( macOS ) – it is a very well-known program in the music field, through which it is possible to record and combine the audio coming from the macOS operating system, from the programs running on it, or from the microphone. The software is paid, but a free trial version is available, which allows you to create recordings of up to 10 minutes long.
How to create an online audio file
If you do not want to “burden” your computer with a dedicated program, it will be useful to know that you can create audio files online , using the browser : in this regard, I recommend that you contact the free Apowersoft Free Online Audio Recorder .
The latter, after installing a small launcher, allows you to create an audio file directly from within the navigation program, from any operating system, allowing it to be saved in MP3, AAC, WAV, WMA and OGG formats.
To be able to use it, connected to the home page of the service , click on the Start Recording button and then on the Download Launcher button located inside the “balloon” that appears after a few seconds. Once you have the necessary file, start it and follow the instructions shown on the screen, to finalize the installation of the “little program” necessary for the operation of the whole.
Once this is done, wait for the launcher to load and, to select the source from which to record the audio, click on the button depicting a speaker located at the bottom left. To start capturing sound, then press the REC button . Subsequently, if you wish, you can pause and resume the recording at any time by clicking on the appropriate button located in the center of the screen.
When you have finished, you can stop the recording by clicking on the Stop button : the recordings made in this way are automatically saved on the computer and listed in a special list, reachable by clicking on the button depicting a list ; to view the path of each file, click on the folder icon located at the bottom.
How to create an audio file on smartphones and tablets
You don’t have a PC as you have chosen to use your smartphone and / or tablet as the only device and, consequently, would you need some advice on the best apps to create an audio file ? I’ll settle you immediately.
Integrated audio recorder
Most Android devices, as well as all iPhones and iPads, have a built-in voice recorder with which you can create audio recordings very easily.
In the case of Android , the app can have different names, depending on the variant of the operating system installed on the device: for example, the “standard” app of Xiaomi smartphones is simply called Recorder . Having said that, after identifying the app in question on your smartphone or tablet, open it and press the Rec / Pause button , which usually resides in the center, to start or temporarily stop recording; to end it, press the Stop button instead . The recording will be saved automatically.
If, on the other hand, yours is an iPhone or an iPad , the app responsible for recording audio from the microphone is called Voice Memos and resides on the Home screen of the device (or in the app Library). To use it, once started, press the Rec button (the one with the red dot ) to start recording; to end it, instead, tap the Stop button (the red square ) instead .
As needed, I would like to point out that you can call up the Pause , Resume and End buttons , together with the audio editing tools, by dragging up the bottom of the application panel. If you need an extra hand while using the aforementioned app, please take a look at my guide on how to record audio with iPhone .
Apps to create audio files
How do you say? Your Android device does not integrate an application used to create voice notes, or iPhone and iPad Voice Memos failed to meet your expectations? In this case, you can rely on a series of apps to create third-party audio files , mostly free, available on the Play Store or on the alternative stores for Android and on the App Store. Here are some of them.
- Easy Voice Recorder( Android ) – This is an easy-to-use voice recorder, which provides three different recording modes: voice notes, meetings / lessons and RAW music / sound. Recorded files can then be exported in AMR, AAC or PCM format. Basically the app is free, but there is a paid version available that includes extra features (such as recording in stereo mode and automatic silence exclusion).
- Triveous Voice Recorder( Android ) – this is another excellent application dedicated to the Google operating system, which allows you to record files in different formats (M4A, WAV and AAC) and automatically upload them to the cloud. It is free but a paid version is also available, with additional features such as noise cancellation, automatic silence skip and recording via Bluetooth microphones.
- Voice Recorder – Voz( iOS / iPadOS ) – is an application that allows you to create audio in different formats (such as AIFF and WAV), edit and share them with ease with your own contracts and on social networks. It’s free.
- Voice Record Pro( iOS / iPadOS ) – this app allows you to easily create, edit and share notes and voice recordings, exporting them also in MP3 format. It is free with the presence of advertisements.
To learn more about the subject, I invite you to read my guides dedicated to apps for recording and to those dedicated exclusively to voice notes , in which I told you both of the solutions mentioned above, and of other excellent applications useful for the purpose.
How to convert audio files
Do you have a music file created with a very specific format but you need to convert it to MP3 or another type of audio, more suited to the goal you need to achieve? In this case, specific tools for the purpose can come to your aid, called converters : these are programs, apps and websites that can transform music from one format to another in a very simple way.
In most cases, it all comes down to indicating the location or loading the source file (i.e. the one to be transformed), specifying the target format and pressing a button to start the conversion, which generally takes a few seconds (depending on the audio length). If you are interested in this possibility, please take a look at my tutorial on how to convert audio files , in which I have covered the subject in great detail.