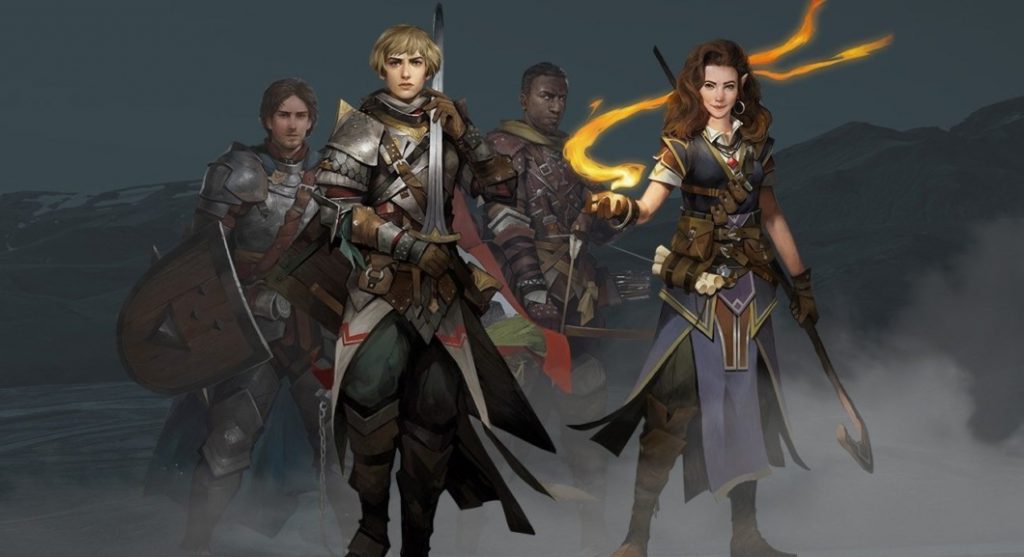
The release date for Warhammer 40,000: Rogue Trader is December 7, 2023.
Developer: Owlcat Games . Publisher: Owlcat Games .
The storyline is 60 hours long. 100% completion time is 80+60 hours.
Warhammer 40,000: Rogue Trader System Requirements . When was it released?
| Characteristic | Minimum requirements | Recommended requirements |
| CPU | Intel Core i5-4590T CPU 2.00GHz | Intel Core i5-6400 CPU 2.70GHz |
| RAM | 8 GB RAM | 16 GB RAM |
| Video card | AMD Radeon RX Vega 6 Intel HD Graphics 630 DirectX 11 |
NVIDIA GeForce GTX 1050 Ti AMD Radeon RX 570 DirectX 11 |
| Disk space | 40 GB | 40 GB |
| Operating system | Windows 64-bit: 10 | Windows 64-bit: 11 |
Warhammer 40,000: Rogue Trader Text Design . All Items
Battle – all tactical battles and bosses are marked in the text.
Item – useful items, can be highlighted with the Tab key.
[Dogmatist] – plot choices that influence the character’s worldview.
Companion – all characters that can be taken into the squad.
Achievement – actions to obtain optional achievements.
Walkthrough
Prologue. By Right of Blood
Warhammer 40,000: Rogue Trader Guide
Upper decks
We play as the distant heir of Rogue Trader Theodora. We’ve been summoned to a massive ship to be introduced to the local customs and prepared for our new position. Kunrad Voigtwyr, a master of whispers, escorts us to the captain. Along the way, we can inspect the people and screens.
In the next room, we’ll enter battle. We’re up against a single, enraged Servitor robot . On each turn, you can move around the green field, use all your skills for action points, and only shoot or attack once, which we do last. The end-of-turn button is in the lower right corner, shaped like a skull.
We’ll continue on our own, using the map as our guide (press M). It’s always best to rotate the game camera so it faces south to north, making it easier to check the map. Head northwest to the semicircular platform where we’ll meet Lady Theodora herself. Next to her is another heir, a candidate for her position. We can use [Knowledge: Xenos] and [Knowledge: Warp] in conversation.
There’s an assassination attempt on Theodora. We’ll engage in a team battle . We’ll hide behind cover and pick off nearby enemies. After victory, we’ll learn that someone has mutinied on the ship, even while it’s traveling through the warp. We’ll be sent to investigate the elevator in the south, where we’ll meet Kunrad. He’ll knock us out and drag us to a new location.
Kunrad was planning to steal Theodora’s Trade Warrant, and he needed our heir’s blood to do it. Refusing is pointless; we can use [Technique 45]. The Warrant’s defense system will activate the turrets and destroy the rebel squad.
Inside the room, we examine a huge document. A vox-skull robot will lead us back. Behind us, we need to press the button to close the door, after which we’ll meet Abelard’s companion . We’ll learn how to use healing: in Abelard’s inventory, we’ll equip the “medkit” item in the quick access slot and use it on the wounded hero.
Rebels will rush into the hall; Abelard and I will destroy the enemies . After victory, we will gain a level increase. At each level, you can improve a stat, a talent, or sometimes both. The added properties are indicated in a clockwise circle. After upgrading, proceed to the next location.
Sanctuary of the Navigator
We’ll meet Idira , a companion. She’s an unsanctioned psyker and a soothsayer, and she hears voices in the warp. Nearby, rebels are trying to kill the Navigator, but he’s under a protective dome. We’ll position the characters behind cover and begin the battle with three heroes . Idira can inflict vulnerabilities on enemies and attack them with sound and lightning.
After victory, we find Navigator Vespidas nearly dead. Without him, the ship won’t be able to travel through the warp, and finding a new Navigator will be difficult—they’re mutants with a third eye. The dying Vespidas will task us with finding the Chief Helmsman to bring the ship out of the warp.
Officer’s deck
We’ll meet our companion, Argenta , a warrior of the Adepta Sororitas. Ahead of us is a locked door that needs to be hacked. Tutorial: equip any alternate weapon in your inventory and press “X” to switch. Turn on the map, which will show “Loot” markers. Search chests or the bodies of slain enemies in these locations. Some items will be transferred to your cargo, while weapons, armor, and first aid kits will be moved to your inventory. Finding a master key will allow you to hack the doors.
In the next room, there’s a battle: 4 heroes against 7 rebels . Among the enemies are warriors with swords; don’t let them get close to your ranged fighters; they won’t be able to shoot if there’s an enemy nearby.
We collect all the trophies in the hall. We need to open the doors; we can use [logic] or the melta charge we found. There’s a door in the corridor to the south near the rubble; you can open it with a multi-key or a charge. Inside, we’ll find a helmet .
A fiery barrier will appear on the way, and the ghost of “Theodora” will emerge from it, offering us help. Argenta will warn us that heresy is tempting us. Choose the answer: [Dogmatist], [Heretic], [Schismatic] +15 . It’s best to stick to one chosen path to earn the achievement later .
After the fire, we’ll meet Edeltrad’s assistant. We can use [knowledge: warp 50]. Go through the door to the west and loot the crates in the corners. There’s another inconspicuous door to the south; inside, we’ll find some glasses . After collecting all the stashes on the map, go to the elevator.
Upper decks
We’ll find the real Theodora killed at her work station. There are three loot points nearby; collect them all and find a handwritten letter with a seal, Theodora’s Rosary, and a Rogue Trader’s Robe . As you exit , a squad of seven rebels will attack . Among them is a combat servitor, which has significantly more health.
The ship’s bridge
The rebellion’s organizer, Kunrad, will perform a heretical ritual. The Second Heir will run after the enemy, fall into the summoning circle, and transform into a monster.
Boss: Chaos Spawn . The monster has 140 health, attacks with tentacles at close range, and spits acid from afar. It’s best to leave the boss alone at first and kill all the small rebels. If any enemies remain, the boss will eat them and restore 40 health. On hard difficulty, if you don’t let the boss eat the enemies, you’ll earn the “Don’t Touch!” achievement for doing so . If the heroes lose all their health in battle, they’ll fall and be injured, but won’t die permanently.
At the bottom of the screen is a colored “Momentum” bar. It allows you to use a Heroic Act or Desperate Measure once per battle. Each hero class has its own abilities. For melee warriors, use this ability at the right time to restore all health. Defeating the boss will reward you with the Mantle of Heroism and the Gloves of Overpowering .
After victory, Abelard will appoint us as Theodora’s successor. We will take the Lord Captain’s place and bring the ship out of the warp. The mutiny is over.
Chapter 1.
Warhammer 40,000: Rogue Trader. What is this game?
Abelard will gather all the officers, and we’ll question them to find out the situation on the ship. We’ll learn that the officer, the Master of Weapons, has temporarily succumbed to heresy. We’ll choose whether to execute him: [Schismatic], [Dogmatist] .
We’re in the Raikad star system. The Lord Inquisitor has tasked us with finding his missing assistant here. But we also need to replenish the losses from the rebellion and find a new Navigator. Idira will make a prophecy. The Sororitas sister will tell us about a personal request. Speaking with the Vox Master gives the option to [Sociability 40].
| Personal request from Sister Sororitas
If we agree with Argenta, we’ll come to the lower decks and address the children of the slain soldiers. We’ll choose how to address them, what to do with the disgruntled troublemaker, and how to respond. |
The local star’s map contains a pair of planets and a station. You can visit them in any order. First, fly to the nearest station.
1.1. Eurak-V (Secrets of Navis Nobilite)
The station won’t respond, so we’ll disembark anyway. We’ll see the squad kill three prisoners. Felek Orsellio will tell us about the betrayal at the station and ask us to help kill another keeper, Theobald Orsellio, in order to rescue the captive Lady Orsellio. All three of these characters are Navigators, so we can side with any of them. But first, we agree with Felek to proceed without a fight. We’ll receive a phylaketry filled with blood.
In the first room, we examine two trophies. In the northwest, we jump over the cabinet [Athletics]. In the central room, in the middle, there’s a trap; it’s best to disarm it [Explosives]. A squad of seven people is defending above . After defeating them, we activate the map and collect all 12 trophies. There’s a locked door in the north; we go through the eastern door first.
There’s a trap behind the eastern doors. At the end of the corridor, you can clear the [Athletic] rubble; behind it are the Gloves . Open the doors on the lower left; behind them are the Seer’s Glasses . Unlock the two doors upstairs; at the dead end, you need to “Awaken the Spirit of the Cogitator.” We can use [Technique 25] or [Logic 40]. Select the line “6. 01101100,” and the northern door in the central hall will open.
Examine the cistern behind the northern door and take three types of acid. In the right-hand hall, upstairs, there’s a converter; you can grind crystals into the same dust. Insert any catalyst or any flesh into the flasks below. We’ll recreate the control rod . Return to Felek; you can kill him or follow his instructions to another navigator.
Upper level. We’ll meet Lady Cassia, where we can pass [Will], [Persuasion 45], [Assault 45] checks. The conversation continues with [Persuasion 45], [Commerce 40]. The old protector, Theobald, is with her. If you’ve collected all the documents and seen all the scenes, it will become clear that Felek is the real traitor. Choose who to support:
- Attack Theobald- take the Lady away by force.
- Attack Felek—he’s a real traitor. Lady will support us.
- We attack both navigatorsand take Lady with us.
When we return to the ship, Cassia will perform a ritual of unification with the ship and become our new Navigator. However, we’ll be able to bring Cassia, our companion, along with us. In space, we choose what to do with the Navigator station. If we choose “Take out everything,” we’ll receive a ” Profit factor increased by 2. ” A little later, we’ll have a personal meeting with Cassia.
| Dark Echelons
Lieutenant Avrilla Vent will come to us. We’ll learn that another riot is brewing on the work decks, and Abelard has sent an assault team. The lieutenant will offer to speak with the workers personally, and that will be enough to resolve the problem. If we agree, the whole squad will go. Lower decks. The first person they meet will accuse Abelard. Below, we’ll meet three leaders of the worker clans. [Intensity 40] can be used in conversation. We can simply stop the persecution of the workers, or eliminate the rebels. Secret. In the southwest corner, on the southern wall, turn the valve (1). In the same room, in the north, there’s a valve (2). In the western room, on the western wall, there’s a valve (3). You need to turn all the valves to get the stash container at the entrance in the pipe. |
| Ghosts will appear at Theodora’s desk. We can submit to the demon or reject the demonic blade. On the computer nearby is a list of all the game’s Kickstarter backers. |
1.2. Raikad Minoris (New Blood)
Star Harbor
We land in the harbor, and in the air we’ll be fired upon by anti-aircraft guns. On the surface, we’ll learn there’s been a rebellion on the planet as well. We won’t be able to take off again until we destroy the anti-aircraft gun.
We collect the trophies at the northern dead end and head south. After descending the stairs, a battle with rebels will begin . There’s a friendly squad on the eastern rise; we can speak with the soldier, Jasper Lucky: [Knowledge: Imperium 40], [Persuasion 40], [Persuasion 40].
Beyond the next staircase is the second battle . Here, enemies will start throwing grenades, frags, and smoke grenades at us. To the south, there are doors leading to a tiny, separate area; inside is a safe and light armor . Outside, to the east, there are traps.
A third squad will attack from the eastern exit, but they will be destroyed by Pascal’s new companion – a tech-priest of the Adeptus Mechanicus, an operative class, he can degrade the weapons of enemies and improve our weapons.
Further west, take the elevator up and loot the chest containing some Synth Leather Armor . In the northeast corner, there’s a squad of 15 rebels . Behind them is the exit.
Upper Avenue (Streets of the capital)
We’ll be met by a soldier, the only survivor, who will lead us further. If you’re [observant], we’ll notice he’s wearing someone else’s clothes. There’s a chest along the way; you’ll need tools or [equipment] to open it. Further ahead, there’s a trap before the stairs.
When we see the slain squad, we choose to follow the guide or kill him. If we follow him, we’ll fall into a trap and won’t be able to position our warriors before the battle. There’s a 10-man trap near the fallen sign .
There’s a breach on the southern path, leading to the cellars; don’t enter yet. Near the breach, a chest contains a Heretic’s Armor and an Officer’s Chainsword . At the northern dead end, there’s a squad of 11 people , including arsonists.
There’s a big fight in the center , with 17 people against us , but they’re spread out. It’s best to attack from the north, clearing the two rooftops of snipers first. In the central square, a strong, grim rebel is guarding an anti-aircraft gun. We must destroy the anti-aircraft gun: [Equipment 50], [Explosives 40]. We’ll complete part of the “Glare of the Last Dawn” mission.
The main path is to the west, and the northern balcony leads down. We disable several traps along the way and turn the valve to turn off the steam. We hack the [technical] doors and enter the secondary area.
| Warehouse facilities
We’ll see a heretical ritual being performed here. In the text quest, we can use [Knowledge: Warp 40] and [Observation 50]. Before the fight, we can destroy the lens (no monsters will spawn) or blow up the barrels (kill 4 enemies). Let’s start a battle against 12-16 enemies . If the lens is still intact, we’ll shoot at it; otherwise, two small “blue horror” monsters will spawn every few turns. After victory, we’ll see that the heretics had the same metal as Theodora. The companions will argue about the heretical nature of the Rogue Trader’s past. We can use [Perception]. Among the trophies around there is a Ghost Cloak . We can hack the computer [Technique 40]. In the northwest corner, near the red cistern, we read the note on the wall; in the nearby corner, we can hack the computer. The eastern corridor is full of traps. Secret. In the northwest, examine the computer; there’s an instruction manual next to it on how to activate the nearby mechanisms. Follow the instructions: 1) panel in the center of the western wall “close the relay”, 2) the red tank in the center, to the right of the lens, turn the valve, 3) south-east corner, turn on the spark generator, 4) north-eastern corridor, before descending into the drains, “close the relay”, 5) computer cogitator in the north “supply power to cogitator”. After completing all the steps, we will be able to unlock the safe [logic] near the northern computer; inside there is a carbine with 12-18 damage and a hand flamethrower with 6-9 damage . |
| Hive drains
From the Storage Rooms, descend to the area below in the northeast. You’ll see numerous “infidel” workers. Collect the trophies and examine the drawings on the floor [knowledge: warp]. Descend to the southwest corner, remove the trap, and behind it is the trophy, a Blessed Cape . Boss: Herald of Tzeentch . Examine the sick man; he will transform into a monster. He has 145 health and only has a blade. During the fight, he will teleport to four locations and recruit all the workers around him. The workers are beyond saving; kill them with AoE damage. Upon defeat, you will receive the Hypnotic Pendant and. “ |
Western side
We return to the surface and head to the western area. There are bodies in the southern square, with many traps ahead. On the bodies, we’ll find a strange monocle from Terra . On the northern platform, there’s a round hatch [technical equipment], the third entrance to the underground area.
In the central square stands a fanatical old man who plans to cripple his family. We use [Schismatic Follower], [Logic 35], then [Persuasion 40], [Logic 40], [Lore: Imperium 40] of our choice. We convince the old man to leave his family alone, and then choose his fate: [Schismatic], [Dogmatist] . If we kill the old man, we will receive his chainmail .
Command center
Let’s enter the bunker where Governor Medina has taken refuge. We’ll discuss with him how he plans to suppress the rebellion. We can use [Commerce 40] to get a +2 profit factor .
Tech-priest Quartz-Kreim is standing nearby; he’s the first merchant you can buy a couple of items from. The rest will become available once you’ve raised your reputation. We can hack the computer nearby [Tech 25].
We tell the governor we’ve destroyed the anti-aircraft gun; only then can we leave the planet. Techpriest Pascal will demand to be allowed into the Omnissiah’s monastery. The governor will agree only under threat of death. On the same planet, we fly to another location.
Electrodynamic Abode (Reflection)
On the landing pad, in the south we examine the chest , in the north we open the gate using the computer.
Inside the building, a tech priest will tell you about a rebel invasion. Loot two loot from the chests near the nearest blue generator . On the western path, there are eight enemies near three power sources . During the fight, you’ll have to avoid the areas where the current appears; it alternates between the three power sources. It’s best to stand between the three powered rooms. Among the enemies is a Chaos Spawn; it’s easier to lure it under the current, and it will die on its own.
In the middle of the western path, on the side you can jump over a blockage [athletics], in a dead end we will find a computer [logic], a multi-key, a plasma pistol .
There’s a large group of enemies in the northern hall. Pascal will offer to change into the clothes of slain rebels and discreetly activate a device in the hall that will kill all the enemies. Choose [Schismatic], [Heretic], [Dogmatist] +2 . If you decide to change clothes, you’ll need to convince one cultist in the hall [Knowledge: Warp 25], [Attack 25], [Persuasion 25]. Activate three devices [Attack 25], [Technique 25], [Athletics 25], [Stamina 35].
After the victory, examine Tech-Priest Abel, tied to the wall. We’ll complete the quest “Request and Response.” The enemies performed a ritual on him, and now the priest is susceptible to heresy. Choose his fate: [Schismatic], [Dogmatist], [Heretic] +3 .
Six Tech-Priests will attack on the eastern path . They use the same attacks as Pascal. They are immune to lightning bolts and some skills.
Secret. All enemies are dead, let’s search the building more thoroughly. In the northeast corner, open the side room. Inside, the cogitator computer will ask us to finish the anthem. There are three questions to answer. Solution:
1) “…Omnissiah, who is the source of the holy discharge,”
2) “…the hidden key that closes the chain”
3) “…The immortal mind that created the spark.”
Solution reward: aiming visor, electric arc rifle .
Secret. Open the doors in the southeast corner. Behind them are two more doors, where mummified tech-priests are hidden. You can talk to one of them for [Technique 25], [Persuasion 25], [Persuasion 35], and he’ll help you in the next battles through the local technology.
Open the hidden door in the southwest corner. We’ll see Heinrichs interrogating heretics. Heinrichs is the Lord Inquisitor’s assistant, the one we needed to find. Heinrichs’ companion will be added to the party. The seventh extra hero must be temporarily removed from the party.
Together with Heinrichs, we follow the eastern path. Only he will be able to notice the round cogitator; a secret door will open opposite it. The surviving Tech-Priests and their leader, Dar-Impulse VI, have taken refuge inside. If we use the [Dogmatist – Follower] path, the leader will send two Tech-Priests to assist us . We grab the trophy behind the statue and descend through the door next to “The Depths of the Monastery.” There’s another trophy ahead by the door .
Boss: Zarya . A female seer, the leader of a cult, stands in the center of the reactor. She’s trying to blow up the reactor to bring about the “dawn.” In the conversation, select [heretic], [schismatic], [dogmatist] +3 . Let’s begin the fight.
During the fight, Zarya herself is invulnerable, protected by a dome. There are only two turns left before the reactor explodes, but killing each Tech-Priest will add another +1 turn. We need to quickly kill six Tech-Priests standing in a circle around the room within eight turns. It’s best to split the squad into two parts, sending three heroes to the left and three to the right. The two farthest Tech-Priests are protected by two Terrorspawns; we need to run past them. We’ll save our Momentum supers for the farthest Tech-Priests. Once all the priests are dead, the danger of the explosion will pass, leaving only two powerful Terrorspawns to kill.
Once we defeat her, Zarya will attempt to force the panel open and die. Use [Knowledge: Xenos 25] to find her blade. Choose what to do with the blade: [Heretic], [Dogmatist], [Schismatic] +3 . Zarya’s body contains a Blasphemous Prism, Avenger’s Bracers, and a Dark Energy Gem . Return to the ship.
| Unidentified ship
We’re flying through space toward the ship on the lower right. They’ll try to trick us over comms at first, but it turns out it’s the Stormfang—a Void Brotherhood pirate vessel engaged in illegal trade. We can choose to fire on the ship or trade with them. If we trade, we won’t be able to attack them. A flamethrower, a cloaking cloak, and a melta charge are available for purchase . |
| Raikadi Philia, the Prison Planetoid (Looking for Trouble)
We land on the lower planet. There’s a trophy at the entrance. Further on stands pilot Raquel, the wife of pilot Jasper, whom we rescued on the main planet. We clear the traps along the way and enter the building. Barracks. There are three traps at the entrance. Take the diary trophy from the table. In the room with chains, a fight with nine prisoners will begin . The second diary is on the top central bed. In the corner of the bedroom, tear down the poster; behind it is a stash, a prisoner’s shiv, and an improved autopistol . In the southwest room, near the bodies, is the third diary, the prison guard’s key , and a drawing on the wall [knowledge: warp]. We hack the upper door [technical]. Inside, three prisoners will kill the rebels and try to negotiate with us. They want to escape with the pirates, and in exchange, they’ll tell us about the Shadow Quarters in Futfol, where the merchant Rizza lives. We choose the prisoners’ fate: [heretic], [schismatic], [dogmatist] +3 . We open the upper room with the key; inside is a diviner’s staff, a soaked cloak, an enemy crusher , and another exit from the building. We can build a bridge outside to avoid entering the barracks. Then we’ll take the elevator down to the quarry. We’ll find Commandant Castella has captured Evin Winterscale. Boss: Commandant Castella . We face 9 enemies, including 3 snipers in the corners. Killing the leader himself is useless for now; he will be revived by the nearby unholy lenses. First, destroy the 3 lenses, eliminate the assistants, and then the boss himself. After the victory, we free Winterscale. We can heal him, simply take him home, or kill him. We collect the trophies around him, and from the commandant’s body we take a noble sword, a high-precision pistol, and an improved pressure suit . We return to the ship. |
| Raikad Majoris
To the bottom left, on an empty planet, we’ll find a crashed ship [knowledge: Xenos 50]. We can loot it for resources ( a set of Drukhari hook needles 10, a Drukhari shattershard 5, a piercing fragmentation cannon ), blow it up, or leave it alone. |
| On the ship, we speak with the supply clerk, Yanris Danrok. Some of our servitors have malfunctioned; we can go and inspect them. We’ll see that these former humans have regained consciousness. We choose their fate: [Schismatic], [Dogmatist] +3 . |
Raikad Minoris (Taste of Victory, Escape)
To finish the chapter, you need to speak with the governor after clearing the Electrodynamic Abbey. He’ll organize a “triumph” for us—a celebratory procession and the public execution of the heretic Zarya.
On the main street, we choose the ceremony plan and board a tank. We’ll drive past crowds of people. But right during the ceremony, the spirit of the murdered Zarya will appear, and the “Last Dawn” will begin: the local star will disappear, and everyone around will succumb to heresy.
18 people will attack . We’ll defend around the tank. Avoid the purple clouds; they’ll constantly deal damage with fel damage. The last enemy will turn into a Chaos Spawn. After defeating them, we’ll contact the ship; we’ll have to walk to the star harbor: [Schismatic], [Heretic] +3 .
Near the central stage is a second squad of 13 people , including three abominations. It’s best to defend yourself on the stairs. You can pick up an emergency injection near a statue below .
Star Harbor. We’ll be ambushed by six people . There are several mines in the way, and two snipers are firing on us from both sides. The enemies have a plasma rifle . Near the ships, we’ll see a soldier kill the governor. We choose who to take with us and save from death; we can use [Dogmatist – Follower] or [Persuasion 10]. But in any case, everyone will die in the explosion.
Boss: Zarya (Chaos Warrior) . A Chaos Space Marine will attack. He has 317 health and is armed with a machine gun and a sword. He has good armor, so it’s best to scan him first, add vulnerabilities, and then fire at him. He has eight supporters. When the boss’s health is low, he’ll climb to the high ground, and 10 more rebel supporters will appear. If we can kill the boss in three turns, before he destroys the shuttle, we’ll earn the “Savior of Aviation” achievement .
After the victory, we’ll take his gem, heavy bolter, and Life Drainer sword . By this point, we’ll have reached level 16 and unlocked a new hero class of our choice, one of three. We’ll board the shuttle.
The ship’s bridge. We learn that the local sun has been stolen by the xenos Eldar. The entire planet has been stricken with heresy and must now be exterminated. We choose who to save before then: nobles, commoners, or tech-priests [Schismatic] +15 , or destroy them all [Dogmatic] +15 .
Together with Pascal, you need to start the ship’s warp drive. You can use [logic]. Select the line “3. Venerable Machine Spirit!” We’ll destroy the planet and move on to the next star system. Theodora’s funeral will take place during the journey.
Chapter 2. Footfall
W40k: Rogue Trader Walkthrough
In the new system, Inquisitor Heinrichs will leave us. We choose how to visit the station: incognito or officially. It’s best to choose “incognito”; it’ll be necessary for one achievement.
Unidentified ships . Two ships will attack along the way , and we’ll engage in our first space battle. Ships constantly move through space by inertia due to the lack of friction and gravity. Each turn requires movement, though you can only accelerate or decelerate slightly.
Each weapon type has its own effective range. Sidearms can fire at targets to the left or right, but aren’t particularly powerful. The most powerful weapons are forward, but turning and aiming at small, fast ships can be difficult. Torpedoes can be launched; they are controlled separately from the ship, and are best used for braking and intercepting enemy ships. It’s best not to use two torpedo tubes; they function as one.
When we’re fired upon, our force field will be disabled on a specific side, after which the ship itself will take damage. Shields can be restored each turn, but this will reduce our speed and firepower. Repairs to the ship itself can only be done after the battle. These battles earn separate experience for the ship.
Altar-Templum-Calixis-Ex-17 . The Tech-Priests won’t let us into their temple.
Dead world . An empty planet without resources.
Drusus’s Blessing . A trading ship. Sells new ship parts: Mark-201.b Augur Kit for 13. Class 1 Jovian Engine for 15 .
Footfall (Torn Spirit)
Alpha-Rho Futfola Void Dock
We’ll be met by a delegation, even if we arrived incognito [observation]. A gang of 17 people will attack us and the delegation . Among the enemies is Bloody Amelia, 105 health, with a shotgun.
In the southern hangar stands the Tech-Priest merchant Opticon-22. From him, we’ll get Mobile Extraction 2 and the quest “Hunt for Knowledge.” We can raise our reputation with him and pick up items from the Explorators faction .
Along the way, we’ll see several leaflets from the underground organization ANV. Search the trophy boxes near the southern wall to find a grenadier’s cloak . One trophy behind the containers is currently unavailable.
Shadow neighborhoods
There are a few more leaflets here. Thirteen bandits, many of them flamethrowers , will attack in the western alley. It’s best to stay behind the walls and wait for the enemies to approach. After defeating them, take the Flame Shell and the “Note from Zola’s Anvers,” which tells you where to find the gang’s lair—the quest “Rot.”
In the northwest corner, you can clear a pile of rubble [of athletic equipment], behind which are some grenadier’s gloves . There’s a trap on the east street. To the southeast, a courtyard is cordoned off by exterminators. Near the corner gate, speak to the sergeant; he’ll only let us through with the governor’s permission—the quest “Where the Shadows Are Deepest.”
| Quest: Rot
Shadow Quarters. After killing the flamethrower gang in the southwest corner, head to the central western street, where an entrance has appeared. A dark shelter. Inside the building are 13 Anver bandits . During the fight, the gang leader will activate a device, filling the entire room with poisonous gas, and the enemies will be wearing gas masks. You need to run to the control panel in the western corner as quickly as possible. After defeating them, you’ll complete the mission. Take the adrenaline combat boots and flamethrowers . There’s a multi-key in the eastern room. |
“The Fortitude of a Martyr”
In the northern part of the block, across the bridge, we enter the bar building. Collect the trophies on the lower stairs, in the main hall opposite the entrance, on the shelves to the right. To the left, in the nearby room, we’ll see a murder, with a Mastercrafted Power Mace trophy nearby .
In the far left room is the merchant Rizza. You can buy Void Brotherhood reputation and goods from her . If you previously interrogated the pirates in prison, you’ll now receive a 5% discount.
Atrium of Footfall
There’s a trophy, a fireproof cloak, at the entrance . In the square, people are trying to kill refugees from the exploded planet to avoid being infected with heresy. The priest Hieronymus the Sorrowful is trying to stop them. We can observe or intervene, using [pressure 15]. If we engage in conflict, we’ll have to defend our honor and kill 8 instigators .
In the south of the square, we can carry out repairs [equipment 30, 15]. We go up to the balcony to see Hieronymus; in conversation, there’s a choice: [Dogmatist], [Heretic] +4 . He turns out to be the former boss of our warrior Argenta, and we’ll receive the quest “Lost.” We’ll discuss the Adeptus Ministorum: [Dogmatist], [Schismatic], [Heretic] . You can buy Drusian reputation and goods from Hieronymus .
There’s a xenos zoo to the west of the square. We can buy them out or mock them: [schismatic], [heretic] +5 . [Knowledge: xenos] reveals that they’re not xenos, but disguised mutant humans. We choose the fate of the zoo’s organizer: [schismatic], [heretic], [dogmatist] +4 .
In the northwest, open the upper platform and take the Boots of the Stalwart Vanguard from the crate there . On the eastern street, hack the computer, climb onto the roof, jump between the roofs, and inside the cabinet on the roof, take the Greatsword and the Commander’s Monocle .
| Quest: The Scum of Society
Atrium. We go to the southwest corner of the location for the funeral. 1. If we call ourselves Fidelio, we’ll be mistaken for the unknown heir and an attempt will be made to kill us. Head southeast, and an official will offer to retrieve items from the crematorium. We agree and proceed through the mines into the building. Inside the furnace, we’ll find ourselves trapped. Choose one character and shoot the floor tile. We’ll fall through the floor to a floor with marauders; you can kill them or spare them. Further on are the sewers, and at one point, you’ll need to step into the sewage. Choose who will go there. If we choose ourselves (the last line), we’ll earn the achievement “This is a job for the Lord Captain!” In the northwest corner of the sewers, you can break open a tile [logic], and underneath it is the Noble Amasek drink . Nearby, in the trophies, there are the knuckle duster “Finger Protection” and a stimulator injector . We engage in battle with the utility workers . When we return to the surface, all the guests at the funeral will attack us : 14 enemies . After winning, we will receive a profit factor of +3 , and will be able to choose who to give the inheritance to. 2. If we come under our own name, we can look around [Observation 30]. A pirate captain is buried here; the inheritance went to a certain Fidelio, but no one knows him by sight. We speak with the chaplain, the captain’s mate, the captain’s son, and the granddaughter; she’s on the western balcony, behind the crates. Downstairs, we examine the “Book of Farewell” and the body of the deceased. In the southeast, we remove the trap; behind it is the trophy, the Chartist Pendant . From all the conversations, we learn that the captain, before his death, recalled the ship “Repentance,” and Fidelio—the woman who sought revenge on him for destroying that ship. After speaking with the chaplain, we interrogate the servitor robots around the coffin and find Fidelio. 2a. Having learned about the deceased’s pirate past, we can attack the guests . 2b. We force the chaplain to give the inheritance to his assistant or son. 2c. We take the inheritance for ourselves ( profit factor +1 ). 2d [Schismatic Follower] . Give the inheritance to the pirate’s granddaughter; for this, you’ll receive the achievement “An Inheritance That Burns Your Hands . “ |
| Quest: Dreams and Stories
In the Atrium bar, ask Octaviana about rumors and receive a task. Atrium. In the northeast, next to the temple, we’ll find a note. Docks. At the bar to the north, examine the column by the window; there’s a note in it. Shadow Quarters. You need to go to the infected part of the quarter. If you weren’t able to get permission from the governor, you need to continue the story and return here at the end of the chapter. Among the infected people, you’ll find a note about the founder’s statue. Atrium. From the entrance, go up the western staircase to the southern statue. There’s a cogitator nearby; examine all the lines in it. Find a chest at the base of the statue with trophies inside . We’ll complete the quest, but afterward, you can return to Gordey Skatov, tell him about the stash, and invite him to your ship. |
| Secret. Rho Alpha Void Docks. A trophy is visible behind some containers near the southern wall. In front of it is a 5-digit combination lock. To see the combination, hold down the “Tab” key. You need to find the password for this lock somewhere in this same location. The note indicates several locations that contain a clue about the number:
1. In the corner is a priest delivering a sermon near the altar. To his right lies the book “The Life of Saint Drusus, Volume Three.” The first number is “3.” 2. In the center there is a customs agent at the table, he has rank 5. 3. You need to guess the third number. 4. In the bar next to the docks there is a window from which you can see the statue and docking bay 111. The last number is “1”. We return to the castle. Switch #2 is broken, so we press lever #4 third. We enter the password: 3541 , and take the trophies: psyker’s shoes, interrogation glasses . |
Residence of the Viceroy
We’ll witness a conflict between the Viceroy and the merchant Jai—the quest “Persona Non Grata.” We speak with the Viceroy, [knowledge: Imperium], [observation], [knowledge: warp], [logic]. We’ll receive the quests “Xenos Outrages” and “The Emperor’s Angels in the Expanse.” We’ll learn about Futfol’s trade in xenos trophies: [dogmatist], [schismatic], [heretic] +5 .
The governor asks for food supplies for his station—the quest “Hand of Hunger.” It’s best to demand an unfair price, or use the [Schismatic] route .
We ask about the quarantine zone, [schismatic], [dogmatist], +4 . We can get permission to enter, or wait for the zone to be cleared – the quest “Where the Shadows Are Deepest.” You can buy reputation and goods from the Kasballika Mission from the Viceroy .
When we leave the building, we’ll be approached by a representative of another Rogue Trader, Chord. They want more resources from the Viceroy for supplying the station. But we can’t negotiate with him; he’ll be killed, and a gang of 17 will attack us . The Viceroy’s guards will come to our aid every turn, but we can win without them. Search Lenny Twice Dead’s body to obtain heavy armor .
| Quest: Persona Non Grata
The Martyr’s Fortitude bar, now occupied by the merchant Jai. Mercenaries will try to kill her, but she’ll fend them off. She’ll ask us for help in retrieving her stolen cargo [commercial]. Quest: Wanted in Footfall In the Atrium, head northeast to find the entrance to the warehouse. Inside, loot the crates. Join up with Jai’s squad and attack the 14-man gang . There are lots of fire and acid barrels around; destroy them near the enemies. Once we win, an agent of the Viceroy will arrive and try to chase Jai away from her cargo. We can choose to distance ourselves from her or support [Commerce]. If we support the merchant, we’ll receive a +2 profit factor , Jai’s companion . (She uses captured xenos weapons, so all the dogmatists will be displeased.) Quest: A Profitable Deal We return to the ship and speak with Jai. She’ll offer to build her own trading organization, which will assist us [persuasion]. We’ll receive the gift of the Wanderer’s Omen and the Bloodseeker’s Clave . We choose which merchants to add 2000 reputation to. Quest: Mercatum Tabula Officiale It takes place on the capital planet Dargonus. |
| Quest: Lost
After speaking with the Viceroy, heretical marks will appear on the floor in various places in the Atrium. Follow the yellow section in the image. Arrive at the northeastern street and enter the door opposite the last mark. Cultist lair. There’s a trophy and a trap at the entrance. Nine cultists are performing a ritual in the hall . They’ll summon a Pink Horror monster, 302 health. Upon death, it transforms into two smaller Blue Horror monsters. Interrogate the last cultist. To the east, break open the crate to find the Sororitas Boots . We return to the ship and speak with Argenta. Together, we go to the room with the Trade Warrant. She admits she wants to find the ship of her saint, Argenta. |
Global map
From the Viceroy, we return to the dock. Near the exit, we’ll meet Inquisitor Heinrichs ; he’s finished his business and will be able to join us again. We’ll receive a new quest from the Lord Inquisitor from him.
We speak with the officers on board the ship. Cassia explains that a warp storm has occurred, and all routes must now be re-searched. A warp jump button will appear in the lower right corner of the global map, allowing us to independently navigate to new star systems.
Secret. In the south of the global map, there’s a waypoint called “To the Imperium.” The most difficult route to get there is the one we need to save and try to fly there. You need to fly to the end of the route and die, then you’ll get the “Road to the Imperium” achievement . Later, you won’t be able to fly that far. Reload and fly to other waypoints.
Rules of the game on the global map
Profit Factor . The game doesn’t have traditional trading (you’re a Rogue Trader, owner of several planets, fabulously wealthy, and throwing money around). Instead of money, the profit factor and reputation are used. Profit factors can be earned through missions, by completing contracts (the third quest tab), and by building projects in colonies.
Reputation . Reputation increases separately with each faction. On Footfall, you’ll encounter six merchants, all representing the factions. Afterward, you don’t need to return to these specific merchants; you can approach the High Factotum on your captain’s bridge and trade with any faction through him.
Cargo . Merchants need to sell certain items from our cargo, which will increase their reputation. You can transfer unwanted weapons and armor from your inventory to cargo and sell them as well. If you already have enough reputation and profit to purchase something, you can immediately take it all. Purchasing doesn’t cost resources; you only need to unlock the conditions for receiving it.
Explorators . It’s best to first increase your reputation with the Explorators faction (the Omnissiah’s tech-priests). Their wares include extractors, which can be deployed on uninhabited planets to obtain even more resources. A high reputation with the priests will be necessary for our final planetary projects.
Imperial Navy . The Imperial Navy faction is of secondary importance. They’re the only ones who can purchase ship upgrades, which are essential for most space battles. However, they only accept cargo dropped by enemy ships after winning space battles. It’s best to initially increase your reputation with them by building projects on our colonies. Then, don’t skip space battles, otherwise, enemies in space will become completely invincible later.
Navigation Points . To travel between star systems, you need a pre-existing route. These routes aren’t always available, so you’ll need to spend 3 points to create a new route.
You can permanently simplify a route by spending 1-3 points. It’s best to simplify all main routes to green or yellow to avoid fighting the same type of monsters every time you fly.
These points are earned in new star systems by clicking the “Scout Route” button. There’s also a chance to earn points while flying along complex orange and red routes.
It’s advisable to create and simplify direct routes between all your colonies. Promising routes for reducing danger:
- Furibudus – Trinnitos – Telikos Epsilon – Silence of Mer Segrith – Unclaimed Worlds – Mundus Valantius – Narmer IV – Mortus Acies.
- Mundus Valantius – Crossroads of a Hundred Dreams – Providence of Orselio – Ardematus II – Tenebris Aquae – Cranach.
Side star systems:
| Sotto’s Tomb
Pirates. 3 Cobra-class destroyers . Ice World. Resource: Plasteel 5. After obtaining the resources, open the quest menu, select the “Contracts” tab, and you can exchange the resources for profit. Cosmic dust. Fuel 120% . Cosmic dust. Fuel 120% . Asteroid. Caves. You can mine plasteel [demolitions], or dig a tunnel further and find xenos trophies [agility / observation], [ranged combat / agility]. |
| Aviorus
Jungle World. Smuggler’s Stash, Resource: Provisions 5 . Gas giant. Smugglers’ stash . A burning world. Empty. A shipwreck. A drifting ship. Inside are mad tech-priests. You can blow up a wall along the way; there’s a trophy behind it. Near the jammed door, head to the dead end on the right ahead and press the panel. Run past the power line with one character and disable the installation. Further on are a couple of traps and augmented gloves . You need to set the pressure on two panels to 10, then you can turn on the backup generator. On the way back , you’ll be attacked by 11 enemies : priests, servitors, and two heralds. First, you need to quickly destroy the two hanging “herald” loudspeakers, otherwise they will grant +35 health to all enemies each turn. In the central hall, 18 enemies will attack , including four heralds. (If you can’t defeat them, it’s best to skip this area for now.) Desert World. Elder Navigator. Resource: Adamantium . |
| Trinnitos
Unidentified ships. 3 Cobra-class destroyers . Rocky World. Resource: Plasteel 5 . A world of deserts. Empty. A burning world. Empty. Unidentified ships. Two Eldar ships firing torpedoes. Folstone. We need to protect the priests or refugees. We can use [Dogmatist], [Schismatic], [Heretic] +4 . After that, our first colony will appear on the planet—the “New Overlord” quest. On the planet with the colony, we can gradually build several buildings with upgrades. Choose one of the three building options and move on. |
| Omicron
Cosmic dust. Fuel 120% . Savannah world. Magnetic storm, no landing yet. Dead World. Explore the dead city by any means necessary, collecting a +1 profit factor, a ghost sword, and resources . Miner’s World. Resource: Plasteel 5 . |
| Mirror system
Jungle World. Resource: Xenotech 3. Scanning Anomaly: We land on the planet, examine a couple of crates, and can peer into the abyss of darkness. [Submit to the entity’s will] or [Will 0, quickly move away from the hole]. If the protagonist has the “Sanctioned Psyker” origin trait, we can subjugate the Darkness [Will]. We’ll earn the “Not-So-Bottomless Pit” achievement . Rocky World. Resource: Adamantium 2 . Oceanic world. Nothing. Unidentified ships. 5 pirate ships , they have captured a frigate. Quest “The Hunt for Knowledge.” After visiting 10 planets, we can return to Footfall and speak with the priest Opticon-22 to receive a +1 profit factor . |
| Telikos Epsilon
Gas giant. Fuel 100% . Snowy world. Resource: Plasteel 3 . Janus. The plot planet. |
| Side quests, battles
Cassia (personal quest “Stranger Among Her Own”). The Vox Master will report problems with her. We’ll go speak with her personally; we can use [Willpower], [Knowledge: Imperium], [Commerce]. Next, [Assault -15], [Persuasion -15], [Sociability 20].
Idira (personal quest “Echoes of the Past”). Theodora’s ghost was seen on the ship, causing a worker clan to revolt. The whole squad goes to the “Macrocannon Chamber” location and will encounter Theodora. A little further on, Idira is in the clutches of a monster. Argenta will try to kill her. Choose: 1. [Dogmatic] +8 [Do not interfere with Argenta] . Idir’s companion will be killed. 2. [Schismatic] “Argent, stand down .” Let’s save Idira. We choose further: attack Theodora or bring Idira to her senses [pressure / persuasion]. 10 enemies will attack : pink horror, 2 blue horrors, workers.
Assassination attempt . After several flights through space, 18 enemies will attack our personal room . We defend ourselves alone against two demonettes and rebels. Each subsequent turn, one of our allies will run into the room. On the fifth turn, we’ll gather the entire squad and fight them off.
On the captain’s bridge, we speak with Priest Pascal. In the eastern dead end, we examine encrypted data in the system—the “Secret Information” quest. We learn that Theodora had a cache on Dargonus, Chiave Gamma. We’ll be able to visit these planets later. |
2.2. Janus (Sculptors of the Worlds)
In the Telikos Epsilon system, we need to visit the planet Janus. It’s the main source of provisions in our controlled territory.
Governor Wyatt’s Estate . During the meeting with the governor’s wife, we’ll be attacked by five servants . On the next turn, ten saboteurs will burst through the ruined wall . We’ll be assisted by a local guard and a strange sniper.
After the victory, we go into the building and speak with Governor Vistenza Wyatt. A lady-in-waiting always stands behind her. We learn about the local riots and the sniper Irliet. Food supplies will resume only after the riots are suppressed.
In the courtyard of the residence we can talk to subordinates:
1) Vincelex is a priest in the northwest, with trophies nearby.
2) Irliet’s companion is a disguised Eldar sniper, stationed near the western gazebo. You can add her to your squad, but the Inquisitor and Technomage will be against it, or you can kill her [Dogmatist] .
3) Atilius Quintus – in the south near the statue, we will learn everything about food, about the appearance of mutations, and receive an Eldar skull.
4) The security officer is in the east; his squad has surrounded a rebel in a building. You can wait for him to be killed or intervene. If you speak with him in person, you’ll learn that the rebellion is against the governor’s wife because she’s been kidnapping people. We’ll receive the rebels’ vox and be able to find them. Choose the rebel’s fate: [Dogmatist], [Schismatic], [Heretic] +4 .
5) The old servant is in the northeastern dead end. He was the one who let the rebels into the courtyard. Upon seeing us, he’ll take poison, but he’ll answer a few questions. After interrogating him, we can kill him or tell the guards [Dogmatist] .
Janus Forests . If you’ve recruited Irliet into your squad or received the rebel vox, you’ll be able to find the rebel camp in the jungle after leaving the estate.
First, head north, climb the cliff, and examine the body. Further down are traps, and the trophies include Springy Gloves . Four Janus Laserax monsters will attack in the dead-end clearing .
We return to the start and descend the slope [athletics]. There are 19 enemies in the camp , including a couple of strong snipers, a robot, and a grenade thrower. A little later, two Eldar guards , a sniper, and a fighter will come to the enemy’s aid. Eldar have a 95% dodge rate, making them almost impossible to hit with bullets or swords. It’s better to use grenades, magic, or skills that deal damage directly, without checks.
Further along the path are traps. There are trophies and Ergo-Boots in the northern dead end . On the lower path, you can climb the slope [athletics], remove the trap, and behind it is an M40 auto rifle . Two large monsters will attack on the shore .
We’ll find the main base; it turns out to be Eldar ruins. The rebels are led by the Eldar Muaran, who has been manipulated into believing he’s one of the workers. The Eldar sensed the presence of the goddess of chaos, who leads the humans, on the planet and began their rebellion.
- [Dogmatist]. Let’s enter into battle with the Eldar . You can lure people away.
- [Schismatic]. We can avoid the fight if we promise to kill the governor’s wife. Muaran will demand to be made the new ruler of the planet, but you can refuse and make your own demands if you have the “Follower” path level.
- [Heretic – Follower].
Afterwards we choose whether to leave Irliet in the squad.
Governor Wyatt’s Estate . Having gathered all the information, speak with the governor’s wife again. We can use [Dogmatist] or [Schismatic] . Perhaps, on the Heretic’s path, we can leave Wyatt in her place. But when we accuse her of heresy, the lady-in-waiting will kill the governor’s wife and disappear into a secret room. To remove the protective glass, click on the candlestick on the right column [Technician]. In the hallway, we remove the two traps.
In the secret room, we’ll find an altar of demons and drugged nobles. We’ll face eight enemies : mutant nobles, two personal guards, and the maid of honor herself. You need to run as quickly as possible and stand close to the maid of honor, otherwise she’ll summon another demoness every turn.
After winning, take the sinister journal , open the safe in the northern room, and take the notes, the power vice, and the tome of excesses . On the way out, you need to tell the people what happened.
Once in space, we choose whether to send Janus’s food to Futfol: [schismatic], [dogmatist], [heretic] +15 . If we send the food, we’ll get a profit factor of +8 . In either case, we’ll get a mobile extraction 3. On Janus itself, we’ll be able to construct projects and buildings.
Global map (center)
| The Silence of Mer-Segrith
Desert World. Archaeotech Mechanism Part (1) — “Unidentified Mechanism” quest. Resource: Phlogiston 5 . Scorched world. Empty. Desert World. Resource: Prometheus 4 . |
| Pulvis Platinum
Cosmic dust 1-4. Fuel 80+100+80+120% . Planetoid. Resource: Plasteel 4 . A wrecked ship. Eleven mutants will attack . If we crack the safe, we’ll get the Cape of Distraction and the Cassini House Staff . To the west, we clear the [Athletic] rubble and find a surviving navigator and a squad of survivors. They were bringing us a gift from Kunrad; inside was a Chaos artifact, and almost everyone succumbed to heresy. We can use [Explosives], [Persuasion], [Schismatic], [Dogmatist] +5 . If we take the humans with us, we’ll get 100% workers. There’s a hidden trophy on the southwest table: Expeditionary Boots . |
| Providence of Orsellio
Cosmic dust. Fuel 100% . Jungle World. Declare a hunt (provisions +1, uniforms +2) or dismantle the dam. A burning world. Empty. Pirates. Falchion-class frigate . Barren World. Resource: Prometheus 5 . |
| Crossroads of a Hundred Dreams
Rocky World. Resource: Phlogiston 2 . Gas giant. Empty. Ice World. Resource: Promethium 6 . Oceanic world. Empty. Enemies of Humanity. 3 “Swift Death” fighters, 1 frigate . A difficult battle, best left for later levels. The Chaos frigate causes internal fires from any range, dealing damage every turn. Due to a bug, damage is dealt every time a ship is selected, even multiple times per turn. Dead world. Empty. |
| Pillars of Viridica
Ice World. Resource: Plasteel 3 . A wrecked ship. At the beginning, in the icy corridors, there’s a melta charge and a sentry keycard . The large hall is full of traps; jump over a broken bridge. We pass through the infected rooms, grabbing first aid kits, a diary, and grenades. One chest is locked, and the keycard doesn’t work. The final room contains 27 enemies: 2 hordes of weak infected humans and 2 turrets . Shattered World. Mobile Extraction, Resource: Plasteel 7 . Jungle world. Empty. |
| Agatus Archides
A barren world. Empty. The remains of a voidship. Text quest. [Technique], [Willpower / Knowledge: Warp], [Logic], [Willpower], [Observation]. We’ll get some trophies . Lava world. Empty. Continental World. Resource: Provisions 3 . Barren world. Insects ants. The skeleton of a ship. |
| Ardemat II
A broken world. Resource: Adamantium 2 . Recolliger’s plot. We’ll meet a squad of scavengers; you can pick up or buy a Magnus 3 reusable power cell from them . If you have the Eldar Irlieth with you, choose [Dogmatist], [Schismatic], [Heretic] +2 . Burning world. Assault lasgun. Resource: Promethium 7 . An unidentified ship. We’ll meet up with allied scouts, maybe conduct a trade, and learn about the phlogiston resource—quests like “In the Footsteps of History” and “Treasure in the Ocean.” We can also attack the Pilgrim. Planetoid. Resource: Plasteel 2 . |
| Septent Gate
Oceanic world. Empty. Planetoid. Resource: Plasteel 2 . Miner’s world. Empty. Warp Gate. Eldar space station, not yet inspected. Enemies of Humanity. 3 Iconoclast destroyers, 1 light frigate . For victory we receive: Ceramite plating for the galleon (7.3 armor). |
| Providence of Orsellio
Fulton. When the Plague Quarter opens, loot the trophies inside. You’ll find the “Mutant Lair” in the east wall. Inside the building are the Pyromaniac’s Boots . Fourteen mutants will attack in the hall . Take the reagent kit and the “Imperial Pride” bolter .
A battle inside a ship in the warp. Two Plaguebearer monsters will attack ; upon death, each monster will resurrect a dozen smaller plague enemies around it . |
Global Map (East)
| Khepri’s Cradle
Wrecked ship. Trophies: weapons, armor . Rocky World. Source: Xenotech 4 . Scorched world. Part of the archeotech mechanism (2) . Ice World. Resource: Promethium 5. Distress signal. We walk along the icy cliffs, inspect the body [Observation], [Technique]. At the top, we descend to the clearing and inspect the sensor. Six turrets will attack , and mines will appear along the way. It’s best to destroy the three closest cannons first, then the three cannons behind the bridge. After defeating them, we inspect all the turrets, collecting Eldar armor and weapons . In the center, we can blow up the sensor [Schismatic] +5 . After detonating the transmitter, we can find a bunker near the ice wall across the bridge. After passing the [Demolitions Expertise] check, [Knowledge: Xenos], we’ll realize the trap was set by the Drukhari. |
| Star Chambers
Ice World. Resource: Plasteel 2 . Dead World. Trophies: Syringes . Quest “Who Left This Here?” Grantis. Resource: Xenotech 2 . An unidentified Imperial ship. People are searching for burning worlds—quest “Burning Worlds.” If we share the information, we’ll gain reputation: Kasballika Mission +150, Void Soul Trap 30, and the quest “Voyage of the Kasballika Ship.” |
| Langrenne’s Belt
Snowy world. Empty. Shattered World. Resource: Plasteel 6 . Continental World. Resource: Provisions 5. Event. Pirates. 4th Cobra-class destroyer . Ravaged station. 30 enemies: 3 strong warriors, thugs . |
| Nameless Star
Oasis V. Ancient bunker (a reference to Fallout). The planet’s surface is contaminated with a “melting poison” (radiation), which constantly reduces your health by 2. Quickly open the bunker gates [technician], [explosives technician]. Inside, quickly search all the rooms, collecting the trophies. There are three locked doors; they can’t be opened until we repair them. In the western room, take the officer’s key from the body . In the eastern room, search the drawers near the computer and take the old valve . In the adjacent room, on the southern wall, there’s a pipe without a valve . Insert the valve you found into it and turn it. Turn on the ventilation on the computer, and the constant damage will stop. We search everything in quiet mode. In the southern rooms, there’s a Worn Seal —the quest “Mercatum Tabula Officiale.” On the northern landing, in the wall, there’s a “Vox Winterscales” trophy. We unlock three locked doors using the nearby panels and loot the items from the storage areas: the “Loyal Defender” assault rifle . There are also notes about the Doomsday Weapon. When we exit, four turrets will rise from the ground . Fighting them is dangerous; they attack with a series of shots, quickly breaking through all cover. It’s easier to run to the side room and disable the turrets with the [equipment] button. Planetoid. Resource: Plasteel 2 . Shattered World. Trophies. Extraction. Resource: Adamantium 2 . Ketza Temer. Nothing. Warp projection. An anomaly within the ship transports us to another location, landing us on the lower decks among the workers. We use [strength], [intelligence], [agility], [communication], [observation]. |
| Forgotten Twins
Jungle World. Outpost. Trophies: needle rifle, provisions . Planetoid. Resource: Plasteel 2 . Traces of a space battle. Trophies: xenos, fuel . Planetoid. Nothing. Gas giant. Nothing. Dead world. Nothing. |
| Mu-Ro 79
Ice world. Shadows in the glacier, empty. Rocky World. Resource: Plasteel 5 . An Explorator void station. You can exchange two fuels for a +1 profit factor , donate transuranic elements, or loot the station. If we abandon the station, we can return here at any time to exchange fuel for profit or weapons—the rumor “Blood and Nephium” suggests this. |
| Latoti Strait
Dead World. Unknown Ruins . On the northeastern platform is a hidden trophy: a damaged xenos chest . To the west, you can clear the rubble [multi-key], or climb through the window above [athletics]. In the western clearing are xenos laser pillars, a dead man and a cracked vox nearby . Clear the pattern to find a clue to the solution. By rotating the pillars, you need to create a star pattern with the rays. Solution: turn each pillar on once and rotate it once . The rays will be reflected not to adjacent pillars, but through one, to the next, creating a star. The final ray from the center will point to a chest containing an ancient Pyschosil sword (14-20 damage). Secret. Insert the chest you found into the chest with the sword. Place the lasers to form two triangles. Solution: center, southwest, south, north, northwest, center . You’ll receive a xenos trophy: the Veil of Delusive Insight helmet and the Chain of Dominance amulet . After collecting the trophy, a Tzeentch Screamer and two Pink Horrors will attack . You’ll earn the “Adventurous Archaeologist” achievement . Rocky World. Natural Park. Resource: Adamantium 2 . Unidentified ships. You can buy off the pirates, use [persuasion], [pressure], [willpower]. If we engage in battle, we’ll face two Cobra destroyers and two Falchion frigates . We can win at ship level 3. You can fully repair the ship during battle by pressing the small “ship” button on the right. |
| No Man’s Worlds
Continental world. Study gas [medicine]. Gas giant. Nothing. Shipwreck. Unable to locate the source of the wreckage. Planetoid. Resource: Plasteel 2 . Ice World. Trophies: first aid kits, syringes . The remains of a ship. Nothing. |
| Mundus Valantius
Rocky World. Resource: Phlogiston 4 . Lava world. Nothing. Gas giant. Nothing. Ships in front of the planet. Servants of the Omnissiah, landing here. Dargonus. A story planet. |
2.3. Dargonus (Spiders in a Jar)
This is the capital world of our Valacius family’s holdings. We’ll definitely be bringing Inquisitor Heinrichs and Tech-Priest Pascal with us.
At the port, we’ll be met by Priest Opticon-22, accompanied by Priest Tarzus. He’ll accuse Pascal of heresy. We can use [Technique], [Knowledge: Imperium], and [Persuasion] skills. Opticon will agree to investigate, and Priest Tarzus will attack, accompanied by a squad of seven Tech-Priests, Servitors . Pascal will do something to Tarzus, and he’ll begin attacking all nearby targets. Don’t approach him, attack from afar.
Palace von Valantius
Chancellor Clemenzia Verserian, a relative of Abelard, will meet us in front of the palace. The governor will arrive later [logic]. In the courtyard, on the elevated areas near the statues, you can collect a couple of trophies . You can also throw a coin into the fountain.
Inside the palace, in the central depression, there’s a trophy . To the right, you can inspect your personal quarters; among the trophies are the Boots of the Tailwind, a Multi-Melta, Plasma Control Gloves, and a Fanatic’s Cloak . If you sit on the sofa, the security system will be activated.
In the north, we eavesdrop on a conversation between Heinrichs and Achilleas, exchanging coded phrases. From these spies, we learn all about the four local families. In the center, we speak with Clementia; she’ll summon the governor.
Urbend Drivestem. In conversation, we choose how to mourn Theodora. How to deal with ill-wishers: [Dogmatist], [Schismatic], [Heretic] +4 . We learn that problems still need to be resolved on three of our planets: Janus, Veabos-6, and Chiava Gamma. We choose which noble house to support at the inauguration ceremony: Drivestem – Trade, Gaprak – Technology, Sauerback – Faith, Verserian – Servants.
When we leave Dargonus, we learn of the destruction of a hive city. We decide what to do with the refugees; the advisors will offer three options. After that, we’ll be able to build the first project in our capital. It’s best to build the “Emporium” to acquire resources we don’t yet have: weapons, machinery.
| Palace of von Valantius (Quest: Debt to the Navis Nobilite)
Cassia’s personal quest. The Orsellio Navigator House has learned that Cassia is on our ship and is requesting a meeting at our palace on Dargonus. We can arrange a lavish reception (profit factor -1). During the meeting, the Navigators will demand that Cassia be returned to their custody. We can choose to give her up or keep her. At this point, Lady Navigator Elina will attempt to assassinate Cassia. Eight enemies will attack: one Navigator and seven guards . We are assisted by the remaining Navigators and her guards. Once we defeat her, Elina will retreat to the courtyard. We continue the battle in the courtyard. Nine enemies: 1 Navigator, 7 Guardians . After defeating her, we can either kill Elina immediately or hold a trial. We learn that Cassia has a device that controls all other Navigators, inherited from the tyrant Tisiphone. This is the reason Elina attacked. We choose the fate of Elina, Regent Aaronto’s entire delegation of Navigators, and Cassia. It’s best to choose Cassia’s advice. |
| Administratum (Task: Mercatum Tabula Officiale)
Jai’s personal quest. We land on Dargonus in a separate location. Go to the back hall and speak with the Master of Seals. Jai wants permission to open a trading company. You need to fill out an application and sign a consent form. After that, you need to place two seals: Dagonus. In your palace, speak with the Chancellor; she’ll tell you the seal was lost long ago. Fly to the “Nameless Star, Oasis V, Ancient Bunker” waypoint. In the southern rooms, you need to find the “Worn Seal” item. Return to the palace and speak with the Chancellor again. Janus. The Telikos Epsilon System. In the center of the courtyard, we speak with a man named Atilius Quintus. He will affix a seal. We learn that according to the new laws, he must become a servitor. We choose his fate: [Dogmatist], [Schismatic] , [Conviction]. Administratum. With two seals, we return to the Master of Seals. He leads us to a large hall where we must stand in a huge general queue. Jai will offer various ways to speed up our progress in line, but it’s best to always choose [Wait Humbly] to earn the “Thank You for Your Waiting” achievement . After three days, we’ll approach the window. We can threaten or bribe [Persistence], spending -1 Profit Factor. Afterwards, on the ship, we can begin a relationship with Jai.
Fulton (Quest: Jai Heidari Feast) We sit down at a table with Jai in the center of the bar. Octavian’s friend [observation] is with her, along with other guests. Falco’s rival will arrive and present Jai with an aristocrat’s robe . We can remain silent or chase the enemy away. Jai will offer to play “Tan-to-lo” poker. To calculate your hand, you need [logic]. We choose three times whether to pass or not. On the third try, we can cheat. We choose which wish to grant Jai. In the morning, we wake up in our quarters with Jai. |
Global map (north)
| The Solitude of Pelion
Gas giant. Empty. Desert World. Skeletons in the Desert. A burning world. Empty. World-Savannah. Empty. |
| Narmer IV
Barren world. Meteorite traces. Phlogiston 3, Plasteel 5 . Oceanic world. Part of the archeotechian mechanism (3). Provisions 1 . Pirates. 1 destroyer “Viper”, 2 destroyers “Cobra” . Lava world. Empty. |
| Odenate-XI
Drukhari Scouts 1-4. 2×4 Sigil-class Destroyers . If you start a battle in any one of the four zones, enemies from other zones will gradually join in. Ultimately, you need to defeat eight destroyers in a single battle, in groups of two. A ship level 4 and half of all skills are required. Reward: Lance Emitter (52-60 damage) . Desert World. Trophies: Weapons. Resource: Plasteel 2 . Asuryan ships. Irlieth asks for help for her kin caught in a minefield. There are [Logic] and [Ranged Combat] checks. If we fail, the Eldar will perish. Scorched World. Archeotech Mechanism Part (4). After collecting the entire compass from four parts, fly to the Mu-Rho 79 system. We’ll find a cache containing many cargo trophies and a Haddian datastation . We’ll complete the “Guiding the Way” quest. Planetoid. Resource: Plasteel 2 . Jungle world. Empty. |
| Mortus Acies
Lava world. Empty. Gas giant. Abandoned tech-priest base. Trophies: cargo . Savannah World. We’ll meet the Archqueen [technician]. In return for her gifts, we can send some of our people: the strongest, only volunteers, no one else. Dead World. Abandoned Tech-Priest Base. Trophies: Vehicles . Drukhari Voidships. 2 Death Hatred Frigates . Veabos-6. A plot-driven prison planet. |
2.4. Veabos-6 (Blades in the Void)
Veabos-6 quarries
Below the landing point, there’s a trophy in the trash . We pass through the bars into the prison courtyard. Here, the Drukhari Tazarra has subjugated the human prisoners and forced them to fight in the arena of Commorragh. We can lure some of the people [Dogmatic Follower] , [Persuasion]. Fifteen enemies will attack: gladiators and Drukhari witches .
The main witch and her retinue will watch the battle from above and then leave. This quest will continue in the next chapter. We examine the courtyard; in the center, on a seated body, is a Hunter’s Shell . Outside, we go to the northeastern dead end and pick up the Scorpion Sting sword and a Meltcharge under the tractor . Once we leave the planet, we can build projects there.
Global Map (West)
| Cursed Shores
There is no ready-made path to the system, we create it ourselves. Savannah World. Resource: Provisions 2. Wanderer in the Wasteland. We land on the planet and inside the building we’ll meet a Vox-Cleric [Knowledge: Xenos], [Technique]. We’ll fall into a trap and be attacked by a Genestealer monster with 285 health . After we defeat it, two more of these monsters will attack in turn . The loot includes a heavy machine gun and heavy leather armor . The key can be used to open the doors below; behind them are resources, ammo, and syringes . Rocky World. Resource: Plasteel 7 . Planetoid. Resource: Plasteel 2 . The continental world. Governor Basil will invite you to a hunt, where we’ll witness the rebirth of monsters. We’ll learn that the god King of Distortion is worshipped here—the quest “Heavenly Chariot.” We can execute the governor for heresy. Afterward, we can fly to the anomaly, destroy the rift to the warp (we’ll lose many people, but gain two holy gifts ), or become the King of Distortion’s herald. We can demand tribute from the world, receiving provisions, people, and extractium . |
| Cyrene’s Last Chance
Gas giant. Empty. Scorched world. Empty. A snow-covered world. Resource: Promethium 4. You can take the equipment, donate promethium (-1 fuel, +2 equipment, weapons, armor ), or leave the freezing colony. A mysterious object. A xenos artifact called “Web Gate.” [Knowledge: Xenos] and [technique] can be used. Nothing will help. Shipwreck. Trophies: 114% details . |
| Lapidus Mortus
Shattered World. Resource: Plasteel 8 . Enemies of humanity. 1 frigate “Aconite”, 4 “Shadow Hunter” . A broken world. Resource: Adamantium 2 . Planetoid. Resource: Plasteel 2 . Shipwreck. Dead Eldar. |
| Tenebris Aquae
We make a direct route from north to west into this system. Space combat. Humans and xenos are fighting. Irlieth will ask you to rescue the xenos with transport ships. We use [knowledge: xenos], [commerce], [pressure]. The battle will cease, we will offer assistance, but the Eldar will still perish. Planetoid. Mirror. Destroy or take on board. The wreck of a ship. Nothing. Miner’s world. Nothing. Planetoid. Resource: Plasteel 2 . Unidentified ships. 2 Sigil-class destroyers . |
| Quest: Eldar in Trouble . Irlieth’s personal quest. If you’ve found all three Eldar locations, Irlieth will tell you about her cache. The Children of Asuryan’s Cache will appear in the “Cyrene’s Last Chance” system. Inside are the following trophies: a cloak of shadows and the “Scorpion” chainsword . |
| Nolla Spetum
Ice World. Resource: Promethium 7 . Pride of Santiel. Hive City. Ice World. Resource: Adamantium 2 . |
| Hand of the Emperor
Unidentified ships. We can ask Irliet to help us negotiate, buy us off, or escape. If we’ve already helped Irliet, we won’t be able to attack the ships. Planetoid. Resource: Plasteel 1 . Planetoid. Resource: Plasteel 2 . Scorched world. Nothing. Euphrates II. Tech-priests of the Awareness fleet. Landing is not possible yet. |
| Ice Prince
Ice World. Resource: Promethium 5. Ice World. We land on the planet, among the wreckage there are 16 enemies: 1 huge Brute Helbrute (1008 health), 3 Chaos Space Marines (502 health), Heretics . It’s best to save this battle for the next chapters. Planetoid. Resource: Plasteel 2 . Planetoid. Resource: Plasteel 2 . Gas giant. Empty. |
| Cranach
Dead world. Nothing. Atl. You can take away the extraction [persuasion], [sociability]. Unidentified ships. 2 Pagan raiders, 3 destroyers . Chiava Gamma. A story planet, our tech-priest factory. |
2.5. Chiava Gamma (Return what is lost)
Upon entering the Kranakh system, there will be a text quest. All the priests and servitors will go berserk; we try to stop them with [strength], [pressure], [persuasion], [athletics]. Junk code has infected the ship’s systems. After visiting the tech bay, we’ll bring the ship back to normal.
Manufactorum Chiava Gamma
We land on the planet, taking Inquisitor Heinrichs with us for a personal quest. Inside the factory, we examine the computer records. We’ll encounter a priest afflicted with the [observation] anomaly. If we agree to go with him, we’ll fall into a lava trap; it’s best to attack immediately. Six tech-priests and servitors will attack .
Continue south, passing three steam jets just in time. We’ll encounter a Lexmechanic who has escaped infection; we can use him to interrogate [Schismatic], [Dogmatic] +4 . Nearby, among the trophies, are Stabilizing Bracers . To the west, we descend the inclined pipe and jump to the beginning of [Athletic].
We continue along the lower platform, and in the center we’ll meet a huge spider-priest, Fabricator-Censor Cubis Delfim—the quest “Proper Identification.” He’s the one who rebuilt the factory for demonic experiments. Cubis will raise the bridge in front of us; we need to find a way around it.
Eighteen enemies will attack in the north : four squads, each with a strong Awlfa Skitarii . In the northwest, unlock the large door, use the computer behind it, and lower the bridge. Above, you can blow up the wall [key], hack the computer [technical], and the train car will crush one enemy. Head to the central platform.
| Quest: Secrets of the Cult
Heinrichs’ personal quest. Upon entering the central circular platform, don’t switch it first, but go down and open the doors to a separate location. You’ll see cells with human biomass [medicine]. You can interrogate one still-living creature [schismatic], [dogmatist] +4 . Examine the large Info Vault computer; you need to allow Heinrichs to retrieve the information from there [schismatic], [heretic] . One Tzeentch Screamer and four Pink Horrors will attack . |
We cross the round bridge to the eastern part of the factory. Five Servitors and Priests will attack in the south . In the southwest corner there’s a Portable Cogitator, a Plasma Rifle, and the Bracers of Atonement . You can place a ladder to return to the start.
Secret. At the eastern wall, disable the train car’s brake system, clear the debris on the tracks, and take the train car up. Take the manual valve from the train car on the elevated platform. At the eastern dead end, insert the valve into the mechanism near the empty wall; it will open, revealing Theodora’s secret stash. Obtain the Databank from Chiava Gamma —the “Secret Information” quest.
Higher up in the northeast, we can cast [Dogmatic Follower] on the enemies , granting a permanent “Prayer in Spite” effect . There are seven enemies on the way: a Chaos Space Marine and six Heretics .
Boss: Fabricator-Censor . We’ll catch up with the high priest in the northeast corner. If there’s a [Heretic] path, we can negotiate. Against us is one boss, two large Steel Devil robots, and five archer priests.
After victory, a Chaos hero, [Observation], will appear before us. This is Uralon the Cruel. We can use the [Willpower] and [Schismatic Follower] skills . He will say that we will still end up in chaos, like Theodora. Once we leave the planet, we can develop it. We choose how to clear the factory: [Dogmatist], [Schismatic], [Heretic] +15 .
| Quest: Secret Information
After receiving the Databank from Chiava Gamma, we go to the priest on our ship. He will decrypt the data. We will receive “Interim Report N4-073″—a clue to Theodora’s cache on Dargonus. Dargonus. In your palace, go to your private room and sit on the sofa. If you take wine, the alarm will sound. To open the secret compartment, select [Take the book “Litany of Driving Force”], [Select the composition “Symphony of Honor and Duty. Part 2”]. Find the Databank from Dargonus . On the ship, speak with the priest again and receive Theodora’s Personal Notes. We learn about the Nomos creature that lives inside the ship. (This is the path to the game’s secret ending.) |
2.6. The Silence of Mer-Segrith (System Attack)
We’re flying to a system just above Janus. If we get there quickly, we might be able to rescue the allied ship. Any delay will destroy the ally. We’re engaging the xenos pirates: two Death Hatred frigates, three Forsaken Immortality destroyers.
2.7. Blades in the Void
Star Chambers
We learn of a new xenos attack outside our domain. We fly to assist a neighboring Rogue Trader. In the southern sector, from Fulton, we fly up and to the right. In the Star Chambers system, we fly to the planet “Grantis.”
Governor’s camp
There are crashed spaceships on the sandy shore. We search the crates near them and collect the trophies. In the northern clearing, we’ll witness an Eldar assassinate the governor. The xenos assassin, Marazhai, will approach us. During the conversation, you can perform three hidden checks [85 pressure], and choosing these answers will earn you the “Enraged Dragon” achievement . If you lack the skill, equip the pirate headband (+20 pressure) on the most assertive character. Marazhai will fly away. Kill nine of his warriors . Return to the ship.
Cyrene’s Last Chance
Mysterious object. We examine the huge circular frame in space again, at which point xenos ships will emerge from it. Text quest, use [pressure]. We’ll engage in space combat: 2 destroyers, 1 corsair . More corsairs will gradually appear until we win or 5 turns are up.
Plasma engine chambers
A xenos boarding party will board our ship. Let’s go with our squad to the compartment. It’s best to first go up, jump over the chasm [athletics], and then go straight behind enemy lines to the high ground. 10 enemies: blademasters, marksmen .
After the victory, we learn that the enemy was tricked by a man whose mind was clouded. We choose his fate: [Schismatic], [Heretic], [Dogmatist] +4 . We examine the planted bomb; we need to defuse it [Knowledge: Xenos], [Explosives]. We return to the bridge.
Mundus Valantius. Dargonus
Our capital was attacked by xenos: 1 light cruiser, 2 destroyers .
We land on the planet and meet Regent Clementia in the courtyard. We engage in combat with xenos: 8 enemies . In the center, we examine the bodies and can save one wounded [observation, medicine]. We clear the traps above. There are 20 enemies in front of the palace entrance: Tazarra, Eldar, and two squads of captured humans . During the battle, you can press a button to the right of the entrance, which will activate two turrets that will assist in the fight.
Inside the palace, jump across the chasm and rescue Achilleas’ spy, Skalandra [medicine], in the room on the right. You’ll see the Eldar Marazhai on his throne. He’ll disappear again. Kill his squad of 12 enemies: two Chimera Dogs and two Sslit Serpents . After defeating him, return to the ship.
2.8. The Emperor and My Right
We need to hold an official inauguration ceremony at the palace. In a conversation with the Vox Master, select the following actions beforehand: [Schismatic], [Dogmatist], [Heretic] +4 . Select two of your closest companions.
Quest: Incident . If you’ve gathered all the information about Theodore, Pascal will summon you to his ritual at the end of the chapter. The ship’s machine spirit will answer us, calling itself Nomos. Choose whether to communicate with it: [heretic], [dogmatist], [schismatic] +4 . Discuss this spirit with Abelard, Master of Vox, and Chief Helmsman.
In the palace, we speak with the Master of Ceremonies. We begin our speech to the crowd of subjects: [Dogmatist], [Schismatic], [Heretic] +4 . We walk around the guests in the courtyard. To the left of the center stands the governor with his family. We speak with everyone; we can use [Schismatic Follower] . If we use [Intrusion], we’ll listen to the girl and receive the “Void Beacons” contract . As a gift from the family, we’ll receive a coordinate oracle . To the right, you can play the shooting gallery.
There are three points of interest inside the palace. 1) On the left, between the tables, stands Toriana Gaprak [perception], [persuasion], [knowledge: imperium], [melee]. 2) On the right, Rogue Trader Incendia Chorda; she’ll demand the return of Futfol Station. You can return it or play a joke. She’ll give us a xenos artifact; we can accept it ( the Eye of Hecaton ) or destroy it [dogmatist] . 3) On the top right, Pascal; he transferred the spirit of Nomos into a servitor and brought it to the feast. We can talk to him [dogmatist], [schismatic], [heretic] +4 .
After visiting everyone, we speak with the Master of Ceremonies again and head to his private quarters. Lord Inquisitor Xavier Kalkasar himself will meet us there and interrogate us. We must explain all our actions and contacts with xenos. We will receive the White Ring of the Inquisition as a gift . We can also use the [Dogmatic Follower] path, which will additionally grant us an interrogation dagger . The Inquisitor will leave us, but promises to keep an eye on the situation.
Chapter 3. Commorragh
Warhammer 40,000: Rogue Trader. Walkthrough, Guide
Quest: Disturbing News
Regent Clementia will be coming to the office to report. The Gaprak clan sent us gifts from afar; they only arrived now: four Mechanicus creations, three humans, and nine holy gifts .
Irliet has found her fellow tribesmen; we must travel to their new star system for the quest “In Search of Home.” Afterward, Irliet will offer to teach us meditation. Sitting in front of the pool, we will enter our inner world. We must find and resolve all our inner problems: 1) Marazhai on the throne – Accept and let go of doubts, 2) Sitting at the desk – Dispel fatigue, 3) Lying on the bed – Accept your fears, 4) Heretics are being burned in the central hall – Accept yourself. In the corner, select “Listen.”
Jai’s personal quest. During our flight, another ship will catch up with us and deliver a package to Jai—the head of Kor the Trickster, her former companion. Captain Toto the Vulture will offer to sell Jai in exchange for riches [Commerce]. If we refuse, we’ll keep Jai and engage in combat: 1 Falchion frigate, 2 Viper destroyers .
Atlas’s limit
The system is located in the north of the global map, with a ready route from the “Cursed Shores” system. There are no signs of life within the system.
Ice World. Resource: Plasteel 5. Abandoned Tech-Priest Base.
Asteroid field. Resource: Adamantium 12 .
Space dust. Temporary reduction in maneuverability.
Gas Giant. Trophies: Fuel 100% .
Chartist vessel. We’ll board the abandoned ship. It’s advisable to take the warrior Argenta with you, so you can later earn the “Secret Revealed” achievement . Inside the ship, we’ll fall into Marazhai’s trap and end up captured by the Eldar.
3.1. Commorragh
Obsidian Court
We’ll wake up in a cage, speak with Marajai [conviction], [resilience]. We’ll be interrogated using deceptive visions. We’ll find ourselves in a room with many bodies, speak with Theodora, Heinrichs [will], [schismatic supporter] . The Inquisitor will begin interrogating us, but if we pass the [knowledge: Imperium] and [knowledge: xeons] checks, we’ll see that the interrogation is being conducted by the Eldar Archon Nazrakei. The interrogation will be interrupted by the Eldar Harlequin [knowledge: xeons]. Marajai will be unable to prove our guilt, and for this he will be punished by exile to the arena.
The Abyss (quest: One Foot in the Grave)
Later, we’ll wake up in a pile of bodies. Harlequin will drive away the marauders and hand over the Gift from the Grave pistol . We choose how to regain our freedom [Schismatic Supporter], [Dogmatic Supporter], [Heretic Supporter] +5 ; depending on the path, we’ll receive a special permanent effect .
Quest: Not the biggest problem . They took all our things. First, we need to find and return the boots. Below, near the posts, talk to the tramp and see that he’s wearing our boots [perception]. Use a weapon on him, [persuasion], [dogmatic supporter] . If we get our boots back, we’ll earn the “Victorious Return” achievement .
You can search other bodies or kill the vagrants; we’ll find knives, syringes, and first aid kits on them . We’ve been inflicted with five injuries, four of which we can remove with first aid kits, leaving only the “Hundred Wounds” injury. If we heal these injuries before meeting Malice, we’ll earn the “Ready to Meet” achievement .
There’s a dead end on the right. Go left and watch three Eldar kill a wanderer. We need to avoid this dangerous spot. A little further down, you can follow the chain to the left [athletics]. Then quickly run left, past the patrolling enemy. On the left, we can cross “Into the Pit.”
Pit (quest: Abyss)
A xenos-serpent gang nicknamed Zloba lives here. Only he can cure us of “Hundred Wounds.” We can use [Heretic Supporter] or complete the bandit’s quest—fix the [Technique] mechanism just below. Afterward, we’ll be cured, but the “Mind-Eater’s Agony” effect will remain. We can take some weak weapons from Zloba’s trophies. Zloba will task us with killing the leader of another gang—the Commissar. Let’s return to the surface.
Abyss (2nd time)
When we return to the crossroads with the three Eldar, they will no longer attack, and we’ll see Irlieth’s companion with them , if she was with us. She can be killed or rejoined.
We’re heading along the northern path, collecting loot , and trying to press the [technical] levers; there are more loot behind them . To the northwest is the Arena, but we can’t enter it yet. To the northeast, one entrance is guarded, and the second portal leads to the southern platform.
In the southeast, we’ll find Pascal’s companion . We can use [Persuasion], [Heretic Supporter] . Below, on a slanted support, there’s a body hanging; we can shoot it [Ranged Combat], and a trophy will fall to us: gloves, tracking boots . In the southeast, we board the elevator.
Crippled sector
Here we jump over a chasm [athletics], we can blow up several barricades [demolitions], behind them are trophies , chameleon skin [knowledge: xenos]. In the south, you can get a safe [athletics]. In the southeast, there lives a gang led by the Commissar. He will propose an escape plan, it is almost impossible [logic]. To do this, you need to kill Zloba. We choose who to kill: the Commissar or Zloba. This will not affect the path in any way.
Boss: Malice . There are 10 enemies in this location, but only the leader himself is dangerous. It’s best to station two marksmen far to the north, approach the boss with only one warrior assassin, and begin the fight that way. Turn on stealth with the assassin and attack the boss from behind. At this point, all the enemies will run upstairs. On the third turn, the Commissar’s squad will arrive to reinforce us, and together we can defeat him. Afterward, the Commissar will send the entire squad through a portal, which turns out to be a trap.
3.2. Arena (quest: Survivor’s Revenge)
Arena
We’ll be tricked into entering the arena through a portal. If we use [Dogmatic Follower] , we’ll convince four of the eight soldiers to attack the Eldar, but this will prevent us from earning the achievement. We’ll see a strongman in the neighboring arenas, and Marzhai’s squad in another arena.
1st battle: 2 chimeras . We’re facing two large monsters, with soldiers or bandits on our team. If the first enemies kill all 8 of our allies, we’ll earn the achievement “Those Who Descend to Their Death Salute You .” To do this, hide in the far corners and then finish off the monsters. (If you kill the monsters quickly and save the soldiers, they’ll attack us later, so you don’t have to spare them.)
After victory, we’ll return to the Abyss, where we’ll be met by Harlequin [knowledge: Xenos], a [schismatic supporter] . He’ll task us with finding the Flesh Conductor. In the northeast, we’ll meet Jai , a companion with a permanent “Death Rattle” buff, requiring surgery. Together, we’ll speak with the guard monster and enter the central building.
Anatomical opera
We pass through the roof with the cages and meet an Eldar surgeon named Tervantias the Archmachinator. He will perform the operation and rid us of the brain parasite. We can ask for a reward and receive Punishment of the Fallen . In the chest nearby, we can return all our items . The surgeon will task us with collecting unusual specimens of flesh. We can return to the arena.
At the opera, Marazh stands on the balcony above; we can exchange barbs with him. To recruit Marazh, select [cover the translator with your hand] and speak with Marazh one-on-one: “I want to talk to you,” “I saw,” “You’re trapped,” “Let’s make a deal.” Later, we meet Marazh in the arena and say, “My offer still stands.” He must survive the battle, after which we’ll find him in the Pit, where we can recruit him as a companion . He’s needed for the “Work of the Holy Ordos” achievement .
Second battle: 9 enemies, 2 snakes, 2 snipers on the balconies . Sniper Irliet is a great help here; she has the best rifle; she can kill 2 snipers from afar. Otherwise, you’ll have to run to the portal with any warrior and kill the snipers up close. Avoid the armored snakes and kill them last.
Boss: Marzhai . Once defeated, Marzhai will immediately jump into the arena with a squad of 8 xenos. If our heroes died in the previous battle, they will rise, but their health will be minimal. There are only 2 marksmen among the enemies; the rest can be avoided by circling and firing from afar.
We can return to the “Pit” where the Commissar and Zloba are still alive. You can open the trophy below; inside is a flamethrower, a Detonator, and a Litany of Exhaustion .
If you return to the Crippled Sector, you’ll encounter a Chthonos monster with 432 health . If you deal enough damage to it, it will strike three times at once, killing any hero in a turn. We’ll shoot it from afar with a sniper. After defeating it, examine the monster [technician]; it can be healed or killed. We’ll receive the Life Splitter machine gun and heavy leather armor .
When we approach the Anatomical Opera after the second battle, we’ll be attacked by the winged xenos Scourge, triggering a text quest. There are [observation], [endurance / dexterity / ranged combat], [explosives / athletics / logic], [strength / melee / medicine / endurance] checks. If we pass the [melee] check or other secondary checks, we’ll be able to loot the Scourge’s weapon from his belt, earning the “Sweet Perdition” achievement . Either way, we’ll receive the Scourge’s Adrenal Glands .
Anatomical operation. A strong man, Ulfar’s companion , is locked in the lower cells —quest “Fury in Chains.” We can use [knowledge: Imperium]. To free the space marine, speak to the surgeon, “I need a minute of your precious time.” Give the surgeon any unique monster flesh, and in exchange, ask “I want to take the space marine,” “I will definitely succeed with him,” “Of course.” We receive the key to the cell, free Ulfar, and persuade him.
Now, northwest of the surgeon, a staircase has activated. We go there and see the capsules where companions with psionic abilities are trapped. We convince or kill the surgeon’s assistants, “Master of the Torture Machine,” and free Cassia’s companion, Heinrichs’s companion . This won’t damage your relationship with the surgeon himself. Cassia needs to be calmed down [dogmatic supporter] , [persuasion / pressure / logic]. With the full squad, we return to the arena.
3rd battle: 14 enemies, Grotesque monster . The large monster releases acid and can heal itself by melee attacks. It’s covered by smaller Eldar. Once we defeat it, Harlequin will appear and give us a hint on how to escape [Schismatic supporter] . After the victory, take the beast’s claws from the arena .
Anatomical Opera. Return to the surgeon and hand over all the flesh you’ve found: Arena Beast Claws x2, Chameleon Skin, Abess’s Neuroagonizer, Scourge Adrenal Glands, and Marazh’s Nerve Fibers. Complete the side quest “Scalpel, Needles, and Threads,” and the surgeon will create a new monster. You’ll receive the Gladiator’s Braided Armor . The surgeon’s northeastern staircase is now open, and you can collect the trophies behind it . Lower down in the center, press the levers to open two dead ends, which contain more trophies: a Stinging Ring and an Iron Cape .
4th battle: 1 tamer, 2 chimeras . Before this battle, you must free all your companions and Ulfar, otherwise the “Reunion” quest will fail.
Once we win, a Sslit Warmaster will immediately attack . He constantly hides behind columns, fires accurately, and can kill in one hit at close range.
Next, a Flawless Paragon will immediately attack . It has 461 health. It attacks in melee combat and restores almost all of its health with its attacks. You need to constantly run away from it and shoot at it with snipers.
Boss: Kikeross . At the end, the main witch’s squad will jump down to us. 8 enemies: 1 witch, 1 robot, 6 Eldar. It’s best to take out the Agonis Pain Cannon robot first; it has 717 health and will hinder your ranged attacks on the boss. Kikeross herself is a melee fighter, quickly regenerating a maximum of 693 health.
The next group of enemies will jump down. Harlequin will come to our aid and open the stairs to the portal. We’ll collect the trophies and escape the encirclement. We’ll complete the “Abyss” mission.
3.3. Spire (quest: On the Puppeteer’s Strings)
Outer chambers of the spire
There’s a strange potion at the entrance [resilience]. In the center of the hall, two ambassadors from different Eldar clans are arguing: the Wounded Skies and the Poisonous Whispers. We can pit them against each other [persuasion]. 22 enemies will attack , but they’ll also fight among themselves. You can hide at the top of the stairs and fire back from there.
Quest: The Path We Lost. Harlequin will appear again and tell Irliet that seers of her people are being held captive nearby. We’ll reach the rooftop. You can blow up the wall; behind it are trophies: a monocle, bracers, and the armor of despair . We’ll speak with the two xenos pilots and choose who will take us on the ships.
Spire of the Devastating Storm
We’ll land on the spire’s balconies. We’ll collect a couple of loot outside and enter the building. Inside, you can remove the barrier and disable a couple of acid turrets by pressing a button. Activate the panel on the right, and a ladder will rise on the left, revealing a blast pistol (23-35 damage) and a rifle (24-36 damage) .
The main halls. First, head right; there are seers there for Irlieth’s quest. The first prisoner is by the entrance bridge; he’s completely lost. We can kill him with [Heretic] or [Schismatic] . Below, the second prisoner is in a flask. We can press the buttons (kill him), break the flask, or leave him. There are two entries in the trophies. Upstairs, the third prisoner is chained to a game board with [Intelligence], [Persuasion], [Willpower], and [Dexterity]. If we break the board, Irlieth won’t like it. Nearby, in the trophies, there are gloves and boots .
There are 11 enemies in the eastern dead end : a bloodthirsty experiment . After defeating them, take the journal, armor, and cloak . Rescue the fourth main prisoner and obtain the Webway Resonance Device . Irlieth learns how her worldship perished: it was infected by Theodora, and none of the seers could prevent it. Irlieth will decide to kill the seer; we can stop her with [knowledge: xenos], [pressure], [persuasion].
To the west, we head to the next floor of the spire. There are traps to the left and right, followed by two squads of 18 enemies . We clear one side, then the other. We loot the surrounding area and head to the center, where Surgeon Tervantias is standing. He figured we’d die, and now he’ll try to kill us. Near him is a device from the Stolen Stars that protects the xenos world from the warp. We can destroy it or leave it: [Dogmatist], [Heretic], [Schismatic] +20 . If we engage, we’ll face five enemies, including Tervantias himself, with 330 health . To the north, we take the elevator.
If Marazhai is in your party, he’ll want to find a special device—the personal quest “The Path of the Drukhari.” From the surgeon, head northwest and find the required item near the cliff. Choose whether to destroy the device or give it to Marazhai.
Boss: Iremeriss . In the final location, we’ll meet the Eldar leader who interrogated us. He guards a huge round gate; you can’t get past him without a fight. Nine enemies will attack: the boss has 822 health, along with four Incubi and four Grotesques. It’s best to retreat down the stairs. Two large Grotesques block the way back, but they’re easy to kill.
On the upper platform, on the second turn, many small enemies will arrive that can surround the snipers. Once we’ve reduced the boss’s health to half, he’ll recover, kill the nearest hero, and activate two turrets. Once we’ve finished him off, the turrets will deactivate. It’s best to do this with snipers from cover at the base of the stairs. After defeating him, enter the round portal.
Chapter 4. The Koronus Expanse
Warhammer 40,000: Rogue Trader. Walkthrough, Guide
We’ll travel through the portal to the Eldar ruins on the planet Janus. If we left the Eldar in command of the planet, we’ll be met without a fight. Afterward, we’ll summon our ship and return to the bridge. After listening to all the reports, we’ll receive several story and personal quests. We’ll need to fly around the entire global map again, from bottom to top.
If the Eldar Irlieth is still alive, Inquisitor Heinrichs and the warrior Argenta will now demand that she be punished for treason. Choose between leaving her alone, administering corporal punishment, or killing her. Allowing the Inquisitor to kill Irlieth now will not count toward the “Work of the Holy Ordos” achievement. Afterward, save your game, approach Heinrichs yourself, and hand over three of the heretics’ companions to the Inquisition: Idira, Irlieth, and Marazhai. You will receive the “Work of the Holy Ordos” achievement . If you still need these companions, reload from a save.
From now on, we’ll be able to develop the third archetype for all heroes, and we’ll be able to build level 4 and 5 projects on all five of our planets. We’ll be monitoring project space to ensure there’s enough room in each city for level 5 conditions and projects to earn the “Crown of Creation” and “Dynasty Prosperity” achievements .
Eight new contracts will appear. Speak with the Vox Master to receive additional side quests: “Rare Find” and “Giant Asteroid.” The High Factotum economist has the quest “One-Way Journey.” Speak with Irliet to complete her quest from the previous chapter.
4.1. Footfall (quest: Lord Inquisitor and Lord Captain)
Atrium (quest: The Great Judgment)
Priest Zeta-42 stands at the entrance; he now trades in place of Opticon-22. A Lord Inquisitor has taken up residence at the base, and the area is now littered with hanged and burned heretics. Hieronymus the Sorrowful trades in the southern part of the square.
In the center, on the throne, sits Rogue Trader Incendia Chorda, who serves the Inquisitor and personally oversees the trials of heretics. Chorda will suspect us of heresy, so we respond with [persuasion] and [pressure]. We can support Chorda, and she will task us with finding and killing the previous Viceroy of Fulton. We cannot enter the Inquisitor’s presence yet.
Only now, in a single conversation, will we be able to make Chorda our partner; this option will be unavailable later. If you don’t have enough path points, it’s best to come back later. Choose:
- [Heretic Champion]. Kill Chorda.
- [Dogmatic champion]. Let us support her. Companion of Incendius Chord .
- [Schismatic Champion]. Explain to Chord that “Killing people is wrong” and arrange peace talks with Vladaim. Incendia will go to the monastery to atone for her sins. This will also cause Incendia’s companion, Chord , to appear . By adding Chord to your party, you’ll earn the “Unexpected Reinforcement” achievement . There will be another opportunity to earn this achievement along the heretic’s path.
The Martyr’s Fortitude
You can’t leave this location until you choose one of the two sides in the conflict. Viceroy Vladaim Tokara has set up an underground headquarters in a bar. Rizza is trading in the center, representing the Void Brotherhood pirates. Choose:
- To agree on an attack on Chorda [heretic], [schismatic].
- Kill Tokara for Chorda [Dogmatic] +5. You need to kill 13 enemies. We’ll be assisted by Old Man Hieronymus’s squad. Among the enemies are many strong marksmen and warriors. Tokara himself can be knocked to the ground at close range. We attack him from afar, then retreat with snipers past the bar exit.
After the victory, Chorda will arrive and hold a trial. We choose [Dogmatist], [Schismatic], [Heretic] +5 . Afterwards, Chorda will decide to execute the merchant Rizza and use a special beam. We can choose [Heretic Champion] .
| Quest: Rat Hunt (Jai)
Before the bar, we descend the stairs into the sewers. Jai’s task is to sneak past the patrol and gas all the bandits. If we fail, Jai’s captured team will be killed. If we do this undetected, we’ll earn the “Invisible Bureaucracy” achievement . Solution: There are two enemies on the straight road; turn right in front of them. A little further on, there’s a moving enemy. In the southeast corner, jump over the bridge [agility], insert the gas cylinder [technique]. Return across the bridge. It’s best to proceed further with one character, one with [technique] developed to disable traps and turn valves. The first valve is next to the gas cylinder. The second valve is north, in the center. The third is in the right dead end, the fourth is in the left dead end. There’s a second mobile enemy at the top; you need to go past him to the north and turn on the fifth valve. At the crossroads, wait for the enemy to move up, run west, turn on the computer, and knock out all the enemies with gas from the gas cylinder. After tranquilizing the enemies, we’ll have a choice of how to kill the enemy leader. If we step on a trap or are caught by guards, we’ll engage in combat with a gang of 18 people . After defeating them, we’ll exit through the western corridor. |
Quest: Incident
A strange spy will infiltrate our ship in space and be captured. We ask for him to be brought to the bridge. He turns out to be Asclepius, a tech-priest familiar with the ship’s previous priest and knowledgeable about Nomos’s history. We choose to kill him or leave him under various pretexts ( [dogmatist], [schismatic], [heretic] +5 ). He must be left alive to develop Nomos and later receive the secret ending .
Global Map (Chapter 4)
| Sotto’s Tomb
Asteroid. Caves. You can mine plasteel [demolitions], or dig a tunnel further and find xenos trophies [agility / observation], [ranged combat / agility]. |
| Aviorus
Shipwreck. Drifting Ship (Quest: Enter the Main Computing Cathedral). We’re clearing a difficult location from Chapter 2. Inside are mad tech-priests. You can blow up a wall along the way; behind it is a trophy. Near the jammed door, go to the dead end on the right ahead and press the panel. With one character, run past the power line and disable the installation. Further on are a couple of traps and augmented gloves . You need to set the pressure on two panels to 10, then we can turn on the backup generator. Solution: two valves on the right, one upper left valve. On the way back , you’ll be attacked by 11 enemies : priests, servitors, and two heralds. First, you need to quickly destroy the two hanging “herald” loudspeakers, otherwise they’ll grant +35 health to all enemies each turn. In the central hall, you’ll be attacked by 18 enemies, including four heralds . After defeating him, we’ll find a hidden door in a side dead end, behind which is a Provocateur’s Helmet . On the way back, the narrow corridor is full of traps. A large door opposite the entrance will open, revealing the Chief Tech-Priest. We can use [Knowledge: Warp] and [Intensity] to gain the Fervent Faith buff . Five enemies will attack, including a large Steel Devil . This ship was flying from Chiava Gamma, and the Tech-Priests took this infection with them and are now dead. Take the Diagnostic Tool and Light Armor from the Chief Priest . |
| Omicron
Savannah world. The epicenter of a magnetic storm. [Observation]. Explore the cryoslypts, [pressure], leave the prisoner. Later, the comms officer will have nightmares: [persuasion / pressure / logic], [knowledge: warp, pressure]. |
| Smaragdus Mundos
A new star system has appeared in the center of the global map, with a ready path above, from the Orsellio Providence system. Quest: The Price of Power (Cassia). A text quest will begin on the way to the system. Cassia has had a vision, and she has drawn a picture—the monster Tisiphone Orsellio. You must protect her with [melee/stamina], [observation], [persuasion]. Let’s save our navigator. A burning world. Empty. Desert World. Atlas Palace “First World.” We’ll land in Eldar ruins. Along the way, you can blow up a mine, descend into a pit, and find a gauntlet inside . We examine the xenos statues and find a red Atlas crystal in the center. Fighters of House Orsellio will arrive here after us, but the crystal will kill them. The Eldar Harlequin will tell us that the Orsellio gained their power by breaking off a piece of the Eldar Soulstone. We can kill the Eldar and destroy the stone, but it’s better to give Cassia her word [communication], and we’ll avoid combat. You can loot the surrounding area: an amulet of Immaterium direction . Returning to the ship, speak with Cassia again. |
| Khepri’s Cradle
A rocky world. A secret smuggler hideout. We’ll land on the planet and find ourselves in a large Tech-Priest hall. We’ll be trapped in the center; we need to quickly disarm all the mines before they explode in 10 seconds. In the pit on the left, we’ll find trophies, a Vox, and an Eldar helmet . On the right, descend into the hall and see a kamikaze servitor. Further on, the crates contain syringes and a Drukhari cloak . You can climb through the crates to reach the control room. Inside, watch the recordings and turn off the power. Take the vox, rifle, gloves, and Drukhari helmet . Disarm the traps and, at the entrance to the northern hall, examine the crates to find the “Golden Xenoidol” item, which will earn you the “Golden Toad” achievement . In the final room, we’ll be attacked by 12 Necros . These are robots that move slowly but attack powerfully with lasers and don’t die instantly. It’s best to kill the smaller Scarabs first, otherwise they’ll repair other robots. When the enemy numbers are low, another squad of 12 Necros will join them . After defeating them, grab the Eldritch Sphere, Broken Vox, and Meteorite Fragment . You can also pick up some Xenos Stones under the stairs.
Ice World. Distress Signal. We descend to the clearing with turrets. Now, with our leveled-up heroes, we can spot a hidden door in the northern wall [Observation], use the key [Demolitions]. We’ll dig out the bunker and earn the “Thorough Investigation” achievement . Inside are a couple of xenos traps and the “A Work on Anatomy” amulet . |
| Crossroads of a Hundred Dreams
Ice World. If you spoke to the Pilgrim ship, you can now “scan the planet using enhanced augur components” in Chapter 4. You’ll receive the “See the Truth” rumor and the “Melt the Ice” contract (requires 1 phlogiston, 5 promethium, 3 chemicals). Completing the contract will earn you the “Under the Ice” achievement . Enemies of Humanity. 1 Carnage-class cruiser, 2 smaller ships . Destroy the powerful enemy ships from Chapter 2. |
| Pillars of Viridica
Ice World. Ruins of the Inquisition ship. We proceed along the narrow corridors to the northwest. At the other exit of the building, there is an inconspicuous path along the rocks to the right, which will lead us to the central hall. Here is a Shielding Sphere , which constantly summons new zombies. Don’t kill the enemies immediately, but place melee fighters in front of them and don’t attack. This will allow you to quickly accumulate 500 dodge points for the achievement “Outrunning Doom .” Destroying the Shielding Sphere will yield the Unholy Shard amulet, the Inferno pistol, and the Tempo Carapace . Returning to space, we can destroy the ship on the planet’s surface: [Dogmatist], [Schismatic], [Heretic] +5 . |
| Nolla Septum
A star has disappeared from this star system. Wreckage of a refugee ship. Trophies: books, machine guns . Drukhari voidships. Talon frigate Kiriix, 2 destroyers . Santiel’s Pride. A frozen hive city. We can evacuate 100% of the people and 100% of the fuel before landing. Hive world. On the planet’s surface, head west and you’ll be ambushed. Seven Eldar snipers are on the upper balconies to the left and right . After defeating them, complete the rumor “The Fall of Santiel’s Pride.” Further under the arch, we blow up the rubble and unlock the door to the spire. Inside the building, in the church hall, eight Servitors will attack . To the north, we open the doors and exit the building through the breach and the fallen ship along the corridor. Above is a squad of 8 Eldar , including 3 Medusas who attack everyone with their gaze, like Cassia. Further on, near a circular platform, are 11 Eldar . When we begin the battle, 6 more enemies will arrive on the second turn . |
| Ice Prince
Ice World. Now you can defeat powerful enemies from Chapter 2 on planet surfaces. 14 enemies: 1 Feral Helbrute (1008 health), 3 Chaos Space Marines, Heretic Troopers . Apply all possible debuffs to the huge monster and fire at it from afar with snipers. |
| Cursed Shores
Shipwreck. Sword-class frigate Lightseeker . We can establish contact, but we can’t negotiate; it’s best to strike first. |
| The Misfortune of Garthrafal
There is a new system in the north, a ready route from the Mortus Acies system. Ice World. Resources: Promethium 7 . Empty Name. You can examine the multi-colored star. Snowy world. Empty. Unidentified ships. Several weak ships . Dead World. Excavation site. Quest: The Price of Humanity . Inquisitor Heinrichs’s personal quest. We’ll land on the planet Photon IV. At the entrance to the mine, we’ll encounter strange overseers [knowledge: warp]. When we try to enter, we’ll be attacked from behind by nine Mandragoras . They attack with daggers; if you kill them from afar, they’ll run up to the nearest hero before dying, dealing significant damage. Inside the mine, you can open a side door, revealing a heretical altar, a profane tome, and two cloaks . Emeline is on the top floor, where we’ll see her performing a heretical ritual to summon the local sun. Heinrichs will denounce his colleague. Six Mandrakes will attack . You need to run to three different points as quickly as possible to turn on the lanterns. If the lights aren’t turned on, three new Mandrakes will spawn in the dark area under the lantern each turn. Then, the lights will turn off each turn. Stand nearby and turn them back on until the enemies that have already appeared are gone. After defeating them, choose a sentence for Emilina and pick up the survivors. On the ship, talk to Heinrichs. |
| Dargonus
Quest: Blood Ties . Abelard’s personal quest. Return to our capital world, Dargonus. In the square, we’ll see slain conspirators [medicine], more unusual than servitors. Inside the palace, Governor Drayvstem will accuse the Verserian family of treason: allegedly, they forged documents to disrupt supplies. If we agree immediately, Abelard’s family will be executed. Better to conduct our own investigation. We’ll interview all four aristocratic families. The Verserians deny their guilt. Sauerbeck dislikes xenos [knowledge: Imperium]. Gaprak will tell us about Galen Gaprak’s strange behavior. Drivestem: the governor’s son discovered the forgery of documents. If we interrogate the son [pressure], we’ll learn that he miscalculated and shifted the blame to the Verserians. But it’s too early to draw conclusions; it’s better to spare the son. Find the culprit. Return to the front door, and in the lower hall we’ll see Gallen Gaprak quietly murdered [observation]. A note remains on the body. We’ll question all the families about the deceased. The noblewoman from the Drivestem house will show us the bench where Gallen sat [observation], and there we’ll smell a familiar scent associated with the Sauerbeck family. We announce the verdict. If all the evidence has been collected, Abelard will monitor the reactions of all the families. We list the mistakes made by all the families. Afterwards, we suggest the Seneschal continue his speech. Regina Sauerback will reveal herself and attempt an attack. We choose to execute only Regina, and for the correct decision we will receive the Traitor’s Ring . We speak with Abel on the ship. |
| No Man’s Worlds
Ice World. Abandoned Palace. Land in the Ruined Palace, read the decree in the hallway, and collect the trophies: gloves, boots, and a cloak . On the right, enter the central hall where you’ll see servitors and an immortal nobleman [observation], [knowledge: xenos]. You can flee or engage. 11 enemies: a Corrupted nobleman with 1500 health, 10 servitors . First, kill the robots around him, then use your skills to reduce the boss’s armor; he initially has 120% defense. After victory, you’ll receive the Halo artifact . This item can’t be removed; it makes you stronger but reduces your Willpower. Equipping this item will prevent you from getting the good ending. It’s best to equip the Halo in a separate save to earn the “Dead Man’s Mockery” achievement . (Heindrix, Irliet, and Marazhai won’t let you equip it; they must be absent from your squad or on the bridge.) |
| Langrenne’s Belt
A snow-covered world. Using our enhanced scanners, we’ll find a special Drukhari beacon. We can activate it—the “A Vile Find” rumor. We need to leave the beacon where it is. Pirates. We’ll spot the massive pirate cruiser Elusive Contempt, but it’ll disappear into the warp. Six Viper-class destroyers will attack us . |
| Side quests
Task: Incident . On the captain’s bridge, you need to speak with Nomos again. In the dialogue, all the lines seem to have already been reviewed, but you need to turn to the third line and ask new questions. Choose one of the three options for your life’s purpose; Nomos will remember it.
Quest: Soulless (Marazh’s personal quest) If Marazhai is in your squad, you’ll have trouble with him on the ship. Head to the Upper Decks with another companion, eliminating traps along the way. Once you find Marazhai, don’t kill him, but attack the Mistress of Pain . Once she’s dead, all the other demons will disappear. Choose what to do with Marazhai and speak with him on the bridge. This will begin the next quest.
Quest: Storm Shards If we leave Marazhai alive, the Drukhari will come to the ship later, at the end of the chapter. Agreeing to help them will trigger the “Fugitive” quest, which we can complete in Chapter 5. |
4.2. Quetza Temer (Nameless Star)
We fly to the eastern “Nameless Star” system and meet the ship “Emperor’s Vow” in orbit around the planet Quetza Temer. Assistant Erbreght will tell you [observation] that his Rogue Trader Winterscale has landed on the planet and gotten lost in the jungle. We need to find him (quest: Hunting Grounds). Additionally, we can take Irlieth to the planet to assist the Eldar (quest: Outcast’s Duty, rumor: Beheaded Griffon).
Quetza Temera Forests
We’ll disembark near Winterscale’s empty shuttle. The rest is a jungle journey, through tiny locations with forks and constant loading. Choosing a path will likely be pointless at first; we’ll be transported to random locations.
1) Fork with things.
2) A fork with traps.
3) A clearing with a squad of 11 Eldar . First, kill the snipers in the surrounding bushes. There’s a trophy to the west: the Eldar rifle “Crucible of Suffering” (37-47 damage) .
4) Destroyed tanks.
5) Forest settlement. We’ll find a settlement of local people, the Forest-Dwellers, among whom is the psyker Speaker-with-the-Stars.
6) Altar in the forest. Turn off the turret nearby. If the path is up, go down through the arch.
7) Winterscale’s Camp. A Rogue Trader’s assistant was killed on the left rooftop here. Examine his body and collect the trophies nearby.
8) Meeting place. We’ll meet Calligos Winterscale’s squad in the orchard. He’s accompanied by a retinue of various mercenaries. His assistant, Vorthen the Gray, will offer to kill us, but we can negotiate. Winter appears to be possessed by [medicine]. We learn he’s not lost, but continues to hunt the Eldar, but can’t find their base due to a confusing spell. After the conversation, we need to find a way back to the village.
9) Forgotten Bunker. You can open the bunker; inside is a Stupor sniper rifle (30-45 damage) . Above, there’s a path along a tree bridge.
10) Shuttle crash site. There are 3 exits.
Returning to the village, we’ll instruct the priest to perform the ritual. Afterward, the Eldar’s confusing spell will wear off, and all passages between locations will now indicate where they lead. (Dual exits will appear in the same direction; you don’t need to choose between them; both points lead to the same destination, but now one indicates the destination.) We speak with Winterscale; we can convince him not to kill the Eldar [Commerce / Sociability / Persuasion]. We learn that Winter himself killed his assistant [Observation]. We tell him, “It’s time to go,” and we’ll go on the search together.
Xenos Refuge. We’ll explore all the locations again, looking for a new name. We’ll find an Eldar base, among them is a familiar Harlequin, Nocturne of Oblivion [observation], [logic].
- Attack the Eldar. You can choose the [Dogmatic] +20phrase . This will make Winterscale more susceptible to the influence of the dark forces, and later on the Heretic’s path, we can take him as a secret companion for Winterscale’s companion, for the “Unexpected Reinforcement” achievement .
- Listen to everyone to reach an agreement [Schismatic] +20. We need to persuade Winter [pressure, commerce, persuasion]. If we part ways peacefully, Irlieth will want to perform a ritual to summon an Eldar ship, but this could kill her. We agree; she won’t die. Irlieth will become disillusioned with her kin and return to us. We can demand a reward from the Eldar [commerce]; we’ll receive an Eldar runestone.
In any case, we search the location and collect the following loot: Vox, Eldar armor, a Suin Kleen cannon (28-42 damage), armor, and a cloak . We proceed down through the locations, looking for the passage “To the von Valantius shuttle.” We take off from the planet and land in a new location.
Haemonculus Laboratory
It’s best to take Idira with you; she has a personal quest here called “The Door.” Inside the first room, we face eight enemies: two large grotesques and six clones .
If you previously killed the surgeon, Tervantias the Archmachinator, you’ll only encounter his clones further on, led by one enhanced clone [Knowledge: Xenos], [Observation]. There are 14 enemies in the main hall: 1 boss, 1 large Kronos, and 12 medium and weak clones . Each turn, new weak clones will spawn from 8 capsules; it’s best to destroy the capsules as soon as possible.
After the victory, we collect the trophies: the Arch-Scammer’s Trick helmet . We examine the hole in the ceiling [Observation], [Explosives]. We learn that the Inquisitor collaborated with the xenos. We turn on the computer, open the wall nearby, and behind it is the Doombringer’s Cape .
We look for an open passage and a gap we can jump across [Athletics]. To the south, Idira will notice a hidden door; we’ll enter a separate room. We collect supplies, then blow up the door on the left [Demolitions], creating a bridge leading back. A Desolate Seer and clones will attack . First, kill the Seer, then the weaker clones. After defeating her, we choose Idira’s fate: trust her (she’ll destroy the device) or ask her to equip it.
On the way back, opposite the entrance, we’ll find a hidden door. Behind it is the entrance to the upper control room, which contains a poison flamethrower (35-52 damage) . When we decide to leave the location, we’ll receive a [equipment] message. We’ll be able to quickly return to the village.
Quetz Temera Forest (Quest: Hunting Grounds)
In the village of Kalligos, Winterscale killed all the local people.
- We can attack him [dogmatic fanatic].
- Or we can persuade [persuasion/communication]. Along the way, we can leave the heretic possessed and make him our companion .
- Having gathered all the facts, answer, “Your Arch-Militarist is a heretic and a Chaosite. He is the one who nurtured your wrath.” Winterscale will come to his senses, and Vorthen the Gray will transform into a demon. There will be no battle; Winterscale will kill the enemy himself, but in doing so, he will injure his spine [medicine], leaving him helpless. We can finish off our colleague or return him to his ship. From the demon’s body, we take the armor, chainsword (26-39 damage), and pistol.
The Lord Inquisitor will summon us. We’ll fly back to Footfall. Along the way, pirate attacks will begin. We’ll eliminate the enemies to complete the rumors “In the Wake of Elusive Contempt” and “The End of the Elusive Legend.”
Latoti Strait. Pirates. 4 Claymore-class corvettes .
The Silence of Mer-Segrit. 1 cruiser, “Elusive Contempt,” 4 corvettes . The massive pirate ship has 380 hit points and 250 defense. We repair every turn to avoid destruction. Reward: 3,500 experience.
Footfall. The Lord Inquisitor admits to collaborating with the xenos, but only to sow discord between their clans. He now oversees the defense of the entire star sector, and he’ll send us to lead the battle on the planet Euphrates II—the mission “Siege.”
On Footfall, we speak with Tech-Priest Zeta-42 and give him information about all the scanned planets, but this isn’t enough for the exploration achievement yet. We hand over all the cargo to him to increase our reputation with the Explorators faction to 55800, which will allow us to build the final project on Chiava Gamma. For completing all five rank 5 projects on the planets, you’ll earn the “Dynasty’s Prosperity” achievement .
4.3. Euphrates II (Emperor’s Hand)
We’re flying to the center of the global map, to the Emperor’s Hand system. We’ll begin a war council in orbit around Euphrates II. Three groups are participating in the assault: Thorbald Ironhide’s Space Marines, Opticon-22’s Tech-Priests, and Ayshara’s Inquisitors. We’re choosing whose plan to support [knowledge: Imperium / logic / persuasion]. We’re choosing one of three attack options: spare no soldiers, bomb carefully, or destroy everything.
If Ulfar is on the team, approach him on the bridge and tell him to relay the message to Torbald. Take Ulfar with you to the planet Euphrates II—Ulfar’s personal quest, “The Sinister Howl.”
Battle in orbit
Space battle. Unholy Styx-class heavy cruiser .
Assault bridgehead
A text quest. We choose how to storm the Machine Temple [knowledge: Imperium / observation / pressure]. If Argenta is with us, her personal quest “Driven” will begin. There’s a void cruiser wreck on the way; we choose how to bypass it [ dogmatic fanatic / demolitions / technology / logic]. We’ll encounter the Word Bearers Chaos [pressure / persuasion / demolitions].
Machine Temple. We’ll see Chaos Space Marines performing a ritual [knowledge: warp]. Among them is Uralon the Cruel, who was in our visions, and the traitor Kunrad Voigtwyr. We can use the phrase [dogmatist fanatic] on the path of the dogmatist and the schismatic . The Space Marines will engage in combat in the main chamber, and we’ll take a detour.
If you followed the heretic’s path and obtained the Blade of Chaos, you can now side with the Chaos Word Bearers and fight against the Cosmic Wolves Space Marines. You’ll earn the achievement “Knee-Deep in Chaos . ”
There’s an elevator to the east, but don’t enter it yet to explore the entire floor. In the south, in the center, there’s a squad of heretics; they’ll immediately surrender, so we can execute them. In the southernmost hall, we’ll be ambushed by seven enemies: a Herald of Tzeentch, two Tzeentches, and four Pink Horrors . To win, you only need to kill the Herald. Run up to him, disable his force field, and kill him. On the southern wall, examine the cogitator [knowledge: warp], [power], and obtain the datastick key.
Boss: Corrupted “Defiler .” A spider tank with 2750 health will attack in the western hall, regenerating 20% (550 health) each turn. He’s assisted by 9 minor Heretics. There are 4 plasma batteries in the corners of the room; they constantly increase the boss’s armor. Destroying them will increase the boss’s damage. However, if we defeat the tank without destroying any batteries on Fearless difficulty, we’ll earn the “Property Safety” achievement . To achieve this, we’ll need to deal at least 600 damage per turn. Place several snipers and psykers on the central bridge and fire at the tank. Run your closest warriors in circles to make the tank chase them.
We explore the western corridors and disable the traps. Among the trophies is the sword Unsullied Gift (26-42 damage) . Disable the second cogitator. There’s a second elevator here; it leads to the same location as the first one; we go down.
The Main Generator Sanctum. There’s a warp trap and the 3rd Cogitator on the way. Sixteen enemies will attack in the hall: Servitors and 3 Possessed Cogitators . After the Cogitators are destroyed, 1-3 Pink Horrors will spawn, and of these, twice as many Blue Horrors. Next, blow up the doors and jump across the chasm. We’ll encounter a Wandering Psyker; we can kill him or help [Schismatic / Dogmatic] +4 . After searching everything, return to the main floor.
Prayer Halls. Enter the doors in the northwest corner of the main floor. On the new floor, there are a couple of traps on the stairs and a scratched infocrypt in the cogitator.
The western corridors are full of warp traps, which inflict injuries that will be difficult to remove before the end of the zone. It’s best to carefully navigate this path with one hero with the [Technique] skill, and then open a shortcut for the rest of the characters in the northern corridor.
The southwest room contains an optional battle with 11 enemies: 4 Chaos Space Marines, Corrupted Rust-Trappers, and Heretics . The Chaos Marines fire a 3-shot burst at close range, which can kill instantly. It’s best to approach with one hero and retreat immediately. Sniper the enemies from afar, and they will run through warp traps and take additional damage. After defeating them, grab the Plasma Rifle (24-36 damage) and open the hidden door to the east, revealing a Flamethrower (30-46 damage) .
If you brought Ulfar with you, you’ll encounter a monster called the Scream of Fel in the far northern room . Ulfar’s personal quest requires defeating this beast. Later, as part of the story, you’ll meet Torbald and tell him about the quest you’ve completed.
The main path leads through the eastern corridor, to the Terebrum location.
Boss: Uralon the Cruel . Along the [Heretic Champion] path, you can pick up a secret companion, Uralon the Cruel’s companion , for which you’ll earn the “Unexpected Reinforcement” achievement . Along the Dogmatist and Schismatic paths, we’ll engage in battle. The boss has 1072 health, and 11 warriors are with him: the traitor psyker Kunrad and 3 Space Marines. However, for some reason, all the enemies here deal minimal damage, so the battle will be easy.
Once we defeat the Chaosites, Uralon will plunge a special blade into Kunrad before he dies, and he will become the resurrection body for a powerful demon. A huge winged vulture will appear. We can use the phrase [heretic champion].
Boss: Dawn’s End . The demon has 6250 health and 178% armor. But even if you remove all his armor with skills, he’ll only take 2 damage per attack. This is due to his “Hidden Shield” skill. First, you need to kill a specific monster he’ll constantly summon: a Herald, a Pink Horror, or a Blue Horror. Once you kill the right monster, the shield around the boss will dissipate, allowing you to deal full damage. The boss will summon a new batch of minions; search among them for a new shield guardian. Repeat this several times, and the boss will be slain.
We take the bolter (24-36 damage) and the staff (40-50 damage) from Uralon’s body . We go to the center of the hall to the panel and select “Report Completion.” Upstairs, we’ll meet Space Marine Torbald and a dying Tech-Priest [technician]. We learn that the Lord Inquisitor commissioned the creation of the Yoke weapon, capable of destroying worlds, here. We need to return to Footfall and question the Inquisitor.
| Razt-Tavi (Quest: Aspiring)
Argenta’s personal quest. Immediately after Ephath-II, warrior Argenta will find the planet she needs. Fly to the system southwest of the center; there’s a ready route from the Lapidus Mortus system. In the system, explore: Unknown anomaly. Nothing. Snow-covered world (Salis Prime). Crash site. Near the landing site, there’s a cache on the right containing an Aquila of Speed and Gloves of Intimidation . Find a Chaotic Prism containing the enemy Half-Light. To the northeast, you can blow up a cave; inside is the sword Relentless Purification (33-49 damage) and a Lasgun (14-21 damage) . To the north, you can jump across the islets [Athletics 33%] to get behind the enemies. Engage in battle with 12 enemies: Half-Light, 2 Rust-Trappers, and Heretics . You must destroy 2 prisms, otherwise the Half-Light boss will respawn near them. Once defeated, Argenta will enter the ancient ship alone. We depart the planet. Two days later, Argenta will return, bringing the Sole Star armor , and telling us about her pilgrimage. |
| Mirror System (Quest: Let the Cycle be broken)
Pascal’s personal quest. Our tech-priest will be summoned to the Mirror System, where we’ll see three explorator fleets surrounding the Arkship “Hermetico” [perception]. We’ll board the main ship. “Hermetiko.” Inside, we’ll encounter techno-savages who have forgotten the mechanics but continue to live on the ship. You can only speak with the chieftain in the north and the shaman in the west. There’s a hidden door in the northeast, behind which are gloves and a gas mask . You need to open the elevator, blocked by a servitor and a “spirit Pref.” To do this, examine all the tech-priest statues and notice damage. Speak with the shaman; in the dialogue, you can choose 3×3 dialogue options. The correct answers are: 1. Say that you are the Messiah of Interruption. 2. It seems like it’s worth showing strength and intimidating. 3. You know the answer yourself, Pascal. When we open the elevator doors, the Tech-Priest statues behind us will come to life, and eight enemies will attack . We then enter the main hall and meet Tech-Priestess Nihel “Copper Whisper.” We learn that Amarant, whom Pascal was searching for, is a hive mind of six Tech-Priests. And Pascal is its most important part, as almost all the other priests have already been destroyed. We can try to stop the fight, but Nihel will still attack. There are 15 enemies: a boss, three heavy servitors, and guards . After defeating Pascal, he will want to destroy Amarant’s knowledge. We can stop him and kill him, or allow this. Returning to space, we choose whether to finish off Amarant’s followers or reconcile the Tech-Priests. |
4.4. Task: Questions and Answers
Footfall. In the Lord Inquisitor’s office, we’ll only encounter his assistant, Froshe. We need to interrogate him [persuasion / pressure / medicine]. We can finish him off or let him go. We learn that the Inquisitor has flown into the Septent’s spatial Gate.
Upon exiting the palace, we’ll be met by the surviving Futfol leaders. We’ll choose what each of our subordinates should do in our absence. (Upon returning to space, we’ll see a warning that the game’s linear ending is coming.)
Septent Gate. The Inquisition Fleet now stands before the massive Eldar structure. Let’s engage. Three Firestorm-class frigates .
Once we win, Inquisitor Ayshara’s squad will attack our bridge : seven enemies, then six more . Later, two more Rogue Traders will arrive on our ship: Winterscale and Chondu. If we haven’t already recruited them, we’ll only receive parting gifts from them now: Tarvanna’s Last Stand, Ash . We fly into the dimensional gate.
Chapter 5.
Warhammer 40,000: Rogue Trader Finale Walkthrough
5.1. Battiada Fragments
Objective: To bravely step first into the darkness. We’ll move to the northwest of the global map, to a secluded corner from which there’s no warp access. There are only four star systems here; we’ll search them in order.
Rocky World. Theodora’s Expedition. Let’s examine the wreckage.
Ice world. Signal from planet. Decode signal [equipment]. We’ll land on the planet and find ourselves in a Necron tomb. In the southeastern dead end, we’ll examine the body and find trophies. There’s a human cogitator in the center; we’ll examine [equipment].
After this, the gate will activate, and a squad of necrons will attack us . This is a training battle for those who missed the necrons in secret. It’s best to destroy the scarabs first, so they don’t repair the robots. The necrons themselves are made of living iron, regenerate 10% of their health every turn, and don’t die immediately, instead gaining temporary health. If you don’t finish them off immediately, they’ll restore half their health. They all move slowly, and the most dangerous thing isn’t their tanks, but their snipers, who hit hard from afar and can teleport up close. We kill the snipers first, and avoid getting too close to them. After victory, we can return to the ship.
Secret. Inspect the three cogitators in the corners, complete the [Technique] and [Knowledge: Xenos] checks. Approach the cogitator in the center and select the first lines: “Confirm Activation,” “Proceed,” and “Transfer Data to the Interpreter.” Learn the Necron language and earn the “Polyglot” achievement .
When we return to space, three Jackal-class frigates will attack . Necron spaceships are unshielded and take immediate damage, but they must be destroyed twice. The first time, they heal for 10% each turn, and the second time, after respawning, they gradually deteriorate at a rate of 25% per turn. It’s best to finish them off personally to avoid them getting in the way.
| //-An#8954№01-KT//
Gas giant. Empty. Rocky World. Emerald Lights. Trophies: Pale Shard . Rocky World. Resource: Plasteel 7 . A burning world. Empty. Dead world. Empty. Necron “Ring.” Trophies: Ship Parts 119% . If Marazhai is in your squad, you’ll see Drukhari ships in the first Necron system. You need to help them—the “Fugitive” quest. On the global map, fly to the northern system. On the distant planet, land in a Drukhari camp. You need to fight the Kabal clan. |
| Neos Charoitus
Savannah world. Abandoned camp. [Perception], [Knowledge: Xenos], [Observation]. Fuel availability 120% . Ice world. Empty. Rocky World. Resource: Plasteel 7 . Unidentified ships. 2 Jackal frigates, 1 Savan light cruiser . Desert World. Xenos Tomb. Approach the control panel in the center, and Necrons will spring to life around them: 3 warriors, later 5 warriors, and finally 14 warriors . Snipers will appear on the side balconies; to reach them, press two buttons on the control panel, which will cause side staircases to appear. After defeating them, you can examine the symbols on the columns. There are trophies in one area: the Void Gaze rifle (45-60 damage), a cloaking field emitter . |
5.2. Sanctuary of Taafet
Tomb world (left). Tomb. [Logic], [observation], we get a holofield generator . We choose what to do with the pyramids.
Dying star. Nothing.
Tomb World (center). Tomb. Abandoned landing pad. We’ll land on the planet. Seven Necrons will attack in the clearing below . First, you need to destroy the two beacons on the tomb doors, otherwise they will keep summoning more Necrons. Loot: Heavy Void Suit (85% armor), Bolter (27-41 damage), Gauntlets (Critical Damage x2), Rifle (42-65 damage) .
A dead star. Let’s examine three “star corpses,” red dwarfs.
Unidentified ships. 2 frigates, 2 cruisers .
Tomb World (right). Before landing on the planet, we’ll find ourselves on the captain’s bridge. Nomos will wish to inhabit the body of the priest Asclepius to help us later. We choose whether to allow this. For the secret ending, we allow the inhabitation.
Epitaph
We’ll find Lodra the Inquisitor’s landing site; there are a lot of disabled Necrons around. We’ll see the Necron officer’s ship crash. To the west, under the stairs, there’s a trophy: Astral Stream Boots, Necron Piercing Lasgun (30-35 damage) .
Boss: Elegy of Sorrow . In the center, we’ll encounter a large Necron tank with 1650 health, covered by 12 soldiers. Use snipers to man the balconies to the left and right, and fire at the low ground in the center.
After the victory, take Theodora’s “Crest Notebook.” To the west lies the wounded Tanakia; interrogate her [persuasion], kill her, or leave her for dead. Nearby is an axe (31-41 damage) and a cloak .
Boss: Cryptogeometry Sentinel . Ahead is a force dome, under which the Lord Inquisitor’s squad is hiding. It’s being assaulted by a large, multi-armed robot with 1384 health and 9 Necrons. First, you need to kill the two snipers on the balconies to the left and right, and then get close to the boss to avoid lethal ranged attacks. Five weak Necrons will spawn each turn. Kill the boss to stop them from spawning, and then finish off the remaining ones.
Boss: Hero’s Reflections . We’ll encounter copies of ourselves that have taken different evolution paths: Merciful Reflection, Magnificent Reflection, and Unholy Reflection. They’ll have their best allies: Abelard for the Dogmatist and Idira for the Heretic. The enemies utilize all of their heroic abilities; they have over 1000 health. After defeating them, loot their unique trophies . Descend the stairs below, encountering two turrets ; blow up the walls.
On the lower floor, we’ll meet the Lord Inquisitor. He intends to free the ancient C’tan, the star-devourer, to bind it in his Yoke trap and use it as a weapon against four Greater Demons. We can choose to stop the Inquisitor or join him.
Boss: C’tan Shard . This is a massive Necron lord with 12,500 health. It summons three copies of itself with 300 health each, and can move to any location. It can also move all of our heroes to random locations. The boss attacks from afar with bursts of beams from its spear; you need to get close to it to limit it to single hits. It will regenerate some of its health a couple of times during the fight. Use all your skills to reduce its armor by 240% and finish it off.
After winning, we’ll see Theodora’s ghost and be able to reflect on the C’tan. If you raised Nomos, he’ll offer his own solution to the problem. We’ll choose what to do with the creature.
- “Nomos…” – secret ending, achievement.
- “This monster must be locked up forever.”
- “This monster will serve me.”
- Deal the final blow.
- “This creature is a god” – bad ending, achievement.
Epilogue
At the end, in the form of cards with text, we learn the fate of all the characters in the story: 1) the C’tan creature, 2) the hero’s path, 3) two other Rogue Traders, 4) all 5 factions with reputation, 5) all 5 of our cities, 6) the Prophet, 7) Footfall, 8) story locations: Rykard from Chapter 1, the Last Dawn cult, the Eldar craftworld, Commorah, the Necron system, 9) the ship’s crew: the vox master, the chief helmsman, the high factotum, 10) the noble families of Dargonus, 11) the Harlequin Nocturne of Oblivion, 12) all of the hero’s companions.