
Walkthrough of Starfield.Passage of all story tasks and missions, elections, decisions, search for satellites, game endings
Starfield is a long-awaited new RPG from Bethesda. In this guide, we will tell you how to complete her main story quest.
One Small Step
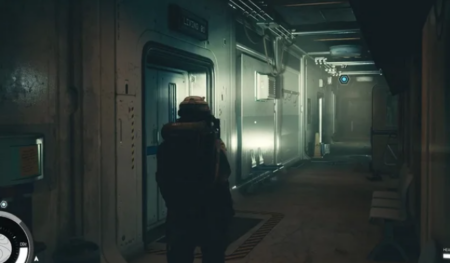
The events of the game start in 2330 at a mining station (Argos Extractors Mining Outpost), located on Vectera’s Moon. You are in an elevator descending into the depths of the mines. After being checked by supervisor Lin and her right-hand woman Heller, you will control one of the Dusty (as the local miners are called). After the elevator stops, follow Supervisor Lin through the shaft corridors. Stay close to the woman while she is interacting with other miners, and make sure they are not distracted from their duties. Soon she will call you to the box from which you need to pick up the cutter. Interact with the box, pick up the cutter and you will see 5 target markers. Use a cutter (LMB) to destroy mineral deposits. The breakaway resources will automatically be sent to inventory, and a notification will appear in the upper right corner of the screen informing you that what exactly did you get? Once you have the resources you need, return to Lin.
Advice . Stock up on beryllium. Explore other parts of the mine and continue using the cutter to obtain beryllium. Before proceeding, stock up on this mineral.
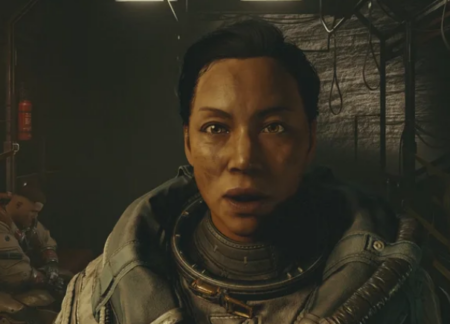
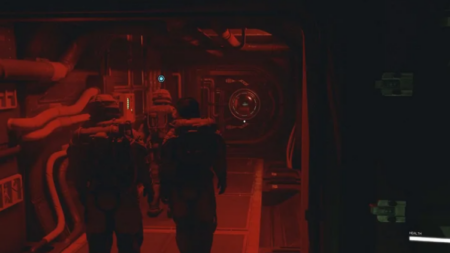
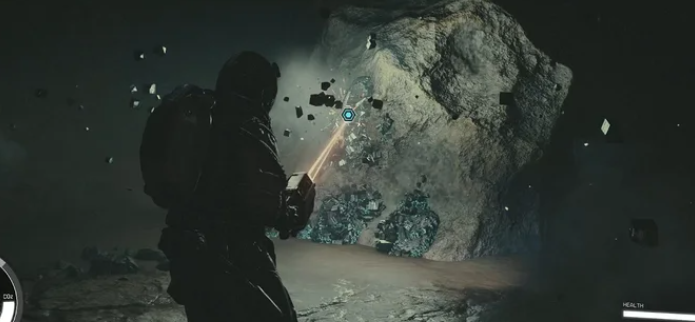
Follow Lin, follow the woman to the excavator and Heller. When the car clears the way, Lin will ask Heller to take a reading. Heller will notice a surge in gravity, but Lin will be calm because she knows about the existence of the anomaly. This is exactly what she went down into the mines for. It’s time to take the first test. Lin and Heller will be asked to explore the opened cave. You will learn how to turn on the flashlight (press the F key). When you approach the cave, Heller will offer to go inside. You’ll come to a room with a strange object stuck in a glowing boulder in the center. You won’t be able to remove the item from the stone with your bare hands, so use the Cutter to break up these mineral deposits. After breaking off part of the stone, take the item. Soon you will wake up in the company of Lin and Heller.
Character creation process
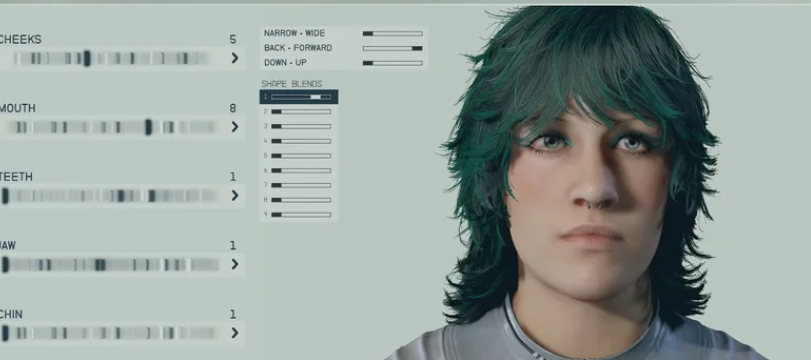
Heller will ask if you remember anything before handing over an item that will launch the character creation menu. Right now you can change different aspects and settings of the main character. In addition to physique, face and gait, you can choose an origin and up to three characteristics (traits). This will affect future gameplay: interacting with characters or extracting resources. Once you’ve completed your setup, exit the character creation menu to talk to Lin about the strange item.
Advice . Game from first or third person. When you get up from the couch, you’ll know that you can switch between first-person and third-person views at any time. To adjust these settings, use the middle mouse button (wheel) (MCM).
After a short conversation, Lin will ask you to follow her to meet a client who is interested in purchasing a strange item. Before we do that, let’s look around the base, collect loot and other key items.
Base exploration
Taking control of the character, enter the cage where the miner is inspecting the suit. Another miner is sitting on a bench nearby and a text log of space mining is lying in front of him. Pick it up.
Advice . In this magazine you will find tips on storing oxygen in a respirator. A little later you will learn that when the oxygen supply meter turns red, the situation will worsen. Once the oxygen is gone, you will start taking damage. In general, keep an eye on its stock!
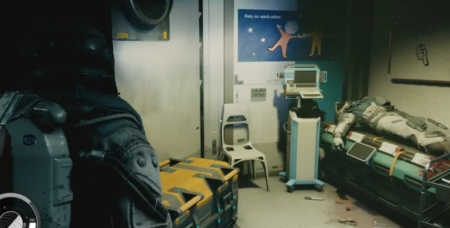
Supervisor’s Journal No. 1 . Instead of following Heller and Lin, enter the room on the right side. Head to the back to find a yellow crate next to a blue container. Take the first supervisor’s log.
Heller’s Personal Journal No. 1 . Now go into the room opposite, behind the miner with the spacesuit. Look to the left. On the bench near the miner is Heller’s first personal journal.
Go to the bathroom on the left side to pick up the first aid kit, and then look around the right side of the room, where there is a door with the sign Out of Order. You can open it to find several books on the shelf near the mirror. If you find Oliver Twist on the shelves, you will begin a quest during which you will have to find London on Earth. Thanks to this you will receive a collectible item.
When leaving the room, look to the left and find a silver case. Inside is a spacesuit, which can later be sold for credits. Return to the couch you started from and take supplies from the first aid kit on the right side.
Heller’s Personal Journal No. 2 . Continue to the right of the first aid kit to find an orange door. You can unlock it using the nearest terminal on the right hand to return back to the mine. When you enter the room, go to the left side and you will find another magazine.
On the right side of the log is a locked door that can be opened with Master Level clearance. A little further to the right, in the back of the room, you can find a storage box.
Supervisor’s Journal No. 2 . When you’re done searching the area, move into the next room to join Lin and Heller. Before you go into the next room, take note of the container on the cart to the left of the door. After going through the plastic partition into the break room, you will find a computer on the right. Here is the next log.
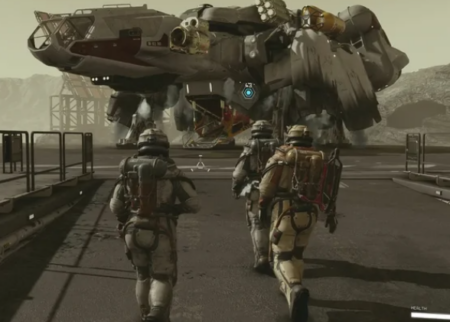
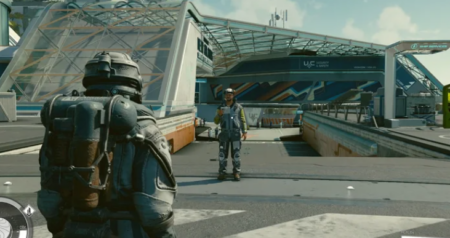
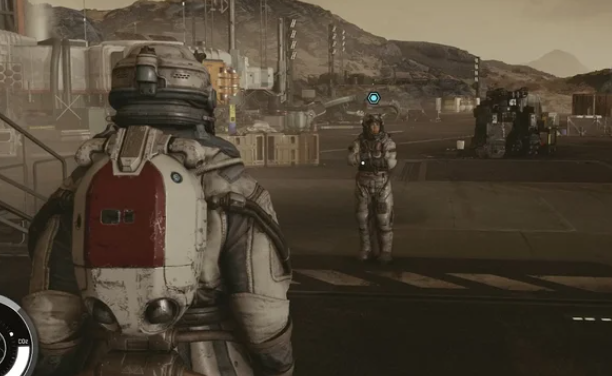
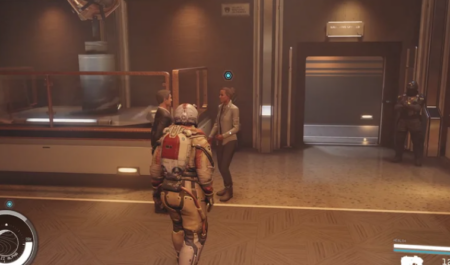
When you’re done exploring the room, go through the airlock to join Heller and Lin. You will be asked to wear a helmet to protect yourself from the atmospheric conditions on Vecter. To equip the helmet, open your inventory: go to the menu and hover over the dot in the lower right corner. Once outside, follow Lin to the right side of the base, where the spaceship will land. Wait for this to happen and meet the client. The man’s name is Barrett, and he understands what you’ve been through. You can talk to him about what you saw in the mine. Unfortunately, the conversation will not be long, as you will hear an alarm – someone has followed Barrett to Vectera and seems to want to take away a strange object. A pirate ship will land in the opposite direction.
Secondary objective: pick up a weapon . It is not necessary to use a weapon in this fight, but if you want, go down the ramp to the pirate ship and look for a weapon container on the left side. In addition, you can search the green first aid kit. The best way to survive this battle is to find cover first. If you have a weapon, use it to kill enemies from afar. You can also wait for them to get closer and shoot explosive objects in different parts of the base. If they get close, switch to the cutter. This will save you ammo! When you clear the area of pirates, be sure to search all the bodies (you can search the corpses of miners). When you’re ready, approach Barrett and talk to him. During the dialogue you can learn more about the Crimson Fleet, Constellation and much more.
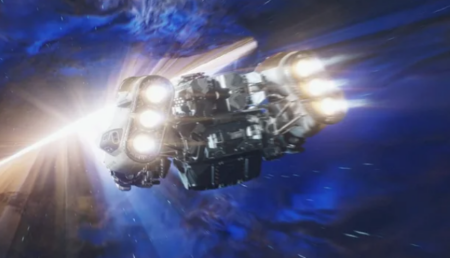
At the end of the conversation, Barrett will give you the Frontier ship and give you a watch. You will be able to scan planets, receiving information on resources, quickly move to your ship, study atmospheric conditions and use them as a navigation device. After receiving the ship, together with Vasco, you can kidnap Vektera and go to your next destination. When you get to the Frontier, look around on both sides of the entrance to get additional medicine from the bags.
On “Frontier”
Barrett’s Personal Note #2 . As soon as you find yourself inside the “Frontier” (Frontier), stand facing the stairs you climbed up here and interact with the door behind it. She leads to the toilet. Barrett’s personal note is hidden here.
Barrett’s Personal Note #1 . As you head towards the hatch, look to the left side of the ship to see a navigation console and a research station. Go to the navigation console on the left and find the following note next to the cup.
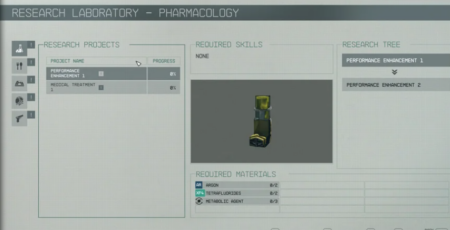
Advice . At the research station you can complete various projects. Each of them requires a certain amount of material for complete research. Resources can be mined on explorable planets or created on industrial workbenches. If you are able to start researching a project, a yellow marker will appear next to its name. By hovering your cursor over it, you will see what materials you have. You can use all the resources you have to start a project, even if you don’t have all the necessary materials.
Barrett’s Personal Note #3 . On the right side of the ship there is a galley and a bed. In the galley you can cook food that gives various bonuses. Approach the bed and on the lower left shelf you will find another note from Barrett.
When you’re ready, go through the hatch into the cockpit.
Advice . How to store items in the cargo area. When on a ship, develop the habit of storing things you find in the hold instead of overloading your character. Because of this, it will consume oxygen much faster. Behind the jump seat on the left side of the cabin is the cargo compartment. On the right, look for the captain’s locker, which can be used to store items, but its capacity is much smaller.
Get into the captain’s chair to leave Vectera. At the moment of takeoff, training to control the spacecraft will begin.
First flight to space
When you first get to Frontier, Vasco will talk about the basics of piloting. Listen carefully to him, study the ship to understand what this or that sensor is responsible for, how to change the power, and so on.
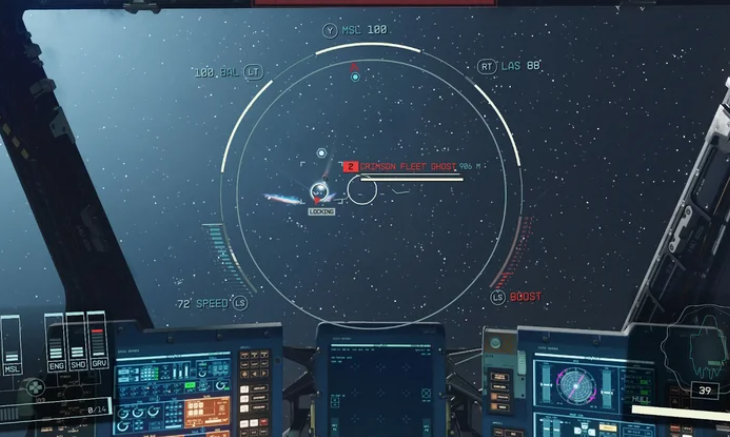
As you attempt to leave Vectera, you will encounter the Crimson Fleet in space. If you have completed piloting training, Vasco will tell you about the “golden mean” and the speed scale on the left side. Keep your movement speed to one to focus on the Crimson Fleet ships. Try to keep them visible, in the center of the screen. After aiming and locking on the target, first fire the laser weapon to break through the shields. When the shield is gone, switch to missiles and ballistic weapons. According to Vasco, even though you survived the attack, the Crimson Fleet’s activity is too high. The robot will inform you that the Crimson Fleet will continue to pursue you further. To get rid of this, you will have to visit Crete and negotiate with the captain of the Crimson Fleet.
Crete is in the same system as Vectera, so open the Narion system and then travel to Anselon’s Moon to find Crete. Before landing at the Crete research base, you’ll learn how to scan planets, checking for resource deposits and looking for potential landing sites. Rotate the planet until you see the Crete Research Laboratory. Land there.
Research station “Kreet”
You can find the required research base southwest of the landing site. Use the scanner to explore the surroundings and find the shortest path to the laboratory. When you enter the first room of the research base, check the container to the left of the door. Pick up the first aid kit and continue to the laboratory. Go up the stairs to the next room and enter the office. As you go up the stairs, look by the door for another first aid kit. At the top, move along the corridor to vault 01 to find another container next to the body. Continue down the hallway until you find a door leading to the kitchen.
Go through the kitchen to the left to the pantry with the first aid kit. Go through the dining room, where you will meet the first group of enemies, then go up to the residential apartments and enter the first door on the left. This is apartment 01. You will find three rooms. On the left side of the main room, next to the first aid kit, there is a computer. Enter the room on the right and find a safe that can be opened at Novice Level.
Leave living room 01, go to the rest room on the right and find a weapon rack on the west side. Continue down the hallway to Lab 01. Before entering, look to the left to find ammo boxes and a first aid kit. After entering Laboratory 01 you will find even more pirates. Clear the bottom floor and go to the stairs in the southeast corner. Before you go up, go into the room on the right, where there will be a computer and a weapon box.
On the second floor, head east and visit Research 01. Search another weapon crate and a health kit hidden behind the door. Continue east, but stop at the pharmaceutical laboratory to the right of the door. Craft any items you can. There are materials on the table on the left side. When you’re done, head north to Research 02.
As soon as you open the door, you will see a first aid kit. There are also pirate pirates in this room that you’ll have to deal with. After entering the room, on the right side is the testing department Testing 01. You need to unlock it, and this can be done with a master key at the Novice level. If you successfully unlock the door, find the Haydn Wynne Project terminal in the far corner, as well as a safe and an ammunition container.
Dr. Wynn, Emergency Medicine 1 . Go upstairs and enter the office to find another computer and a text journal on the left. On the right side of the door you can find an ammunition box that needs to be opened.
Dr. Wynn, ER 2. Bonus Objective: Open the safe. Before you go up the stairs to deal with the Crimson Fleet captain, you can open the safe (Novice level). There is also another text log on top.
A conversation with the captain of the Crimson Fleet can end in different ways. You can use persuasion and resolve the situation peacefully, or you can fight him. I recommend killing the captain to get additional loot. When you’re done exploring the base, return to the ship. Your next destination is Jamison, where you will meet the Constellation and visit the House. To travel to Jamison, you will have to make a gravitational jump into the Alpha Centauri system. Make sure you assign some of your ship’s power to the gravity jump or GRV column in the bottom left corner of the screen.
Advice . Use the mission menu to quickly move. Open the mission menu, then select the current mission to track, click on Set Course to automatically go to your destination.
New Atlantis
To land on New Atlantis, you will have to undergo inspection for the presence of contraband. If you are in possession of contraband, you will be arrested. Therefore, before visiting some cities, it is advisable to get rid of contraband.
Additional task: talk to the mechanic. Once you arrive in Jamison, you can talk to the mechanic. He’s standing on the ramp that leads into Jamison. Be sure to visit him, discuss repairs, modernization and the place where you can hire a ship crew. He will also tell you where you can sell your loot.
Advice . To the right of the ship’s engineer in Jamison is the Trade Authority stand. Trade offices can be found in most major cities, and with their help you can sell unwanted items. Each stand will have a limited supply of credits, which is renewed each time you visit again. You can also sell loot directly from the ship without taking anything out of the cargo hold: just switch to the appropriate inventory.
When you’re done selling your loot and talking to the ship’s mechanic, head to Jamison. You need to go to the UC checkpoint, turn northeast to the station and take the subway to get to the MAST area. Upon arrival, head to the marker to the east to reach the House.
Advice . Use the scanner to navigate. When you open the scanner, if there is a direct path to the target, it will immediately appear as arrows on the floor.
Walk up to the House to automatically use the clock and get inside. Go to the next door to find yourself in the library. You will see several people, and potential companion Sarah Morgan will start the conversation first. She wants to know why Barretta hasn’t returned. Explain to her what happened to the Artifact and Barrett on Vecter. Vasco will confirm this information. When you complete communication with Sarah, find out about the Constellation and search for Artifacts. As you approach the center of the room, you will find Constellation Guide 01 for leveling up your skills.
Go to the console in the center of the hall and install the Artifact in it. The mechanisms will begin to move: the artifacts located in the console will begin to react to the new one. The Constellation members will then share theories and discoveries, after which Sarah will ask if you are ready to get to work and go after the rest of the Artifacts.
Next, you can talk to Sarah and learn more about the Constellation and what this organization knows about the Artifacts. When you complete the conversation, you can further explore the House by completing the first story mission.
Reward : 8000 credits, House key, Constellation set.
The Old Neighborhood
First, talk to Sarah Morgan. Her friends track any strange metal objects in different parts of the galaxy. There’s a tip from UCLA and she wants you to accompany her. When you are ready to continue the mission, Sarah will become your companion, and you will not be able to fire her until the mission is completed.
Leave the House and move southwest to the MAST building. Inside is the training center of the UC Vanguard faction and commander John Thual. During your conversation with John, he will offer you to become part of the UC Vanguard, which will trigger the side quest Supra Et Ultra. By completing this mission, you will unlock a special suit, a booster pack, and be able to buy new upgrades for the ship. Moreover, by completing the side mission Supra Et Ultra you will gain access to a combat simulation. This is not only good practice for space battles, but also a chance to once again reinforce the basics of piloting.
Cydonia (Mars)
Sidonia is located in the solar system, on Mars. The moment you land, you will again be screened for contraband. Land in Sidonia and head to the northeastern part to reach the mining colony of the same name. Proceed to the Sidonia Central Hub. Go to the right through the plastic partitions to reach the bar in the southern part of the Central Hub. When you enter the first door on the right, look to your left and you will see two terminals.
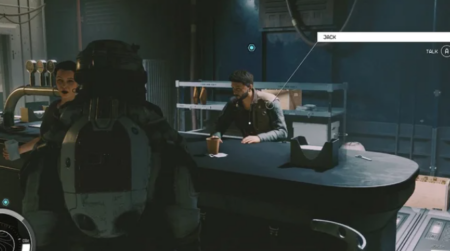
To the left is the Sidonia Mission Council. Here you will receive rewards, be able to deliver cargo or complete research missions. The terminal on the right is a self-service kiosk for completing contracts. There you can cancel any wanted notices by paying fines. Go down the stairs to the southern part of the room where the bar is and talk to Jack about Moar. The man does not want to share information until you pay off his debt of 2,500 credits or cannot convince him.
Advice . Let Sarah put pressure on Jack and the woman will accuse him of lying.
If you fail to collect money, you can collect rewards, complete research missions, or deliver cargo from the task board. If Jack can be convinced, there will be no need to pay, and he will provide information pointing to Venus.
“Gabby’s Request” note. Before leaving the bar, go to the toilet on the left and open the left stall. There is a text journal lying on the floor.

Leave Sidonia and return to the ship. To get to Venus, you won’t have to leave the solar system. You need to move to Venus in the lower right corner. When you approach the planet, Sarah will speak to you. She will offer two options for traveling to Venus, as she will notice a cluster of ships of the Fanatics of Va’Ruun. You can try to approach them directly, but it will be a difficult battle, or alternatively go to the UC satellite on the right, next to the ships. To get closer to it, you need to turn off the ship’s power.
Advice . By turning off the ship’s power, you can operate covertly. To get close to something on the ship without being noticed, turn off all systems except for a few bars on the Engines gauge.
Whatever you decide, you need to approach the satellite beacon and aim at it. Being within a distance of no more than 500 meters from it, you will be able to download data. After reading the satellite data, you will learn that Moara went to Nova Galactic Staryard for emergency repairs. To get to Nova Galactic Staryard, travel to the Moon in the Solar System, which is located in the north. To the left of it is the Nova Galactic Staryard.
Nova Galactic Staryard (Луна)
When you approach him, Sarah will speak to you again, and you can find out from the woman what happened to the Earth. After the conversation, aim at the Nova Galactic Staryard and fly closer. You can dock with star stations and ships that are moored to them. You need to get within 500 meters before a docking prompt appears. Once you dock at the Nova Galactic Staryard, you can board the ship to find clues about Moar. When you enter the first room, you will find a locked door on the left that can only be opened after reaching the Advanced hacking level.
Go through the door to the north to reach the Nova Galactic Staryard. First, go northeast to the dining room, and in the far northeast corner, near the kitchen stove, find a container. Exit the cafeteria and go east to the conference room, where you will find two enemy groups fighting each other. Clear the area and go right (south) to the medical bay. After clearing the area, you will find a door on the right side, which can only be opened at the Advanced hacking level. Make a note of this location, then go left, through the doors to the north.
Side quest “Mantis”. You can open a secret outpost! Search the corpses and if you find information, be sure to read it to start the side quest “Mantis”.
Go left and grab the items from the first aid kit, then go to the room to the northeast. When you enter the room, look at the sink on the right to find the Search and Rescue key. With its help you can open the advanced level door from the medical bay. Return to this door and use the key to reveal a weapon rack and a first aid kit. There is a container in the room on the right.
Return to the main area you entered when you first visited this place, and then turn right to get to the sick bay. Now go north to the control room. To begin with, it is best to clear the area, but before entering the control room, follow the left side to the Security department. Here, look for a weapon rack and a first aid kit hanging on the wall to the right. On the left, find boxes of ammunition lying on the shelves. To the left of the weapon rack there is a door that can be opened with master keys. Inside is a box with weapons and ammunition.
Continue to the control room, kill the enemies, go up to the second floor and go west to reach the workshop. When you go through the first door of the workshop, you will most likely encounter many enemies. One door leads to the left, the other to the right. It is possible to open the door from the left side (Novice level), so if you have lockpicks, start there. In the room there is a container with resources and a box with ammunition. Then go through the door on the right and enter the office. In front of the first chair as you enter the room is Nova Galactic Manual 02.
Follow the right and go down the stairs. You will encounter enemies, so take your time and gradually clear the area. What you are looking for is on the lower level of the ship. Find the tablet on the table in the center. In the eastern part of the ship there is also a pharmaceutical kit and a container with items.
Neptune
Once you receive the tablet, your goal will be updated and you will have to go to Neptune. When you’re ready, leave Nova Galactic Staryard and return to your ship. Having finished exploring this place, return to the Frontier and undock. To find Neptune, stay in the solar system and fly to the upper right corner. Set a course for Neptune, and you will soon see Moara’s ship drifting in the distance. Fly towards Moara’s ship and when you get close to it you will be attacked. Moara will report that it was not his fault, since the ship was captured. While they’re firing at you, demonstrate your space combat skills and dodge flying projectiles. Destroy the shields with laser weapons. When you do this, fire missiles and ballistic weapons at the ship’s engines. Once the ship has received enough damage,
Fly to the ship and dock with it to board. Once on board, prepare for battle. There are five enemies in total, and each will attack you as soon as you enter the eastern door. Follow the hatch to find Moar in the cabin. Talk to Moara, who will happily give you the Artifact. The object is located in zero gravity behind Moara, on the right side of the cabin. After collecting the Beta Artifact, return to the Constellation hideout and install the item.
After completing this quest, you will become a full member of the Constellation, after which three new quests will be activated, which can be completed in any order:
- Return to Vectera.
- The Empty Nest.
- Into the Unknown.
If you talk to Sarah again and ask where she recommends starting, she will suggest finding Barrett first. We are talking about the mission “Back to Vectera”, so we recommend going there. Sam Coe, who starts the Empty Nest quest, is in the Lodge garden, so you can talk to him before starting the Back to Vectera mission.
Rewards : Constellation costume, Constellation space helmet.
Back to Vectera
When talking to Sarah at the end of the previous mission, she recommends completing this task next. First you need to find Barrett. To return to Vectera, open the Narion system and land at the Argos Extractors Mining Outpost. When you do this, you will meet Lin. You can ask where Barrett is, and she will tell you that even more pirates have appeared since you left.
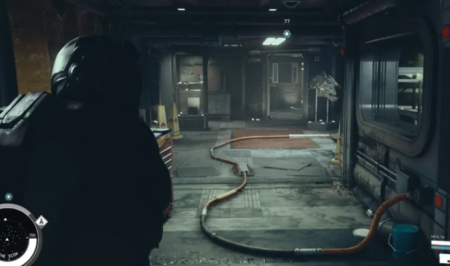
Your job is to find Heller and Barrett, but Lin can’t track their location. To find the communications computer, go to the orange hatch to the north and open it. Behind the hatch, go right and enter the first room. Move to the end of the compartment to find the desired door on the right hand.
Trackers Prime 05 . To the left, to the northwest, there is another vault door that you can interact with. Enter the second room on the right and pick up the collectible.
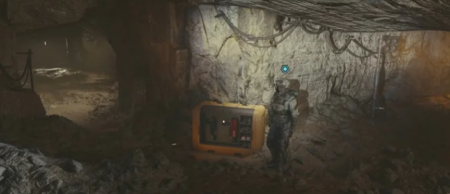
There is also a container on the left. After searching the area, go to the room with the communications computer. Open the room using the control room key and try to interact with the computer, but find that it is disconnected from power. To turn on the computer, you need to find 3 power elements. Three markers will appear indicating their location. They are all located outside the control room.
Go back outside and interact with the robot to pick up the first power cell. Then talk to Lin to get the second one. The third can be found inside the infirmary table where you woke up at the beginning of the game. There are other energy cells that you can pick up – on the table next to the robot, in the break room and in the storage room. By turning on your computer, you can read the emergency message from Barrett and Heller. As soon as you receive the data, give it to Lin and tell her everything you found out.
Bonus Goal: Recruit Lyn to join your team. You will receive information on where to go, and while Lin is waiting for evacuation from Vectera, she is ready to help with the search for her missing comrades. You can recruit Lyn and she will join you on the Frontier.
Altair 5
Travel to the Altair system to get to Altair V. Land at the site of the crashed ship. As you approach the marker, you will find a wounded Heller lying on the ground to the right of the ship. Talk to him about the crashed ship, after which he will say that Barrett was captured by the Crimson Fleet. He will hand over a tablet with the message Emergency Transmission 02, which will allow him to track down Barrett. You can also hire Heller to join your team.
Bessel 3
Open your inventory and scroll down to the Notes section to find Emergency Transmission 02. Once you’ve examined the note, you’ll be prompted to head to Bessel III. The planet is located in the system of the same name. Land at a looted research outpost. As you approach the plundered outpost, you will discover traps set by pirates (including mines). When you get inside the outpost, you will have to destroy the turrets and other defense mechanisms. Find a satellite dish with pirates in the northwest corner. Use long-range weapons (if available) to eliminate them without having to climb up. However, there is a box with ammunition and a container with resources.
Once you clear this place, go up to the first floor of the tower in the southwest. Go down the stairs and find another container in the western corner. To the east, to the right of the computer desk, look for crates with weapons, ammunition, a container and a safe, which can be unlocked in the Novice level. Climb to the top of the tower in the southwest. Search the container, ammunition boxes, workbench for spacesuits, first aid kit and examine the computer (advanced level of hacking).
Orders to the Crimson Fleet . Go to the northwest corner of the room, to the computer and monitor on the wall. To the right of the computer there is a note that you can pick up.
Travel to the Crimson Fleet Outpost objective marker to get inside. It is worth noting that the door on the left will be locked and can only be unlocked at an advanced level. After making your way inside the Crimson Fleet outpost and going down the stairs, you will find Barrett communicating with the Crimson Fleet crew. There is clearly no danger to him, so you can spend time searching the containers on the left and right (boxes with weapons and ammunition, resource container).
You can also climb the stairs on the right and go to the end of the corridor to find two more boxes. When you’re ready, enter the room and fight the Crimson Fleet.
During a conversation with Matsura the Grim, a choice will appear:
- Pay a ransom of 4,000 credits to free Barrett.
- Convince the Crimson Fleet to release Barrett.
- Allow the interlocutor to conduct a dialogue and offer money.
Matsura won’t drop anything special, so you can try to free Barrett during communication or use your companion to pay off the debt. Thus, Matsura informs the rest of the Crimson Fleet that they can leave Barrett alone. Once Barrett is safe, return to the Constellation hideout in Jamison. Enter the library and wait for Barrett to appear. Let him talk to all the members of the Constellation, and then talk to him separately.
Reward : 6000 credits.
The Empty Nest
You can find Sam outside the Constellation hideout. If you look at the center of the room when entering this place, the garden is on the left side. Sam will communicate with his daughter Cora. Talk to him: he will tell you about the expedition and ask for your help. To get to Aquila City, you need to go to the Cheyenne system.
Gravity jump limitations. If by now you have not encountered restrictions when using gravity jumps, most likely you will learn about them right now. Due to the distance, you will not be able to travel directly to Cheyenne from Alpha Centauri. As you plot your course, you will see areas that are out of range highlighted in red. To get to them, you will have to make additional stops at the systems closest to the route. In this case you need Arana/Olympus.
Aquila City
When you talk to Sam in Aquila, he will become a temporary companion until the end of the quest. When you’re ready to continue, say this to be taken to Aquila City. The cards Sam is looking for are in the GalBank vault, so follow the man. When you try to enter, you will be stopped by the Aquila city guard. There is trouble at the Galbank vault and you are advised to stay away from it, and the guards recommend avoiding her unless you can offer a helping hand.
Complete the Jobe Gone Wrong side quest right now. This side mission can be completed before the main quest if you visit Akila earlier and not during the story. All additional quests will be described in more detail in a separate guide.
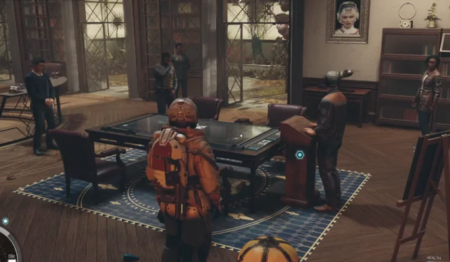
Once you’re inside Galbank’s vault, go down and find the cards with Sam. Sam will give you the key to the bank and you can check all the safes. One of them contains a note for Sam. Once you receive the note, talk to Sam and find out about Jacob. Head to the Coe Estate, which is located in the eastern part of the city. Once you’re there, let Sam and Jacob chat with each other. Talk to Jacob and try to convince him to give up the cards.
While Jacob guards the cards, you and Sam can talk privately and figure out a way to get them. There are three options for the development of events:
- Try to talk to Jacob and convince him.
- Have Sam distract Jacob while you steal the cards.
- Use Cora’s help.
Sam won’t like it if you use Cora, so your best bet is to try to convince Jacob, and if that doesn’t work, ask Sam to distract the man, and then pick the lock in the room he’s guarding. If you focus on talking to Jacob about Solomon’s legacy and convincing him that Sam is following in his footsteps, you may be able to convince Jacob to hand over the office key. After picking the lock or getting the key, enter Jacob’s office. The cards are to the right of his table.
Tell Sam, who will then study the maps to determine exactly where the Empty Nest is located. You can go there by your ship or walk there from Aquila City. If you plan to walk, then after leaving the estate, move northwest and find the steps leading to the lower level. Open the door and exit the city on the east side. Once you’re through the gate, head southeast to reach the Empty Nest.
The empty nest is guarded by members of Shaw’s gang. There are also turrets and robots. If you approach this place from the southwest, which is quite likely, and move on your ship, you will probably come across mines. If you enter without stealth, focus on destroying the turrets and robots first, as they do the most damage. When exploring the area, check the houses in the northwest and head to the building closest to the stairs leading to the goal. Go to the left side and in the last locker on the right hand look for the text magazine “Show Gang, Welcome”. You can also open ammunition boxes.
Once you’re done searching, head northeast to the marker to enter the Empty Nest. Once inside, you will encounter other Shaw bandits. Shoot the explosive containers. Continue east along the path until you reach a small camp where you can find a cache of contraband (Expert level) as well as several crates of weapons and ammo. Immediately behind the cache of contraband, on the table, look for the key to the Shaw gang’s cave. Move further to a locked metal gate that can be opened with the Shaw Gang Cave Key. Follow the cave to the marker until you reach the Artifact. Carve it out of stone. You will receive a Qi Artifact.
Escape the Empty Nest to encounter Shaw’s gang again. There are three options for the development of events:
- Conviction
- Bribery for 4000 credits
- Attack
In any case, Ashta will appear. If you persuaded or bribed the Shaw bandits, you can finish off Ashta with them. Return to the Constellation with Sam and enter the library. Add the Artifact to the rest of the collection, then wait for Sam to appear and talk to him again.
Rewards : Modified Calibrated Rattler weapon, .27 (30) caliber, 7200 credits.
Into the Unknown
Important note about the locations of this quest. In this mission, Vladimir will send you in search of Andrea, and the locations will be random. You’ll be given information about two areas to explore, and the planets you’ll be sent to will be random for each player and playthrough. It seems that in each case you are visiting some kind of cave, but Artifacts will be in both locations. Due to the random placement of the planets, it is difficult to provide a step-by-step description of this task. Thus, I will not describe the first location, but will focus on the second, where you will find Andrei.
So, for example, the first planet I was sent to was Piazzi IV-C. And the random landmark to visit could be anything from an abandoned cryogenic laboratory to a bandit-occupied mine. Wherever you end up, you will follow the marker and receive the Zeta Artifact. In my case, it was a cave with many boxes and objects, as well as first aid kits. The artifact was found in the back.
On the second planet, I visited the abandoned Nirira mine, where I met Andrea. In the western part of the mine there was a passage deeper into the cave. As soon as I got there, I met Andrea fighting with enemies. Near Andrei’s location there were boxes of weapons and ammunition. There was also a computer with which it was possible to recalibrate the robots so that they either could not fight or continued to fight, but on my side.
Once you enter the cave, you will find several ecliptics. With Andrea’s help, you need to clear the area or sneak past them to the back of the cave to get to the Iota Artifact.
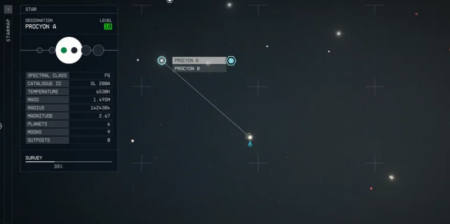
After receiving both artifacts and meeting Andrea, return to the Constellation and talk to Matteo. Leave Jamison and return to Vladimir on the Oko. Dock to the Oka and board to meet Vladimir and tell him the latest news. He will say that the scanner has detected an anomaly, which, in his opinion, is caused by Artifacts. To find the anomaly, you need to go to the Procyon system on Procyon III.
Procyon 3
When you land in an anomaly, you will be asked to open the hand scanner and look for distortions. To see them, point the scanner towards the anomaly. When scanning something, a perfect white circle appears on the screen. However, if you move in the right direction towards the anomaly, the white circle will begin to distort, glitch and diverge, and you will hear some noise. When you get close enough to the anomaly, a marker will appear, making movement easier.
The source of the anomaly is located in the Eta Temple east of the landing point. It is surrounded by water, but due to the natural origin of the planet, you should not dive into bodies of water, otherwise you will receive damage from the icy liquid. There are two ways to enter the Temple of Eta, and you will be directed to the nearest entrance depending on which direction you approach it from. When you’re nearby, you’ll see glowing fragments on the door. As you approach them, the mechanism will start moving, and you will be able to enter the temple.
How to solve the ring puzzle in the Temple of Eta
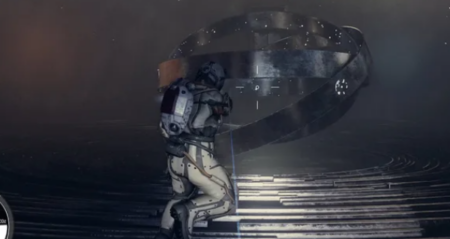
Upon entering the Temple of Eta, you will see metal rings in the middle of the room. They will rise as you move towards the center and begin to rotate around each other. You will also experience a state of weightlessness and be able to move up and down through the air. As you move up and down the room, concentrated clusters of stars will begin to appear. When you get close to them, you will also hear a ringing noise. To solve the puzzle, you will have to fly around the room, moving up and down and passing through clusters of stars. As they pass through these stars, the rings will begin to spin faster. The constellations will appear much earlier, so you will have to act quickly. If you miss constellations, the rings will slow down and you will have to start over.
The goal is to make the rings spin as fast as possible until they start moving out of control and then line up to create a portal. Go through it to unlock a special power. The special power from the Eta Temple is the Anti-Gravity Field. Return to Constellation and talk to Vladimir. Try out your new skill and show it to Vladimir and other members of the Constellation. Now that you have found the artifacts, special power and the first Temple, you can find other temples by starting the side mission “Power From Beyond”.
Rewards : map update, 2 medical kits, 9500 credits.
All That Money Can Buy (Everything that is sold for money)
Walter will report that he has arranged a business meeting on Neon with the seller of one of the artifacts. You must accompany Walter so that everything goes according to plan. Board your ship and travel to the Volia system to find Neon, located on Alpha Volia. Once you get to Neon and land, ask Walter more about the planet. The destination is the Stroud-Eklund headquarters, which must be visited to complete the authorization procedure (only after this can you conclude a deal with the seller).
Make your way to Stroud-Eklund’s headquarters, located in the eastern part of the city. Take the elevator to meet Walter and his partner Issa. After the conversation with Issa, you will need to prepare for the meeting, which will take place in the Astral Living Room. Walter asks to make sure the place is safe and check on the seller.
Since the Astral Hall is located near Stroud-Eklund’s headquarters, let’s go there. Talk to bartender Boone Morgan about security measures in the Astral Hall. He will recommend a VIP package. You can pay 4,000 credits for it or convince the man to give him a discount. Tell them that Stroud is coming here.
Once you get the discount and pay for the VIP package, go upstairs to the Astral Lounge and interact with the computer. You can easily unlock it (beginner level) to learn more about remote door control in the VIP lounge. According to the log information, this function can only be used once. Return to the western part of town and go to Newill’s Goods to talk to James Newill. He has information about the seller. You can ask him about the meeting he arranged with Walter Stroud on behalf of the seller. As always, no one will provide information for free, and you will have to pay 2500 credits or use persuasion to save your money. No matter how you get the information, you will know that the seller is staying at Sleepcrate One.
To find this flophouse, exit Newill’s Goods and follow the door next to the Trade Authority sign to the south that says Ebbside. Follow the objective marker to find Sleepcrate One, then go inside. Look on the shelf on the right to pick up a Termination Notice. Then go to the seller’s computer. Next to the toilet you can find a Galbank Statement magazine. Open the seller’s computer to find private communications between Musgrove, the seller, and a third party. Apparently Musgrove is desperate for money, so be sure to let Walter know.
Return to Stroud-Eklund headquarters and meet with Walter. Move with him to the Astral Hall to complete the deal. When you get to the right place, Walter will tell you that he doesn’t know the seller’s appearance, so first you need to look around. The only clue you will get is that the seller has a much larger briefcase than usual, and to successfully contact you you need to use the code phrase “Ramsey and Travers”. There are many NPCs with cases in the living room, but if you go to the back area closer to the bar, you will find a man near the wall with a large suitcase under his feet.
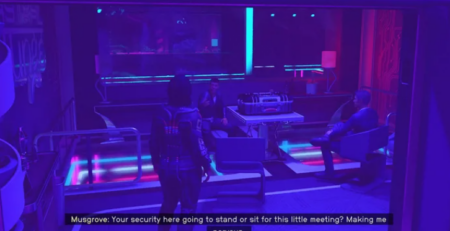
Talk to him, return to Walter and tell him that you found the seller. Walter doesn’t care how much the seller asks, because the main thing is to get the artifact. Go to the seller, stand next to him or sit down. Apparently, if you sit, the seller will appear less stressed. He will ask for double the amount, and you can convince him to accept the original offer, close the doors so that he cannot leave, or take away the artifact.
When you try to leave the Astral Lounge, you will be stopped by Slayton’s agent. Attack him or convince him to avoid bloodshed. You can also signal the security service on Neon. If you choose the latter option, the guards will intervene and drive away Agent Slayton, and you will be free to leave the Astral Living Room. If you try to use Persuasion and fail, a firefight will begin, but you will also receive an additional reward if you successfully complete the fight.
When you go down to the lower part of the Astral Living Room, you will find Issa near the exit. She will tell you that Nikolaus Slayton has placed a reward on your and Walter’s heads, so you won’t be able to leave without problems. To get to Slayton Aerospace, return to the elevator you took to the Stroud-Eklund headquarters. In a conversation with the secretary, you can convince him to let you go to Nikolaus Slayton or attack. Use persuasion and tell him that Nikolaus is waiting for you.
Once you have access to the elevator, go up and talk to Slayton. Unfortunately, Slayton will stop the elevator, and you will have to communicate with him through the intercom. Issa will join in and explain that she paid one of Slayton’s guards. She will tell you how to get through the ventilation system and go up to the next floor. After Issa helps you through the Slayton Aerospace headquarters, you will find yourself at the top, outside the building. The area is patrolled by numerous Slayton security guards. Sneak past them or kill each one to go even higher. Follow the roof and use the stairs at the very end. After that you can climb to the very top.
Move to the eastern part of the roof to find a door that will allow you to return to Slayton Aerospace headquarters. You will soon enter Nikolaus’ office. You can attack him immediately or talk to him and try to come to a peaceful agreement. If you decide to make a deal, Walter will talk to Nikolaus, offering some kind of compromise. Slayton will then ask what to do with Musgrove. You can decide what happens to Musgrove.
Note: If Andrea is in the party, you will receive her disapproval if you offer to let Musgrove go. She wants to hand him over to the authorities.
Go to the office, find the wounded Musgrove and talk to him. You can send him to prison, release him, or kill him. Walter asks for leniency, and even Slayton agrees. Once you’ve taken care of your business at Slayton Aerospace headquarters, you can return to your ship. When you try to leave Neon, Walter will talk to you, completing the task. After leaving Neon, you will have to return to the Constellation hideout. As soon as you try to do this, a certain Helix will approach you and order you to give up the artifact. You will learn that he represents the Bornstellar community and will advise you to stop searching for artifacts. In the middle of the conversation, Walter will inform you that you can make a gravity jump to hide from Helix and complete the task.
Staborn
When you try to leave planet Neon as part of the previous mission, you will encounter a mysterious stranger who will offer to hand over the found artifact and stop trying to find the rest. You can return the artifact to him or make a gravitational jump. Whichever option you choose, you will have to return to Constellation Headquarters to complete the task. After landing, you will be asked to talk to Noelle. You can share with her information about the Born Stars and meeting a stranger. Attend a Constellation meeting and listen to what community members managed to gather.
After the meeting, talk to Sarah. At this point you will be able to give your opinion on who you agree with and who you think Bornstellar might be. The final part of the task is to install the artifact in an empty slot.
Reward: 5000 credits, Calibrated Constellation Space Helmet.
While in the Constellation, talk to Vladimir. He will say that he has found additional signals indicating the location of additional artifacts. At this moment, random will work, and the player will be taken to a random planet, where Vladimir will send him. For this reason, it is difficult to provide a description of the planet you will end up on and tell you where to look for artifacts. So I’ll just describe where Vladimir sent me.
The first planet that Vladimir sent me to was in the Tau system, Ceti VI. There it was necessary to visit an abandoned cryology laboratory, and the artifact was hidden in the cave below it. At this point, the Bornstellar will appear and you will have to fight them. Killing Bornstellar will reward you with Quantum Essence.
The second planet Vladimir sent me to was Indum IV-D. After landing at the Abandoned Mech Graveyard, I headed to the Scavenger Burrows. There was nothing else in the huge cave other than the artifact located at the back of it. As I approached the artifact, Bornstellar reappeared. Having killed him and received the quantum essence, all that remains is to pick up the artifact and return to the ship.
When you receive both artifacts, return to Jamison and add them to the Constellation collection. As Artifacts are added, Matteo will report that he worries about the true motives and goals of the Constellation. During this conversation, you can side with Matteo or Noelle, or choose a neutral position. Vladimir will interrupt the conversation and report that Oku needs to upgrade its equipment in order to continue working. The task will be completed.
Reward: 7200 credits, stealth stimulator (2), 750 experience points.
Short Sighted
When you arrive at the Eye, new markers will appear. You need to interact with Sam Coe, Barrett and Sarah to complete the task. You can find Sam on the right side of the ship, near some panels. To help him, use the welding device to the left of the man. Barrett should be looked for slightly to the left of the main part of the Eye. Use the computer to the right of it to test the software.
Sarah is also in the main part of the ship, right behind Vladimir. She will ask for help with the wrenches, which are located to the right, on the table under the two monitors. Unfortunately, the renovation will not go according to plan. While the Eye is being repaired, Vladimir will offer to find another Artifact, starting the next task.
Reward: Semimetal Wafer, two Tau Grade Rheostats, Microsecond Regulator, 700 experience points.
No Sudden Moves
Talk to Vladimir to find out where the next artifact is. He will tell you about Captain Petrov. To find it, go to the Procylon A system and look for “Scow”. Once you get in touch, you can choose how to get on board. The first option is to attack the ship. This approach is possible, but only on the condition that you are distracted from the main storyline and have significantly improved your ship through optional activities.
Another option is communication. You may be able to use persuasion or the help of one of your companions. Sam Coe was with me on this mission and he was able to negotiate, stating that we had one-of-a-kind sail parts that would be of interest to Petrov. If you boarded the Scow as a result of making a pact with Petrov, activate the airlock and open the hatch to enter the ship. Go up the stairs. If you hang around and search Scow, you can find some items. However, some of them will have a red mark on them, indicating that taking them will be considered stealing. All items without red tags can be picked up for free.
When you get to the main part of the ship, talk to Tao Xun. Ask him about Petrov’s collection and the “special stone”. However, he will not share much information, adding that Petrov has a special key to his collection, and you have practically no chance of getting it. Go north, up the stairs and open the door. There are many cabins on the ship, but most of them are locked and most of the items are red. Now it’s better to focus on finding Captain Petrov.
After going through the door, turn left and go up the stairs to the north. You will come to a corridor with an orange pipe on the floor. Follow the pipe to the upper levels of the ship and go north. You’ll come to a room with guards, statues, and glass display cases on either side. Petrov is at the end of the hall, and a bodyguard stands next to him.
Approach Petrov and talk about the artifact. Again, during the conversation you will be able to choose one of three options:
- Attack Petrov.
- To suck up to Petrov, praise him for such a wonderful collection and declare that you are his fan.
- Talk directly about an artifact from the collection.
Given his personality, flattery is a great option. After that, try to convince him to show you his collection. Try to say that his collection is not that impressive, but insist that he can prove otherwise. Soon the man will agree.
Follow Petrov to the vault and wait for him to open it. And again there will be a choice of what to do next:
- Offer Petrov money for the artifact.
- Say that the artifact contains power that it does not deserve.
- Attack.
Whichever option you choose, Petrov will decide that you are a pirate and will threaten to put a bounty on your head if you touch the artifact. In general, you will have no other choice but to steal the artifact. If you do this, Petrov will attack you. You could attack him first, but if you pick up the artifact first, Petrov will attack you, but will give up after a few hits.
At this point, you can attack him again or ask Petrov to give an order to his guards so that they do not touch you. If you decide to spare Petrov, you can search the ship and take whatever you want. In the same room where the artifact lies, in the northwest, near the door through which you entered here, there are boxes with weapons. Go up to the next floor and, following the corridor to another set of stairs (towards the east), look for a loot container on the right.
There is a Novice level door just before the stairs on the left. Hack it and go inside to find another locked door (expert level required). To the right of it is a workbench for a spacesuit. Go to the end of the living rooms, look in the bathroom and find the key for the Scow subweapon next to the sink.
Climb the stairs and move back to the main room where you met Petrov. Go through the door on the right, open the white partition on the left (south) to enter the bedroom. You can find two plush toys by the bed. These are special toys that make noise when you pick them up (Easter eggs). In the southeast corner of the room, you can open the white partition to reveal an office. Search the contraband cache (expert level) and take the rare rifle from the wall. On the left, next to the computer, you can find the key to Petrov’s vault.
Head back through the main room and down the stairs, following the orange pipe. After going down the first flight of stairs and turning south, you will pass a first aid kit on a white table. Go down the other stairs and look to the left for a storage room. There is an ammo box here and a round door to the right. It leads to the next apartment. Check the two bedrooms and the common area to find a weapon rack, ammo boxes, resource containers, medicine and first aid kits.
Leave the living room, go down the stairs on the right to get into a storage room with many boxes of ammunition, racks of weapons, and so on. There is also a weapon workbench here. Climb the stairs and go to the exit marker.
Once back at the security office, you can go left and go inside. Head to the first door on the left side to find a computer that controls the Scow docking. On the table on the right is the Scow security key. When you leave the room, go to the left, turn left and find another storage room filled with useful boxes.
Leave the security office, go down the stairs to the beginning of the ship and return aboard the Frontier. Your next goal is to deliver the artifact to the Constellation. The only problem is that there is a bounty on you, and you can’t just land on Jamison. You need to either post bail or land on Jamison and surrender to the security forces. If you surrender, a side quest from UC Vanguard called Deep Cover will begin.
Once you manage to return to The Lodge after receiving a reward or starting Deep Cover, add the Artifact to the collection to wrap things up.
Reward: 750 experience points.
High Price to Pay
When you approach Noelle, she will say that there are some problems at Oko, and a message will come from Vladimir that they were attacked. There will be a choice: stay and protect the Constellation shelter or go to the Eye and help Vladimir. If you decide to stay and defend The Lodge, you will accompany Noelle through the basement to the well. The Hunter will continue to pursue you as you make your way to your ship through New Atlantis. The constellation will help in confronting enemies, giving Noelle enough time to retreat. Then you will have to rush to save Walter. If you deal enough damage to the Hunter, he will run away, and then send a message saying that no one has ever challenged him so seriously before. If you stay in the Constellation, help everyone and you can go to the Eye.
If you decide to go straight to the Eye, when you try to leave, one of your companions will approach you and inform you that you will not be able to return inside because the door will be locked. When you get to the Eye, you will find wounded members of the Constellation and Vladimir. One of the companions will be seriously injured, but if you visit the Eye, you can save him. Once you’ve checked everyone out, you’ll have to head back to The Lodge. You will find many dead bodies and wounded allies. Noelle will run away – you can find her in the Well, but you will still have to help her leave the city and return to the Eye.
No matter at what point you visit the Eye, you will need to talk to Noelle at the end. Vladimir will offer to move the artifacts to another location. If you decide to build a place for artifacts on your ship, in the future you will be attacked by opponents more often. Basically, you will make your life more difficult. If you build Armillaria at an outpost, you will first need to build the outpost itself by going into construction mode. A new category of quests will open. Whichever option you choose, add all the artifacts you find to this place.
After this, return to the Constellation base to talk with Matteo, who remembers the word “Unity” heard from the Hunter. Matteo has heard this phrase before and suggests heading to the Sanctum Universum to find out more.
Reward: 11,800 credits, Calibrated Constellation Pack, 800 experience points.
Unity
Head west from the Lodge to find the Sanctum Universum in Jamison. Find the waiting Matteo and Guardian Aquilus. If you have the Raising Universal trait, additional dialogue options will appear and you will be able to ask for advice. You will also gain access to a chest inside the hideout – to the right of the room that Guardian Aquilus and Matteo will enter. Inside the chest are three volumes of Sanctum Universum Vol 01, Sanctum Universum Vol 02 and Sanctum Universum Vol 03.
Go to Matteo and Guardian Aquilus in the Sanctum Universum hall and discuss all topics, including the Bornstellar, artifacts and Unity. Guardian Aquilus will tell the story of a pilgrim who met the founders of Varuun and the House of Enlightenment. The House of Enlightenment can be found in the Well. Talk to Andy Singh about Guardian Aquilus, Unity and the Pilgrim. Head to the UC Building in Jamison to find the imprisoned Va’Ruun. Ask about the pilgrim and the prisoner will tell the story of the Unbeliever. Guardian Aquilus will put together all the information received and point to the pilgrim’s resting place.
Indum II can be found in the Indum system of the same name. Once you arrive on the planet, you can land directly at Pilgrim’s hideout. Go to the marker in the southeast, after which you will have to find clues about Unity. Your task is to collect four pilgrim notes that contain the necessary information.
When you approach the shelter, go to the tent on the left side to find a white box with the first pilgrim’s diary (on the left hand). Then head southeast, past the Caelus Pokeweed. Behind the plants is another building. In the northeast corner of the building, look for a container with supplies, on the left side of which there is a third diary. Turn left again to go deeper into the building and see another container. To the right of it is an additional diary.
Exit and go to the building on the right as you enter the haven. Search the boxes with weapons and ammunition, the first aid kit and pick up another pilgrim’s diary. Having done this, open the door next to the first aid kit. Go to the table and find the fifth Pilgrim’s journal.
By collecting all the Pilgrim’s Notes, you will be able to get the answers you need to unlock the computer terminal. It is located on the right side, near the door opposite the table. To gain access to a locked room, you need to interact with the computer and answer a series of questions.
Correct answers to the questions:
- Question: If you came seeking the right answers, you will know what question to ask (If you came for the right answers, you should know what question to ask).
- Answer: What is the Unity? / What is Unity?
- Question: I return your question with a question. If you have read my writings, what is the burden of the people? (I will answer the question with a question. If you have read my writings, what is the burden of the people?)
- Answer: People are necessary. But people are madness. (People are important, but also crazy)
- Question: Who is your most formidable opponent? / Who is your most formidable opponent?
- Answer: Myself. / I myself.
- Question: Where does enduring contentment come from? / What is the source of lasting satisfaction?
- Answer: In stopping. In embracing compassion. (Stop, show compassion)
After this, you will be asked to search the room. The last fragment of the pilgrim’s diary is located on the right side at the entrance to the room. There are also supply containers here. If you look to the left, you will see shelves with a bag. Inside it lies Trackers Primer 02, which permanently increases damage from ballistic weapons. Be sure to read The Pilgrim’s Last Record, which states that the truth is hidden on Gila II, inside the Scorpion Sting.
Return to the ship and fly to the planet Gila II in the Gila system of the same name. It is located a little far away, so you will have to make additional gravity jumps. Once you reach the planet, follow the ruins to the south. You’ll see a pillar of light coming from what looks like Scorpio’s tail. Interact with the Glyph in front of it to activate the mechanism. You need to use the four circles on the glyph, which act as arrows, to move the light from the Scorpio sting until it reaches the beginning of the Constellation image. This is the leftmost star. After going to the last point of the Scorpio constellation, you will find the Hunter and begin the task “In Their Footsteps”.
Reward: 800 experience points.
In Their Footsteps
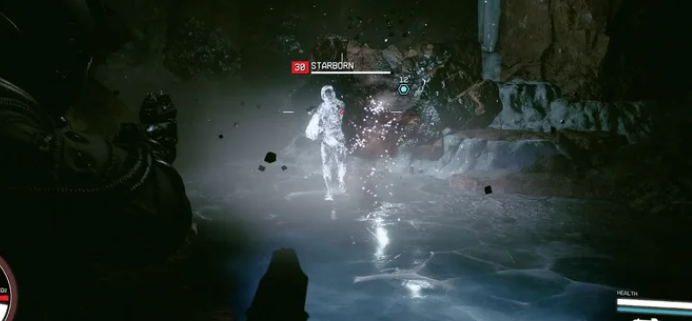
Talk to the Hunter and tell him that you were sent by Guardian Aquilus, who wants to learn more about Unity. The stranger from the Born Stars, whom we met earlier, will also be here. Dock to the Scorpius and head inside to meet Helix and the Hunter. Approach the Hunter and you will learn that Helix is the Emissary. You can talk with the Hunter and the Emissary about the attack on the Constellation and the Eye, and discuss the artifacts. Interesting details will emerge about who they really are.
After several conversations with the Hunter and the Emissary, which will reveal their identities, information about the Bornstellar and the Unity, you will be able to talk with the Emissary again. He will say that you must find out how dangerous the artifacts are. At this stage you will be asked to complete two tasks. One will help you understand the true power of Artifacts, and the other will help you figure out the nature of Unity.
Rewards: Mercury (6), Plutonium (8), Grease (3), moon base key, 750 experience points.
Missed Beyond Measure
Since you lost a companion in the High Price to Pay mission, it’s time to say goodbye to him. Talk to Noelle at the Constellation Hideout, who will ask you to attend the service. Go to your room and interact with the bed to start the service. When you wake up, you will find yourself in the main hall. Alternatively, you can skip the funeral service. Say a few words at the podium, after which the task will be completed.
Unearthed
After completing the mission “In Their Wake”, visit the Constellation to begin the Final Glimpses quest and complete the Missed Beyond Measure mission. Afterwards, go to the Moon. At the end of the quest “In Their Footsteps”, the Emissary will ask you to study the Moon, giving you the key to the lunar base. You can find the Nova Galactic Research Station in the Solar System, on the Moon, which is a satellite of the Earth. After landing, go to the northeast, where the station is located. You need to go through the airlock door, which opens with the same key to the lunar base. The door itself is on the right side of the station, sticking out from the tunnel.

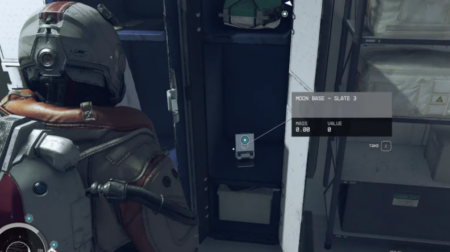
Once inside, head to the computer terminal with the marker. When you interact with him, you will receive two documents. The one you are looking for is Project Prism Launch. The goal will update and you will be asked to climb to the roof of the building. Before you go upstairs, turn around and look at the table opposite the one you just interacted with. In the far right corner is the Moon Base Slate 02. Picking up the item will unlock an additional objective.
First, let’s find the rest of the tablets. If you don’t want to be distracted by this, scroll down. Go north past the computers, enter the next room, turn left and look into the galley. There’s a Moon Base Slate 05 on the drying rack. Continue east and find the last room on the right, across from the dumbbells and punching bag. In this room on the right, look for Moon Base Slate 04 “No Pain, No Gain”.
Return to the first room, open the blue door to the east, turn right behind the door and go to the lockers. The first locker contains the Moon Base Slate 03 tablet. Continue north to almost immediately find the Moon Base Slate 01 tablet. It is on a box, and to the right of it is a supply container. Just past the crates, turn north and go up the stairs. Open the blue door to enter another room. You will find a Master-level box, as well as a container to the right of the computer. On the table to the left of the computer is another Moon Base Slate 06 tablet.
Once you collect all this, you can go back outside and go up to the roof to listen to the recording. Once played, you will be directed to NASA – return to the ship and find the NASA launch tower on Earth. When you find yourself on Earth, head northeast to the desired object. Approaching the NASA tower on the left side, look for a door that cannot be opened due to no power. Find platforms on the corner of the tower that you can use to climb higher:
When you reach the next level, look to the right, behind the pipes. Look for a power element among the rubble. Use it to open the door and search the boxes located in the room. Now go up and follow the tower to the north. Climb the stairs on the right and climb over the crates to the next part of the platform. On the left there will be a broken staircase leading up. Jump on it and follow the platform on the left side. You will reach another gap that you need to jump over. Follow the top of the stairs, go through the door and enter the next room to find a huge hole in the floor. Go to the left side through the door in front of this hole and cross to the other side.
There is an elevator in the distance, and you will be asked to find an energy source to launch it. When you approach the door, look to the left and follow the yellow pipe to a door that can only be opened with a NASA access code. Having done this, search the drawers and find the battery on the right. Use it to start the elevator. Return to the elevator and press the blue button to activate it. Once you’re inside NASA, follow the marker to the computer on the desk in the northern part. Open your computer, go to Access Station and select “Delivery From Mars”.
Go through the red-lit door to the north, drop down into the cave and follow the rubble-covered path until you open a door that leads to a room with various information about NASA and the history of space flight. Head to another red door to the north, look to the right and pick up Judith’s Personal Recording. Follow even further into the cave in the east, go along the corridor until you find a door on the right side with the inscription “Lab”. Open it and go inside. You will see a slope in front of you, going left and up. Climb it and find the next door to go through. Continue down the hallway until you find a hallway with three doors. You need to go through the door on the left side that says Secure Access, but first you have to turn on the power. To get the power cell, open the second door on the right (the first one is locked and requires an expert level to unlock it).
Find the container and take the power element. Pull the lever to power the door, then go through it and continue deeper into the cave until you reach a room with stairs leading down to a Secured Access door and a locked area just above. Go down to the Secured Access door and at the bottom of the stairs turn left to find the power cells. Pick up any of them and go to the northern part of the room to install the power cell in the power slot. Return to the Secured Access door and go through it. You will find yourself in a red-shimmering room containing various boxes. Go up the stairs on the left side and go into the back room.
Prepare to go through the large metal door on the right. Before you do this, be aware that the room is filled with robots and turrets, so you must enter it with caution. To begin with, you can lure out the robots to deal with them without pressure from the turrets. Head west to the door you need to activate. Go to the right through the other door until you reach the computer terminals and the power lever. Pull the lever, go back to the door and raise the shutters.
Continue deeper into the cave until you find the next computer, located in the office at the bottom of the platform. Run it and read the files. Go through the door south of the computer, open the next one and you will be taken to the stairs, where you will encounter zero gravity. Go down to the bottom floor and find the corpse. Collect the NASA Maintenance Key, then return to the second floor and go through the door on the right side to find the last computer. Read the files and click on the red button next to the computer to release the artifact.
Return to the stairs and go down to the floor below. Open the door and turn right to get into the room with the Psi artifact. As soon as you pick it up, you will be attacked by Bornstellar. You can either run back through the entire facility or fight every enemy. When you leave the NASA tower, you will be asked to talk with the Emissary. You can meet him and the Hunter to the east of the tower, from below. After speaking with the Emissary at the end of the quest, you will be given a choice:
- We agree that the Emissary is right, the artifacts should be protected and kept in safe hands.
- Side with the Hunter, declaring that whoever receives the artifacts first will gain incredible power.
- Abandon the paths of the Emissary and the Hunter.
The choices you make during this mission will affect what your battle will be like at the end of the mission. If you side with the Emissary, you will team up with him against the Hunter. If you side with the Hunter, team up with him against the Emissary. If you refuse the offer of both characters, the battle will be the most difficult, since you will have to confront both. Despite completing all mission objectives, there is one thing left to do – complete the Final Glimpses mission.
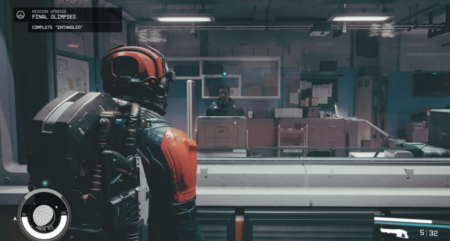
Final Glimpses
Complete all previously described tasks, since this quest will be the last stage of the previous one (only after that it will be considered completed). When you return to Constellation, talk to Vladimir to begin the quest. As in previous missions of this type, the location you will have to visit will be random. I was assigned to explore Aranea II, where the Omicron artifact was located in the Muybridge Caves. Whatever planet you are assigned to explore, we recommend going to this one first. Then you need to fly to Freya III. However, before you can do any of this, you need to get a ship with a gravity jump range of 21LY.
To do this you need to visit a ship technician. Since you’re starting this quest in Constellation, it makes sense to visit the mechanic near Port Jamison. If you were able to accumulate credits, don’t bother and buy a ship with the appropriate gravity jump range. Alternatively, you can modify your existing ship and improve the gravity drive. Also pay attention to the side quest, which will give access to new modifications for the ship – Supra Et Ultra. It wasn’t until I started this mission that I was able to modify the Frontier and install the gravity drive needed to complete the story mission.
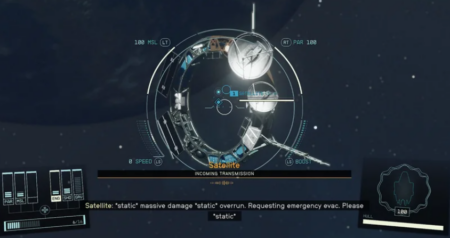
As soon as you strengthen the drive, go to Freya III. When you try to do this, you will notice something is wrong: the ship will receive a distress signal from the satellite. Despite the distortion, you will understand that it is coming from the Nishina Research Station. The objective will update and you will be asked to land on Freya III and travel to the Nishina Research Station to investigate the distress signal. This will begin the story mission described below. And in order to complete the current mission, you will have to deal with the problems at the Nishina research station.
Entangled
By examining the distress signal from the satellite on Freya III, you will be able to determine its source – the Nishina Research Station. Land on Freya III and approach the Nishina Research Station to the east. If you go up the stairs instead of the elevator, you will find yourself in a camp with boxes and containers. On the right, in the southwestern part of the camp, look for a weapon rack and a spacesuit. When you talk to the guard over the intercom, he will report that the laboratory did not send any distress signal. Regardless of whether you admit that you represent the Constellation, or simply decide to investigate the distress signal, he will say that the director is ready to meet with you, but your companion must wait outside.
Go to the Nishina Research Station and talk to Ethan. After some checks, the man will ask you to follow him. Move through the Vault, after which the room around you will begin to disappear. You will find yourself in an alternative universe with a completely destroyed laboratory. Once in the ruins, you can explore them. If you head towards the door, you will return to an alternate universe with an entire laboratory. After moving into the ruins, turn around and find a weapon box and a supply container.
When you start moving towards the door to the work area, you will be attacked by Cataxi – you can either fight them or run towards the door to return to Ethan. As you follow Ethan into the work area, look to the left to find a supply container. After passing through this location, you will again be transported to the ruins. When you approach the table, Raphael will appear and explain to you what happened here. He will mention a metal object that he worked with in the laboratory and which led to destruction. During the conversation, you will return to the entire research station: Ethan is communicating with Director Patel over the intercom. Then the door to the hall will open, and you will be asked to go to the left to go up to the director’s office. Once you do this and turn left, you will return to the ruins with a new goal – to find the director’s office.
Follow the corridor to the northeast and enter the door on the left. A Cataxi will appear inside. On the left side of the door, look for a first aid kit. A little further to the left you can find a pharmaceutical laboratory. Kataxi can inflict poisonous effects, so craft injectors or snake oil that will help remove the poisoning. After entering, look for a skeleton in a chair in the western part of the room. Approach him to find Dr. Barakova’s journal at hand.
If you go to the room to the north, you will find a pharmaceutical kit. When you’re done scouting the area, head southeast and enter the Emergency area. Climb the stairs on the left to teleport into the entire laboratory and continue following Ethan. The director’s office is located ahead. Talk to Director Patel and Maria about alternate universes, the artifact, and how it became a source of distortion. Director Patel will believe you faster than Maria, but soon both women will agree to look around and try to help.
Follow Maria to the factory. As you move, you will return to the destroyed universe. You will be given a new task – to get to the laboratory. Turn around and go northwest. Follow the first door on the left side to enter the director’s office. There is a skeleton behind the table. Check the right side of the table for an incident report. The door to the northwest leads to the director’s office and can be opened. Go through the door on the left and look at the sofa. Next to it is a safe that can be unlocked (advanced level). Leave the director’s office, go northeast to Emergency through the room on the left. Then turn southwest and drop down the hole in the floor of the next room. You will return to the room with Raphael.
Explain to Raphael what happened and how you disappeared, and then make your way to the laboratory in the destroyed universe. Raphael will give you a key card to Nishina’s storage room, which will allow you to open some doors. Before you leave, check out Raphael’s office for ammo boxes and other useful loot. Follow the door south to the door with the white deity, open it with the key card that Raphael gave. Follow the Emergency area to move to the entire laboratory. Follow the door in the southeast into the main hall to enter the now destroyed laboratory.
Open the door to the southwest and go through the rubble on the left. Talk to Rafael again. When you go to the marker, you will find yourself in a whole laboratory and find yourself in the security room with Ethan. Talk to him and you can get a rare weapon. During a conversation with Ethan, question the man behind Kataxi and persuade him to hand over a prototype of a rare weapon. By convincing Ethan to give you a weapon, you will be able to fight the Kataxi much more effectively in the destroyed universe.
After talking with Ethan, exit the security room and go through the main hall to the northeast. Soon you will be teleported to a destroyed laboratory. Head northeast and search the first aid kit to the right of the door, then go through the door on the left. When you enter the large room, head to the southeast side and go through the door marked Emergency. Climb the stairs to return to the entire laboratory. You will be on the stairs leading to the production laboratory and to the director’s office. When you reach the top, open the first door on the left to enter the production laboratory. Inside it is Maria, ready to begin testing.
While Maria is tinkering with the equipment, wait until distortions appear in the laboratory. To test them, Maria will ask you to stand inside the distortion. When you first approach them, nothing will happen. After Maria makes adjustments, you will be teleported back to the destroyed laboratory. To interact with distortions and control them yourself, you will need a probe control unit. Fortunately, when you enter the distortion, you will find yourself in a room with the desired item in the east. Look for it next to the supply container. Once you have it, go back through the distortion that appears in the northwest corner of the room.
After a successful experiment, you can talk to Maria about distortions. She will once again direct you to the director’s office, on the way to which you will find several distortions. You can now freely use the probe control unit to enter and exit distortions to teleport from one universe to another. Get to the director’s office and report that everything is ready. Before you leave, she will tell you what will happen after you find the artifact.
If you go down to the clinic, you can talk to Dr. Tatyana Barakova and get free medications. If you previously picked up her personal diary, you can give it to the woman and get even more supplies. In addition, you can use credits to purchase medicines. When everything is ready, get to the elevator and enter the distortion. After this, you can get into the elevator and go down to start searching for the laboratory.
As soon as you exit the elevator, notice the distortion to the left. Go through it, move northeast and activate the distortion in front of the door. From here you can go north to the Burnout Room and pick up the Nishina Particle Lab Keycard. Once you’ve done that, go back to the door and enter the distortion to the left of the lockers. Use the key card and open the door to the universe with a whole laboratory.
From now on, proceed carefully when exploring each room, as there are security turrets and robots. In the next room there are two doors located opposite each other. If you get caught by a surveillance camera, you will be attacked by two robots. The camera hangs in the east, on the wall under the ceiling. After clearing the room or disabling the camera, go through the locked door in the far right corner (south). Go down the stairs and turn to the right. Watch out for another security camera at the end of the corridor, near the turret. Enter the door on the right and go through the distortion in the right corner, near the cabinets.
Once you are in the destroyed laboratory, go northwest into the open room. Follow it to the northern part and enter the distortion to return to the entire laboratory. Be careful as you approach the computer, which will allow you to disable the lock – there is a security camera hanging above it to the left. Go to the computer and interact to complete the unlocking procedure. To the left of him there is a box with weapons and a first aid kit.
You can go through the door to the west. Turn right and go through the corridor marked Particle Accelerator. In the middle of the corridor, on the left hand side, there is the next distortion that you need to go through. Continue along the corridor towards the Emergency Department (you are in a destroyed laboratory) and go down the stairs on the left. Once you get over the first flight of stairs, you’ll come to another distortion. Head inside and through the blocked passage at the bottom of the stairs.
Go down the stairs to the east and get ready: you need to get into a room filled with security cameras, turrets and robots. Ahead, in the eastern part of the room there are columns on which two cameras hang. When you enter a room, look up and face the door. There is another surveillance camera hanging above it. Look to the right and you will see another camera on a beam right next to the stairs. Climb the stairs to get to the next level and achieve the next goal. Go to the northeast corner and enter the distortion in front of the Accelerator Robotics room.
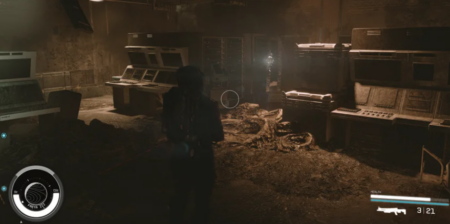
Go through the Emergency door in the northwest corner of the room, drop down to the marker and pick up the Nishina Utility Closet Keyward. Face east to use distortion and return to the entire lab. Go up the stairs and enter the distortion near the Secure Access door above. Back in the ruined lab, head south and enter the distortion in the corner. Go down the stairs to the east and turn right to reach the storage room. Enter the distortion inside the storage room to find a burned out computer room. You need to go to the southeast corner and take advantage of the distortion between the equipment, which will take you back to the entire room. Remove the lock.
Be careful, as there is a security camera hanging right next to the door. Use the Accelerator Mainframe Computer and open the doors. Go to the southwest corner of the room and enter the distortion. Follow back to the utility room and go through the distortion. Leave the room and go up the stairs to another part of the room. As you approach the accelerator control room door, be careful as there is another security camera inside. Use the computer in the control room and remove the lock. Return to the southern part of the room and go down the stairs. Follow the corridor east, through the Access Tunnel, enter the distortion halfway down the corridor, continue east and look into the cave.
When you enter the room, you’ll encounter a lot of Kataxi – fight them, then go up the slope that leads to the broken ledge, to the east. Go through the distortion on the ledge to return to the laboratory. Open the door to the west leading to the vault corridor, tunnel and High Energy Research Lab. Look into the room on the left and be careful of the security camera on the right side of the room. Follow the distortion near the security camera on the eastern side of the room. Open the door to the east, move through the cave and up the slope until you find yourself in a room with a hole. You will see a sign indicating a tunnel, storage facility, and High Energy Research Lab. Go downstairs.
Move into the room with the marker and enter the next distortion. Interact with the computer in the utility room, then open the door to the west and enter the next room. While doing this, look to the left to see a camera on the wall. Go up the ramp to the east to the tunnel and High Energy Research Lab. Look for the security camera, which is located a little higher, on the southeast wall.
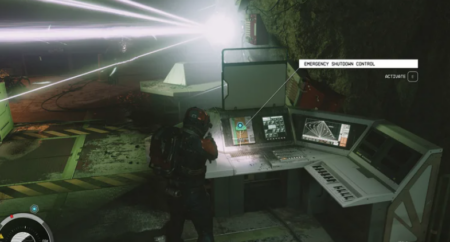
Once you reach the top of the ramp, turn south towards the stairs. Enter the distortion to the left of the start of the stairs, go up it and go through the door marked Emergency. Get to the top and go through the western door to reach a room where you need to disable the power locks or switch universes.
So, you have reached the main control room and can begin opening the locks. There are seven of them in total. In addition, there is a choice:
- Disable 7 locks in the destroyed laboratory. You’ll have to fight off the Kataxi they encountered in the alternate reality. After you turn off the power, you can deactivate the device and remain in this universe.
- You can go through any distortions scattered around the room and find yourself inside an entire laboratory. In this case, you will have to deal with surveillance cameras, turrets and many robots. If you decide to remove the blockage in this reality and turn off the electricity, you will remain in the whole universe.
After making a decision, turn off the probe in the reality in which you decided to stay. Take the Lambda artifact.
When you leave the Nishin Research Laboratory, you will have to talk to Raphael or Director Patel. If you decide to disable the blocking in a destroyed world, you will save Raphael, but everyone else will die. The biggest advantage of this choice is that you will be able to recruit Raphael to your team after you pick him up from Freya III and drop him off in New Atlantis. However, if you decide to save the entire universe and laboratory by allowing Raphael to die, you will be rewarded with a legendary spacesuit from Director Patel.
Reward: 10,200 credits, 800 experience points.
Revelation
The mission will begin after you are sent to the planet Massada III. When you reach it, the consequences of the decision you made during the Unearthed quest will become known. Depending on the decisions you make, you will find on the planet:
- If you decide to side with the Emissary, the Hunter will meet you here.
- If you decide to side with the Hunter, you will encounter the Emissary.
- If you didn’t support anyone, meet both NPCs.
A difficult battle in space will begin, especially if you decide to refuse the help of both characters. If you have chosen at least one, then he will help in battle as an ally. Before entering the battle, check the ship. The task will be greatly simplified if you install an engine with high maneuverability, which will allow you to evade the powerful beams of the Born Star ships. Next, focus on installing a good shield. If during a battle the shield’s strength drops to its minimum values, you will have to move to a safe distance and allow it to recover.
When it comes to combat priorities, focus on the Bornstellar ships first. Once they are eliminated, switch to the larger ships. As always, destroy their shields with laser weapons, then switch to ballistic or explosive weapons. Once you have dealt enough damage to the ship(s), the Hunter or Emissary will disappear. You will need to meet him at the Buried Temple on Massada III.
If you have an ally (Emissary or Hunter), you will meet him too. Head east to reach the Buried Temple and follow the trail of Ecliptic bodies. As you move past them, collect loot, including ammo and other useful items. When you approach the open part of the entrance, you will be greeted by the Bornstellar. They will appear from all directions and you will have to defeat Guardian Musa.
This enemy’s main skill is creating doubles, so you will have to destroy all his clones. During the battle you will be constantly bombarded with grenades. To counter this, keep moving. The location is littered with flammable containers, so stay away from them. Try to keep your distance from enemies and lure them onto these containers. Attack primarily from a distance to have a better chance of avoiding damage from grenades. When you defeat Guardian Musa, you will receive Quantum Essence.
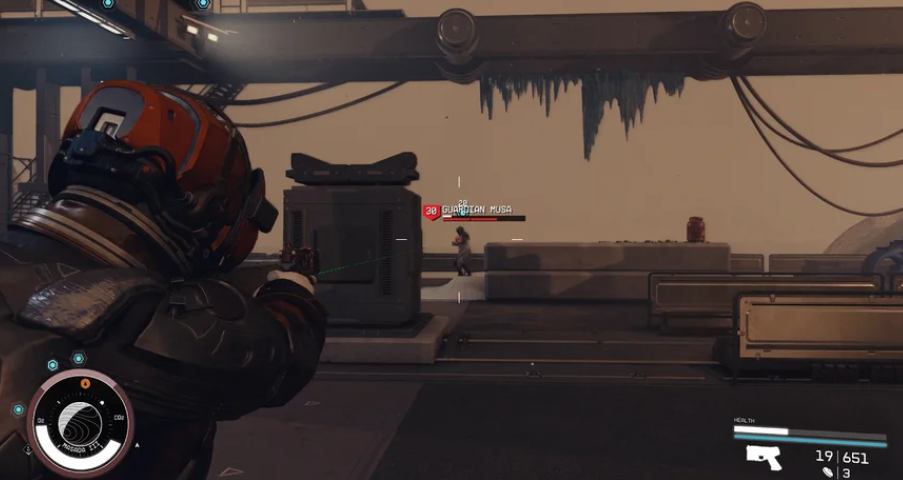
Continue southwest to find more Ecliptic bodies. When you reach the large blue door with yellow handles, go through the tunnel to the southeast. Continue along the path until it turns south into a building. This will take you to the Buried Temple. When you enter it, the corpses of the Ecliptics will begin to come to life. Eliminate several enemies until you spot Guardian Athalia. It is this enemy that revives the corpses of the Ecliptics. Focus all your firepower on the Athalia Guard, continuing to deal with the revived soldiers if necessary.
When you manage to knock down Guardian Athalia’s shield and deal damage to health, she will teleport away from you and continue to resurrect Eclipticians. As soon as possible, close the distance and attack the Guardian again. When you win, pick up the Ecliptic Base ID Card to go through the door. Head northwest and use the card on the terminal next to the Secure Access door to enter the Ecliptic base.
Head northwest from the Ecliptic base and follow the path to the left. Take the stairs on the left to go down to the marker. As you approach the bottom of the stairs, you will find a partition and an anomaly on the other side. Enter the anomaly to enter the distortion, where you will meet Lin and Heller. You will have to climb the slope to the cave where the first Artifact was found. Once you reach the cave, enter the distortion to exit the anomaly. As you move towards the next room, objects will be attracted to each other and explode, causing even more Bornstellar to appear. You will meet two Guardians, Teuthra and Rynn.
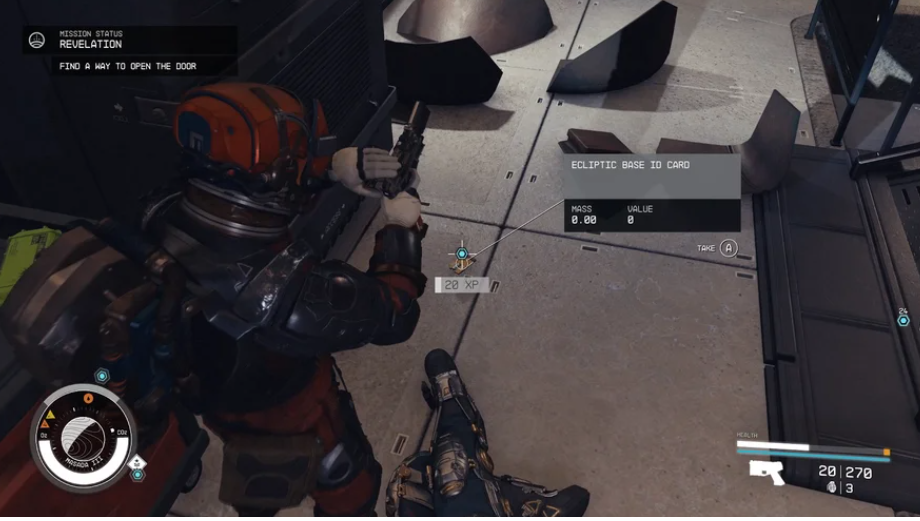
In addition to them, you will have to fight with robots and turrets. You can disable the defense systems to open a room with a computer that controls robots and turrets. Both Bornstellar use thrown weapons, although Guardian Teuthra seems to be much better at it than Rynn. Therefore, the first thing to do is get rid of Teuthr. When your opponent swings his arm, be prepared to dodge the projectile. After dealing with Teutra, switch to Rynn. In fact, the biggest problem in combat is the turrets and robots that need to be destroyed or disabled. Once both Guardians are down, you will find a key that allows you to disable the defense systems.
Go through the yellow door in the northwest of the second floor using the Ecliptic Base Key. Follow the path down to the next anomaly to return to Petrov’s ship. To leave the anomaly, you need to talk to Petrov. It will all end in another battle, and you will have to finish off Petrov to get the key to his personal apartments. After this, open the door on the right behind Petrov, leaving the anomaly and returning to the temple. Go through the cave to the elevator, go down deep and find another anomaly, with which you can talk to Vladimir or attack him. Then turn around and enter the distortion to get out of the anomaly.
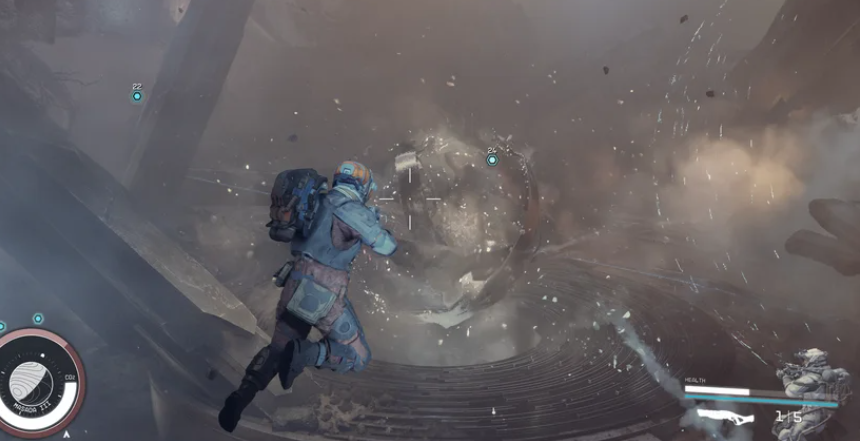
You will find yourself in a spacious cave, where Guardian Fionn and his doubles will appear. If you manage to destroy the Guardian, all his clones will disappear, which is why I recommend focusing on the main enemy. From time to time, Fionn will disappear and reappear, rushing at you and attacking you with melee attacks. At these moments, use melee weapons. Once you’ve cleared the area, move to the back of the cave to reach the temple.
There are two ways to obtain artifacts:
- Convince the Hunter/Emissary to hand over the artifacts. The battle will end, and you will do without bloodshed.
- Attack Hunter/Emissary or both. This will lead to a battle inside the Temple. During the battle, you will rush through alternative universes, find yourself in the Constellation, NASA and other places that you managed to visit throughout the game.
At the end of this battle or after successful persuasion, take all Artifacts. Approach and take the last one, the Mau artifact. When you find the last artifact, you can return to the ship and see Unity with your own eyes.
One Giant Leap
If there are unfinished tasks, take care of them, and then head to Unity. When you are ready to take the next step and complete your journey, go to the console on the ship to install all the artifacts and build the Armillary. If you want to do a gravity jump, just remove the Armillaria. Once you reach Unity, meet your counterpart and learn what Unity is. You will understand why you collected artifacts and visited different temples, and then you will have a choice – to become Born Star or return to your old life.
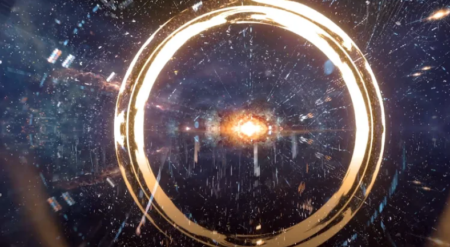
If you return to your old life, simply turn around and follow the same path you came here. After this, you can continue the game as usual, but you will have the opportunity to return to Unity by simply restoring Armillaria on the ship. If you decide to become Bornstellar, you will enter the sphere. This will end the current game, but at the same time activate New Game+. By choosing this option, you will see the end credits and can immediately switch to New Game Plus mode.
New game +
While most similar games allow you to go into New Game Plus mode with all the collected weapons, upgrades, skills and abilities, Starfield changes this formula and when you start New Game + you will only save your current level with experience points, supernatural abilities and all progress made in upgrading skills. Everything else, from items to progress on side quests or improved relationships with companions, will be lost.
If you decide to start New Game Plus, you will be rewarded with a unique spacesuit and a cool spaceship. You will return to a time shortly before the start of the mission “Into the Unknown”, so when entering the Constellation, in a conversation with Sarah, you will be asked to skip the main storyline. If you decide to replay the main tasks, you can complete them as before, collecting artifacts. If you decide to skip the main quests, you will immediately receive all the artifacts found up to this point in the storyline, and also receive information about the location of the temples to unlock any unlocked abilities.
Among the Stars
To unlock this quest, you must complete the One Giant Leap mission and become Bornstellar. This will begin the New Game + mode, and at the beginning of the playthrough you will have the opportunity to complete the “One Small Step” task. As before, you need to go to the Constellation and talk to Sarah. The dialogue will be different from the previous one, since the Constellation members will have the feeling that they have already met you before. You will be offered to replay the storyline, starting with the quest “One Small Step,” or skip the main quest and declare to the Constellation that you are Born Stellar.
To begin the “Among the Stars” quest, you will have to skip the storyline. Tell us everything you know about the artifacts and temples, after which Sarah will send you to the Eye, where you can talk with Vladimir and find out in which places the artifacts are scattered.
After that, go to each of the listed planets. This way you will collect all the remaining abilities that you were not able to obtain during the first playthrough of the game.