The MCM-316 Introduction to Video and Photography course at Government College University Faisalabad (GCUF) is the perfect opportunity for you to hone your skills and unleash your creative potential. In this article, we will delve into the study notes of MCM-316 to give you a sneak peek into what this course has to offer.
MCM-316 Introduction To Video And Photography Study Notes At GCUF Faisalabad.
The History of Photography: Capturing Moments, Preserving Memories
Introduction
The history of photography is a captivating journey that spans centuries, documenting the evolution of this art form from a simple concept to the technological marvel it is today. From the earliest attempts at capturing images to the ubiquitous presence of cameras in our modern world, photography has become an integral part of our lives. In this article, we will delve into the fascinating history of photography, exploring its origins, significant milestones, and the impact it has had on society.
The Birth of Photography: From Camera Obscura to Daguerreotypes
Photography as we know it today traces its roots back to the camera obscura, an ancient optical device that projected images onto a surface. This concept laid the foundation for the development of the first photographic process by Joseph Nicéphore Niépce in 1826. Niépce’s heliograph, as it was called, captured the first permanent photograph using a combination of chemistry and light sensitivity.
However, it was Louis Daguerre who revolutionized the world of photography with his invention of the daguerreotype in 1839. This process involved exposing a silver-coated copper plate to light and then using chemicals to develop the image. Daguerre’s creation marked a significant milestone in photographic history, making it possible to create detailed and precise images for the first time.
The Evolution of Photography: From Film to Digital
Throughout the 19th and early 20th centuries, photography continued to evolve rapidly. The invention of roll film by George Eastman in the late 1800s made photography more accessible to the masses. It allowed for multiple exposures and simplified the process of capturing and developing images.
The next breakthrough came in the form of the Kodak Brownie camera in 1900, which popularized snapshot photography. This affordable and easy-to-use camera democratized photography, allowing people from all walks of life to capture and preserve their memories.
The advent of digital photography in the late 20th century further revolutionized the field. With the invention of the first digital camera by Steven Sasson in 1975, photography transitioned from analog to digital. This shift eliminated the need for film and allowed for instant image preview and storage on electronic devices. Today, digital cameras have become commonplace, embedded in our smartphones and giving us the power to capture and share moments with a single click.
Photography and its Impact on Society
Photography has had a profound influence on society, shaping our perception of the world and documenting significant moments in history. It serves as a powerful medium for storytelling, allowing photographers to convey emotions and narratives through their images.
Historically, photography played a crucial role in journalism and photojournalism, bringing important events and social issues to the public’s attention. Iconic photographs like Dorothea Lange’s “Migrant Mother” during the Great Depression and Eddie Adams’ “Saigon Execution” during the Vietnam War have left indelible marks on our collective memory.
In addition to its journalistic impact, photography has also become an integral part of our personal lives. It captures milestones, preserves memories, and allows us to relive special moments. Wedding albums, family portraits, and travel photos all hold a special place in our hearts, reminding us of cherished experiences and loved ones.
The Future of Photography: Technological Advancements and Beyond
As technology continues to advance at a rapid pace, so does the field of photography. We are witnessing the rise of smartphone photography, with camera features improving year after year. Artificial intelligence and computational photography are enhancing image quality and enabling advanced editing capabilities.
Moreover, new trends such as drone photography and virtual reality are pushing the boundaries of what is possible in the world of visual storytelling. These innovations are opening up new avenues for photographers and expanding the possibilities of what can be captured and shared.
In conclusion, the history of photography is a testament to human ingenuity and our desire to capture, preserve, and share moments. From the camera obscura to the digital age, photography has come a long way, transforming the way we see the world and leaving an indelible mark on society. As we look to the future, it is exciting to imagine the new advancements and possibilities that lie ahead for this ever-evolving art form.
Conclusion
Photography has a rich and diverse history that has unfolded over centuries. From the early experiments with light sensitivity to the digital revolution, photography has continuously evolved, showcasing the extraordinary ability of humans to capture and preserve moments. As technology progresses, we can only imagine the exciting advancements that will shape the future of photography. The power of a photograph to convey emotion, tell a story, and preserve memories is a testament to the enduring impact it has on our lives. So next time you pick up your camera or snap a shot on your smartphone, take a moment to appreciate the history behind this remarkable art form.
Photojournalism! An emerging field of journalism
Would you consider yourself a visual storyteller? Are you passionate about capturing the essence of a moment through the lens of a camera? If so, then photojournalism might just be the perfect field for you to explore.
What is Photojournalism?
Photojournalism is a specialized form of journalism that combines the power of photography with the art of storytelling. It involves capturing images that tell a compelling and informative story, often accompanied by a concise caption or article. These images are used in various forms of media, including newspapers, magazines, websites, and social media platforms.
The Importance of Photojournalism
In today’s fast-paced world, where information is constantly being shared and consumed, photojournalism plays a vital role in delivering news and stories visually. It allows people to connect with events and issues on a deeper level by conveying emotions, capturing significant moments, and providing context to complex situations.
The Evolution of Photojournalism
Over the years, photojournalism has evolved from a mere supplement to written news articles to a powerful medium of its own. With the advent of technology and the rise of social media, the demand for compelling and visually appealing imagery has skyrocketed. People now rely heavily on visual content to stay informed and engaged.
The Skills and Expertise of a Photojournalist
Being a successful photojournalist requires a unique set of skills and expertise. It’s not just about having a good eye for composition and lighting; it’s also about having a deep understanding of the story and subject matter. A photojournalist must be able to capture the essence of a moment while adhering to ethical standards and journalistic integrity.
Additionally, photojournalists need to be adaptable and quick on their feet. They often find themselves in challenging and unpredictable environments, where they must think on their feet and make split-second decisions to capture the perfect shot.
The Impact of Photojournalism
Photojournalism holds immense power in shaping public opinion and influencing change. Through their images, photojournalists can shed light on injustices, highlight social issues, and bring attention to untold stories. By capturing real-life moments in a visually compelling way, they enable viewers to connect with the subject matter on an emotional level, sparking empathy and, ultimately, driving action.
The Future of Photojournalism
As technology continues to advance, the field of photojournalism is constantly evolving. Traditional platforms such as print media are transitioning to digital formats, opening up new opportunities for photojournalists. With the rise of social media platforms and online publications, photographers now have a broader audience and greater accessibility to share their work.
However, this digital age also presents challenges. The abundance of visual content on the internet has made it increasingly difficult for photojournalists to stand out and gain recognition. Nevertheless, the demand for powerful and impactful imagery remains, and photojournalists who can adapt to this changing landscape will continue to thrive.
Conclusion
Photojournalism is undoubtedly an emerging field of journalism that holds immense potential for both aspiring photographers and storytellers. It allows individuals to combine their love for photography with their passion for storytelling, making a meaningful impact through visual communication.
So, if you’re ready to capture the world through your lens and tell stories that matter, photojournalism might just be the field for you. Embrace the ever-changing landscape of digital media, hone your skills, and let your photographs serve as a powerful catalyst for change.
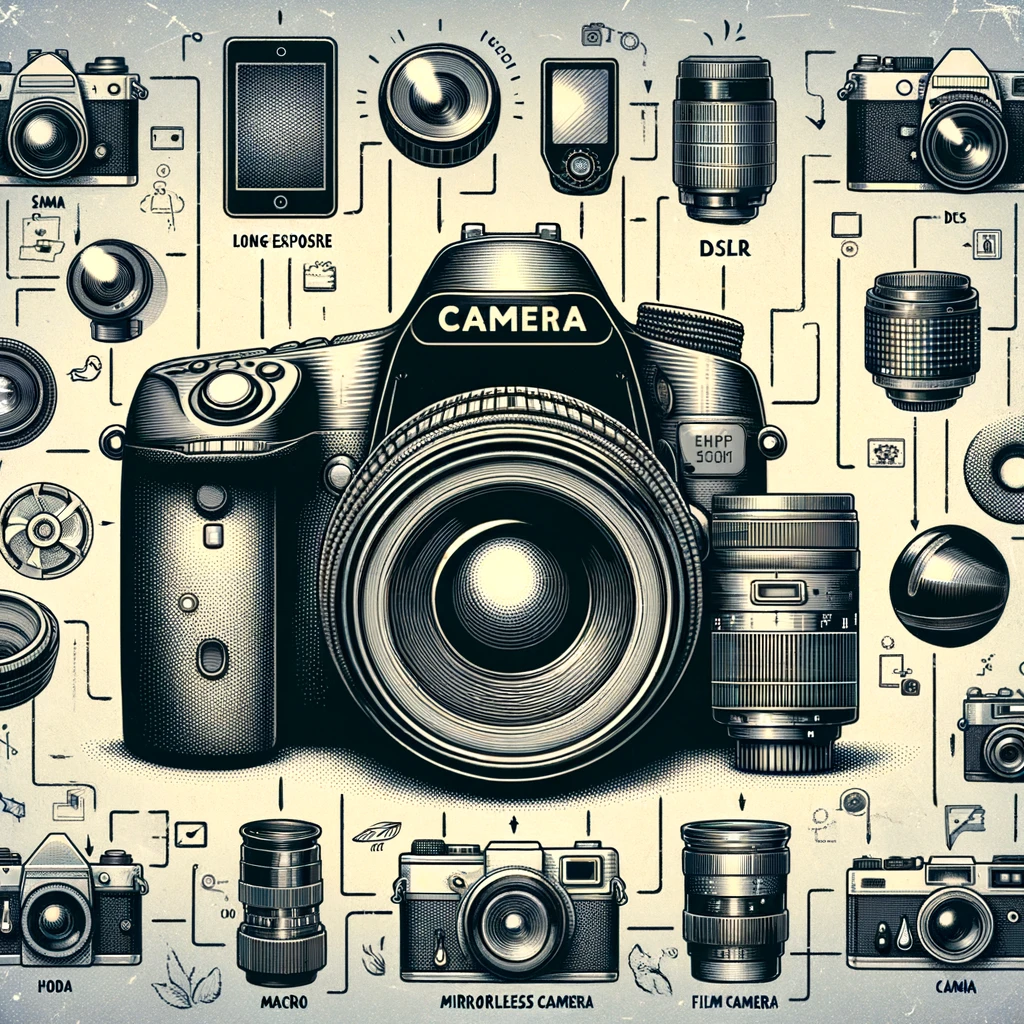
Know your Camera! The art and science of camera operation
Introduction
If you are passionate about photography or simply want to improve your skills, it is essential to know your camera inside out. Understanding the art and science of camera operation can help you capture stunning images and unleash your creative potential. In this article, we will explore the main aspects of operating a camera, providing you with the knowledge and confidence to elevate your photography game.
The Basics: Getting to know your camera
Before diving into the art and science of camera operation, let’s start with the basics. Familiarize yourself with the various components and functions of your camera. The lens, shutter, aperture, ISO, and focus are key elements that determine the quality and characteristics of your photographs.
Lenses: The lens is often referred to as the “eye” of the camera. It allows light to enter and guides it onto the image sensor. Different lenses offer various focal lengths, allowing for wide-angle or telephoto perspectives. Experimenting with different lenses will give you a deeper understanding of their capabilities and how they can influence your composition.
Shutter: The camera’s shutter controls the duration of the exposure. It opens to allow light onto the image sensor and then closes to capture the image. By adjusting the shutter speed, you can freeze action or create motion blur effects. Understanding how the shutter speed impacts your images will enable you to capture dynamic or serene moments with precision.
Aperture: The camera’s aperture determines the amount of light entering the lens. It is represented by an f-stop value. A wider aperture (lower f-stop) allows more light and creates a shallow depth of field, while a narrower aperture (higher f-stop) limits the light and increases the depth of field. Knowing how to manipulate aperture settings will help you control the focus and background blur of your photographs.
ISO: ISO refers to the camera’s sensitivity to light. Higher ISO values allow for better low-light performance but can introduce digital noise. It is essential to find the right balance to achieve optimal image quality. Experimenting with different ISO settings in various lighting conditions will enable you to capture stunning images with minimal noise.
Focus: Proper focusing is crucial to ensure sharp and clear images. Most cameras offer autofocus capabilities, but learning how to manually focus can be beneficial in certain situations. Understanding different focusing modes and techniques will give you more control over the creative outcome of your photographs.
The Art of Camera Operation
Understanding the technical aspects of camera operation is essential, but it is equally important to embrace the art of photography. Once you have mastered the basics, it’s time to explore the creative possibilities that your camera offers. Here are a few techniques to elevate your photography:
- Composition: Composition plays a critical role in creating visually appealing photographs. Experiment with the rule of thirds, leading lines, symmetry, and framing to bring balance and interest to your images. Don’t be afraid to break the rules and try new perspectives to unleash your creativity.
- Lighting: Light can make or break a photograph. Learn to observe and utilize natural and artificial light to enhance your subjects. Experiment with different lighting angles, intensities, and colors to create mood and drama in your images.
- Storytelling: Every photograph has the power to tell a story. Think about the message or emotion you want to convey through your images. Pay attention to details, capture candid moments, and experiment with different perspectives to create a narrative in your photography.
- Post-Processing: In the digital age, post-processing has become an integral part of photography. Explore editing tools and techniques to enhance your images. However, remember to maintain a balance and stay true to your artistic vision. Post-processing should complement and not overpower your photographs.
The Science of Camera Operation
While photography is undoubtedly an art form, it is rooted in scientific principles. Understanding the science behind camera operation can help you make informed decisions and take full advantage of your equipment. Here are a few scientific concepts to consider:
- Exposure Triangle: The exposure triangle refers to the relationship between shutter speed, aperture, and ISO. Mastering this concept will allow you to achieve proper exposure in any lighting condition. Balancing these three elements is a fundamental skill that every photographer should acquire.
- White Balance: White balance refers to the color temperature of an image. Different light sources emit varied color temperatures, which can result in images appearing too warm (orange) or cool (blue). Adjusting the white balance settings will ensure accurate color representation in your photographs.
- Dynamic Range: The dynamic range of a camera measures its ability to capture details in both dark and bright areas of a scene. Higher dynamic range cameras produce more realistic and vibrant images. Understanding your camera’s dynamic range will help you choose the appropriate exposure settings for challenging lighting situations.
- Depth of Field: Depth of field refers to the range of sharpness in a photograph. It is controlled by the aperture and the distance between the subject and the camera. Knowing how to manipulate depth of field will enable you to isolate your subject or capture an entire scene in sharp focus.
As you continue to explore the art and science of camera operation, keep in mind that practice is key. Embrace the continuous learning process and be open to experimentation. With time and dedication, you will develop your unique photographic style and capture breathtaking images that tell your story.
Types of Photos and Photography
Introduction
Photography is a popular art form that allows us to capture and preserve moments in time. There are various types of photos and photography techniques available, each with its own unique characteristics and purposes. In this article, we will explore these different types of photos and photography, highlighting their features and uses.
The Different Types of Photos and Photography
- Portrait Photography
- Portrait photography focuses on capturing the essence and personality of an individual or a group. It typically involves close-up shots with an emphasis on facial expressions, emotions, and body language.
- Portrait photography is commonly used in professional settings, such as for headshots, corporate profiles, and family portraits.
- Landscape Photography
- Landscape photography showcases the beauty and grandeur of the natural world. It often features wide-angle shots of stunning landscapes, such as mountains, forests, beaches, and sunsets.
- Landscape photography is popular among nature enthusiasts, travel photographers, and those who appreciate the wonders of the great outdoors.
- Wildlife Photography
- Wildlife photography focuses on capturing animals in their natural habitats. It requires patience, skill, and a keen eye for detail to capture elusive and breathtaking moments in the animal kingdom.
- Wildlife photography is a challenging but rewarding genre, allowing photographers to document and raise awareness about the beauty and importance of wildlife conservation.
- Street Photography
- Street photography captures candid and unposed moments of everyday life in public places. It often reflects the urban environment, capturing the people, architecture, and street scenes that make up the fabric of a city.
- Street photography offers a unique perspective on life and society, showing moments of spontaneity and capturing the essence of a place and its people.
- Fashion Photography
- Fashion photography showcases clothing, accessories, and style. It requires creativity, attention to detail, and the ability to create visually stunning images that highlight the fashion and convey a specific mood or message.
- Fashion photography is commonly used in advertising campaigns, fashion magazines, and editorials, influencing trends and showcasing the latest designs.
- Macro Photography
- Macro photography focuses on capturing small subjects at a close range, revealing intricate details that are often unnoticed by the naked eye. It requires specialized equipment, such as macro lenses, to capture tiny subjects, such as insects, flowers, or intricate textures.
- Macro photography allows us to explore the beauty and complexity of the smallest elements in our world, providing a different perspective on the intricate details that surround us.
- Documentary Photography
- Documentary photography aims to capture and tell a story through visual storytelling. It often focuses on social issues, historical events, or cultural practices, providing a window into different aspects of the human experience.
- Documentary photography plays a crucial role in raising awareness, documenting important moments in history, and initiating conversations on pressing social issues.
Conclusion
Photography is a versatile and expressive medium that allows us to capture and share moments, emotions, and stories. From portrait photography to wildlife photography, each type offers its own unique perspectives and challenges. As photographers, we have the power to freeze time and preserve memories. So pick up your camera, explore the different types of photography, and start capturing the world through your lens.
Photo Composition: The Laws and Rules of Photography
Introduction
Are you a photography enthusiast looking to take your skills to the next level? One of the most important aspects of capturing stunning photographs is photo composition. Understanding the laws and rules of photography can make a significant difference in the quality of your shots. In this article, we will explore the essential principles that can help you compose visually appealing and captivating photos.
H2: Photo Composition
Photo composition refers to the arrangement of elements within a photograph. It involves the careful placement of subjects, use of lines, colors, and patterns, and consideration of balance and symmetry. By following a set of laws and rules, photographers can effectively draw the viewer’s attention to the desired focal points, resulting in powerful and engaging images.
H3: The Rule of Thirds
The rule of thirds is one of the fundamental principles in photo composition. It involves dividing the frame into nine equal parts with two horizontal and two vertical lines. The intersection points of these lines form four key focal points. Placing your subjects or points of interest along these lines or at the intersection points creates a visually pleasing composition. This technique adds balance, tension, and dynamics to your photos.
H3: Leading Lines
Leading lines serve as a powerful tool to guide your viewer’s eye through the image. These lines can be literal, such as roads, fences, or rivers, or they can be implied, such as lines created by the arrangement of objects or patterns. By incorporating leading lines into your composition, you can create depth, add a sense of movement, and draw attention to specific areas of the photograph.
H3: Symmetry and Balance
Symmetry and balance play crucial roles in creating visually appealing compositions. Symmetrical compositions can provide a sense of harmony and order, while asymmetrical compositions can introduce tension and interest. Experiment with the placement of your subjects or points of interest to achieve a balanced composition. Remember to consider the size, shape, and color of the elements to create a harmonious visual arrangement.
H3: Framing
Framing is a technique that involves using elements within the photograph to create a frame around the subject. This can be achieved by shooting through archways, doorways, or natural elements such as trees or branches. Framing adds depth, removes distractions, and draws attention to the main subject, resulting in a more focused and impactful composition.
H3: Rule of Odds
The rule of odds suggests that an odd number of subjects tends to create a more visually appealing composition than an even number. This principle is based on the idea that odd numbers create a sense of asymmetry and balance, catching the viewer’s attention and evoking interest. Experiment with odd numbers of subjects in your photographs to achieve a more pleasing composition.
H3: Color and Contrast
Colors can significantly impact the mood and visual impact of a photograph. Understanding color theory and using complementary or contrasting colors in your composition can add depth and visual interest. Experiment with different color combinations to create powerful and eye-catching images.
H3: Breaking the Rules
While understanding and applying the laws and rules of photography is essential, it is also crucial to know when and how to break them. Breaking the rules can lead to innovative and unique compositions that stand out from the crowd. However, it is essential to have a solid understanding of the rules first, as breaking them without purpose may result in an ineffective composition.
Conclusion
Mastering photo composition is an art form that takes time, practice, and a keen eye for detail. By understanding and applying the key laws and rules of photography, you can elevate your skills and create impactful and visually stunning images. Remember to experiment, break the rules when necessary, and let your creativity soar. Happy shooting!
Lighting Techniques of Photography
Lighting plays a crucial role in photography, allowing photographers to capture stunning and visually captivating images. With the right lighting techniques, photographers are able to enhance the mood, emphasize details, and create a professional and polished look. In this article, we will explore various lighting techniques used in photography to help you improve your own photography skills.
The Importance of Lighting in Photography
Lighting is one of the most important elements in photography. It has the power to transform an ordinary photograph into a work of art. Understanding lighting and how it interacts with your subject can make all the difference in your photographs.
Natural Light Photography
Natural light photography refers to using the available light in the environment to illuminate your subject. This technique is particularly popular among outdoor photographers, as it allows them to capture the beauty of natural scenery in its purest form. To make the most of natural light, photographers often consider the time of day and weather conditions to create the desired effect.
Studio Lighting Techniques
In a controlled studio environment, photographers have the freedom to manipulate light to achieve their desired results. Here are some common studio lighting techniques:
- Loop Lighting: In this technique, the key light is positioned at a 30-45 degree angle to the side of the camera. It creates a slight shadow on one side of the subject’s face, adding depth and dimension.
- Rembrandt Lighting: Named after the famous painter, Rembrandt lighting is characterized by a small triangle of light on the shadowed side of the face. It is achieved by positioning the key light at a 45 degree angle and slightly above the subject’s eye level.
- Split Lighting: Split lighting is achieved by positioning the key light at a 90 degree angle to the side of the camera. This technique creates a dramatic effect by illuminating only half of the subject’s face.
- Butterfly Lighting: Also known as paramount lighting, butterfly lighting involves placing the key light directly in front and above the subject, casting a small shadow under the nose. It creates a flattering and glamorous look, often used in portrait photography.
High Key and Low Key Lighting
High key and low key lighting are two contrasting techniques used to create different moods and atmospheres in photography.
- High Key Lighting: High key lighting is characterized by bright and even lighting, with minimal shadows. It is often used in fashion and beauty photography to create a soft and ethereal look. To achieve high key lighting, photographers use multiple light sources or reflectors to evenly illuminate the subject.
- Low Key Lighting: On the other end of the spectrum, low key lighting creates a dramatic and moody atmosphere by focusing on dark tones and deep shadows. It is commonly used in film noir and artistic portrait photography. To achieve low key lighting, photographers use a single or few focused light sources to create strong contrasts and shadows.
Light Modifiers
Light modifiers are tools used to control and shape light to achieve the desired effect. Here are some common light modifiers used in photography:
- Reflectors: Reflectors are used to bounce existing light onto the subject, filling in shadows and creating a more even lighting. They come in various sizes and colors to provide different lighting effects.
- Softboxes: Softboxes are large, square or rectangular-shaped light modifiers that diffuse and soften the light source, reducing harsh shadows and creating a more flattering light. They are commonly used in portrait and product photography.
- Umbrellas: Photography umbrellas are translucent or reflective, used to soften or bounce light. They are portable and easy to set up, making them a popular choice for photographers on the go.
- Snoots: Snoots are narrow tubes or cones that restrict the spread of light, creating a focused and directed beam. They are often used in product and still life photography to highlight specific areas.
Conclusion
Mastering the art of lighting in photography is essential for creating visually stunning and impactful images. Whether you are shooting in natural light or a controlled studio environment, understanding different lighting techniques and how to use light modifiers can take your photography skills to the next level. So grab your camera, experiment with lighting, and let your creativity shine through.Keep in mind that lighting is not something you should be afraid to experiment with.
The Terminology of Photography: Understanding the Key Terms
Introduction:
Photography is an art that has captured the hearts and minds of people all over the world. Whether you are a professional photographer or just someone who loves taking photos, understanding the terminology of photography is essential. In this article, we will explore the practical uses and applications of these terms, allowing you to enhance your photography skills and capture stunning images.
The Main Keyword: Terminology of Photography
One cannot discuss the terminology of photography without first understanding the different terms used in the field. Let’s delve into some of the key terms every photographer should know:
1. Aperture:
Aperture refers to the opening of the lens through which light enters the camera. It is measured in f-stops and determines the amount of light that reaches the camera’s sensor. Understanding aperture is crucial as it directly impacts the depth of field in your images. A wide aperture (low f-stop number) will result in a shallow depth of field, while a narrow aperture (high f-stop number) will produce a greater depth of field.
2. Shutter Speed:
Shutter speed refers to the amount of time the camera’s shutter remains open. It controls the duration of exposure and determines how motion is captured in a photograph. A fast shutter speed freezes motion, while a slow shutter speed can create a sense of motion blur. Mastering shutter speed will allow you to capture both fast-action shots and long-exposure images.
3. ISO:
ISO refers to the sensitivity of the camera’s image sensor to light. A low ISO value (e.g., 100) is ideal for shooting in bright conditions, as it reduces image noise. On the other hand, a high ISO value (e.g., 1600) is suitable for low-light situations but may introduce graininess or noise to the image. Understanding ISO will enable you to make informed decisions about how to balance exposure and image quality in different lighting conditions.
4. Depth of Field:
Depth of field refers to the area in a photograph that appears sharp and in focus. It is influenced by the aperture setting, the focal length of the lens, and the distance between the camera, subject, and background. Understanding depth of field allows you to control what elements of a scene are in focus and helps you create impactful images with blurred backgrounds or sharp details from front to back.
Practical Uses and Applications of Photography Terms
Now that we have explored the key terminology of photography, let’s delve into the practical uses and applications of these terms:
1. Portrait Photography:
When capturing portraits, understanding depth of field is crucial. By using a wide aperture, such as f/1.8, you can create a beautiful bokeh effect, where the subject is in sharp focus while the background appears blurred. Combining this with precise focus on the subject’s eyes can result in stunning portraits that draw attention to the person’s face.
2. Landscape Photography:
In landscape photography, achieving a greater depth of field is often desirable to ensure that both the foreground and background are in focus. To accomplish this, using a narrow aperture, such as f/16, is recommended. This technique allows you to capture sweeping landscapes with sharp details from the nearest rock to the farthest mountain range.
3. Action Photography:
Action photography requires a fast shutter speed to freeze the motion and capture sharp images. When photographing sports events, wildlife, or any fast-moving subjects, opt for a shutter speed of at least 1/1000th of a second. This will ensure that you freeze the action and capture the perfect moment without any blur.
4. Low-Light Photography:
In low-light situations, increasing the ISO can help you achieve well-exposed images. However, it’s important to strike a balance between high ISO and image quality, as excessive ISO can introduce noise to your photographs. Experiment with different ISO settings to find the sweet spot that allows you to capture clear and well-lit images, even in challenging lighting conditions.
Conclusion
The terminology of photography is a cornerstone in the world of capturing stunning images. Understanding and applying key terms such as aperture, shutter speed, ISO, and depth of field enables photographers to unleash their creativity and capture visually compelling photographs. Whether you specialize in portraits, landscapes, action shots, or low-light photography, mastering these terms will undoubtedly elevate your skills and allow you to produce breathtaking images. So grab your camera, play around with these settings, and see the world through your lens with a newfound expertise!
ABC of Adobe Photoshop and why is it necessary for photography
Introduction
In today’s digital age, photography has become more accessible and popular than ever before. With the advancements in technology, almost everyone carries a camera with them at all times in the form of their smartphones. However, capturing a great photograph is only the first step in the process. To truly enhance and bring out the beauty of a photograph, editing is necessary. And when it comes to photo editing software, Adobe Photoshop reigns supreme. In this article, we will explore the ABCs of Adobe Photoshop and why it is absolutely essential for photography.
What is Adobe Photoshop?
Adobe Photoshop is a powerful and versatile software that allows photographers and graphic designers to manipulate and enhance photographs and images. It offers a wide array of tools and features, making it the go-to choice for professionals in the industry. From simple tasks like cropping and resizing to more complex editing techniques, Adobe Photoshop has it all.
The importance of Adobe Photoshop in photography
- Enhancing and retouching photographs:
Adobe Photoshop enables photographers to enhance the quality of their photographs in ways that were not possible before. With tools like the healing brush and spot healing brush, imperfections and blemishes can be easily removed. Colors can be adjusted, brightness and contrast can be altered, and overall image quality can be improved to create stunning visuals. - Creative freedom and artistic expression:
With Adobe Photoshop, photographers have the freedom to explore their creativity and bring their artistic visions to life. The software allows for endless possibilities in terms of manipulating images, adding special effects, and creating unique compositions. It gives photographers the ability to turn a simple photograph into a work of art. - Advanced editing features:
One of the key reasons why Adobe Photoshop is so beloved by photographers is the vast range of advanced editing features it offers. From layers and masks to filters and blending modes, these features allow photographers to have complete control over their editing process. They can selectively apply edits, make precise adjustments, and experiment with different techniques to achieve the desired look and feel. - Compatibility and file formats:
Adobe Photoshop supports a wide range of file formats, allowing photographers to work with their images in any format they desire. Whether it is RAW files from high-end cameras or JPEG files from smartphones, Photoshop can handle them all. This compatibility makes it easier for photographers to seamlessly integrate their editing workflow and ensures that their final images are of the highest quality.
How to get started with Adobe Photoshop?
If you’re new to Adobe Photoshop, getting started can be a bit overwhelming. However, with a little bit of practice and patience, you can become proficient in using this powerful software. Here are a few steps to help you get started:
- Familiarize yourself with the interface:
Take some time to explore the different panels, menus, and tools within Adobe Photoshop. Understand the layout and how everything is organized. This will give you a better understanding of where to find certain features when you need them. - Learn the basic tools and shortcuts:
Start by learning the basic tools like the selection tools, brush tool, and healing tools. Additionally, familiarize yourself with common shortcuts that can save you time and make your editing process more efficient. - Use online tutorials and resources:
There are plenty of online tutorials and resources available that can help you learn and master Adobe Photoshop. Websites, video platforms, and even Adobe’s official website offer a wide range of tutorials catered to different skill levels. These tutorials can guide you through various techniques and help you unlock the full potential of the software. - Practice, practice, practice:
As with any skill, practice is key. Experiment with different images and editing techniques to hone your skills. The more you practice, the more comfortable you will become with Adobe Photoshop.
Conclusion
Adobe Photoshop is an indispensable tool for photographers looking to take their images to the next level. Its wide range of features, advanced editing capabilities, and compatibility make it the go-to choice for professionals and enthusiasts alike. So, whether you’re a beginner or an experienced photographer, investing time in learning Adobe Photoshop can greatly enhance your photography and unleash your creative potential.
Ethics of Photography and Photo Editing: An In-Depth Discussion
Introduction
In today’s visually-driven society, photography has become an integral part of our lives. It allows us to capture moments, evoke emotions, and preserve memories. However, with the advent of photo editing software, the line between reality and manipulation has blurred, raising ethical concerns. This article delves into the ethics of photography and photo editing, exploring the responsibilities of photographers and the impact of digital enhancements on our perception of truth.
The Importance of Ethical Photography
Photography has long been regarded as a means of documenting reality. From photojournalism to personal snapshots, the authenticity of images is crucial in conveying stories and portraying people, events, and landscapes accurately. Ethical photography not only maintains the trust of the audience but also upholds the integrity of the craft itself.
Honesty and Representation
At the core of ethical photography lies the principle of honesty. Photographers have a moral obligation to present subjects truthfully, respecting their dignity and privacy. Manipulating or altering images beyond reasonable adjustments can distort reality and mislead viewers. By respecting the boundaries of representation, photographers can preserve the trust of their audience and ensure the authenticity of their work.
The Challenge of Photo Editing
Photo editing, once limited to darkrooms and skilled professionals, has become increasingly accessible to the masses with the advent of digital photography and user-friendly editing software. While editing can enhance the aesthetic appeal of an image, it also raises ethical questions. To what extent can photographers manipulate their images without compromising their integrity? How does photo editing impact our perception of reality?
Retouching and Body Image
One of the most debated aspects of photo editing is its effect on body image. In the pursuit of unattainable beauty standards, models and individuals are often subjected to excessive retouching, erasing imperfections and altering their appearance. This not only perpetuates unrealistic ideals but also contributes to low self-esteem and body dysmorphia among observers. As photographers, we must question the ethics of editing that perpetuates harmful standards and consider the responsibility we have in promoting authenticity and diverse representations.
Contextual Manipulation
Photographers also possess the power to shape narratives through the selection and sequencing of images. This raises concerns about the deliberate manipulation of context to convey specific messages or evoke desired emotions. While storytelling is an integral part of visual communication, manipulating contexts can distort the truth, perpetuate stereotypes, or mislead the audience. Ethical photographers must strive to maintain transparency and provide accurate representations within the context of their work.
Informed Consent and Privacy
Respecting the privacy and informed consent of subjects is another ethical consideration in photography. While capturing candid moments can result in powerful and authentic images, photographers must always obtain consent when a person’s privacy may be compromised. Invasion of privacy can damage relationships and undermine trust, not only between the subject and the photographer but also within the broader community. Therefore, it is essential for photographers to navigate the delicate balance between artistic expression and respectful documentation.
Balancing Artistic Freedom and Responsibility
Photography is an art form that allows for subjective interpretation and creative expression. However, photographers must remember that with this artistic freedom comes the responsibility to use their skills ethically. While photography allows for creative editing and manipulation, it is important to maintain transparency and disclose any alterations made to an image. By being open about the editing process, photographers can foster trust and ensure their work is understood in its intended context.
Conclusion
The ethics of photography and photo editing is a complex and ever-evolving topic. As photographers, it is our duty to prioritize honesty, authenticity, and respect in our work. By embracing ethical practices, we can contribute to a more inclusive and truthful visual representation of the world around us. Let us strive for images that not only captivate but also serve as a catalyst for positive change.
Videography vs. Photography! How is making of video and still photos similar and different?
Introduction
In today’s digital age, visual content creation has become increasingly popular. Both videography and photography play a crucial role in capturing and presenting moments, stories, and emotions. While they share some similarities, there are also distinct differences between the two mediums. This article aims to explore the similarities and differences in the making of videos and still photos.
Videography: Capturing the Essence of Motion
Videography is the art and skill of capturing moving images, incorporating audio, and creating a cohesive storyline. It involves recording a sequence of images in a continuous flow, resulting in a complete motion picture. Videographers use specialized equipment, such as cameras, microphones, and stabilization tools, to capture high-quality footage.
Similarities with Photography
Videography and photography both involve capturing visuals to convey a message or tell a story. They both require a good sense of composition, lighting, and timing to create visually appealing content. Additionally, both mediums utilize the principles of visual storytelling, allowing the audience to connect with the subject matter on an emotional level.
Differences from Photography
The main distinction between videography and photography lies in their approach to capturing moments. While photography freezes a single moment in time, videography captures the unfolding of events. Videographers have to consider factors such as movement, pacing, and continuity, which photographers do not typically have to contend with. Additionally, videography often requires post-production editing to stitch together footage, add transitions, and enhance the audio quality.
Photography: The Art of Preserving Moments
Photography is a form of visual art that focuses on capturing still images in a single frame. Photographers carefully compose shots, manipulate lighting, and choose the perfect moment to press the shutter button. With advancements in technology, digital photography has become accessible to a broader audience, allowing anyone with a camera or smartphone to partake in this creative pursuit.
Similarities with Videography
While the primary goal of photography is to capture still images, there are areas where it overlaps with videography. Both mediums require an understanding of composition, lighting, and storytelling to create impactful visuals. Moreover, they share the common objective of evoking emotions and engaging the audience through visual storytelling.
Differences from Videography
The most notable difference between photography and videography is the absence of motion in still photos. Photographers seize a specific moment, often characterized by its uniqueness or significance. Without the luxury of capturing an entire sequence, photographers must rely on composition, lighting, and timing to encapsulate the essence of the subject matter within a single frame. Post-processing plays a significant role in photography, as photographers enhance their images through editing software to achieve their desired aesthetic.
Conclusion
In conclusion, while videography and photography share similarities in their creative processes, they also have distinct differences. Videography captures the essence of motion, allowing viewers to experience the events as they unfold. On the other hand, photography preserves a single moment, freezing it in time and inviting viewers to contemplate its significance. Both mediums rely on composition, lighting, and storytelling to create visually captivating content. Whether it’s through the power of motion or the art of stillness, videography and photography both offer unique and valuable ways to capture and immortalize our world.
Know Your Video Camera: Basics of Video Camera Operation
Introduction
Are you an aspiring filmmaker or a video enthusiast? Do you want to capture high-quality videos and master the art of using video cameras? Look no further! In this article, we will dive into the basics of video camera operation and help you understand your equipment better. Whether you are shooting for personal projects or professional purposes, knowing the ins and outs of your video camera is essential for achieving outstanding results.
The Importance of Understanding Your Video Camera
Before we delve into the technicalities of video camera operation, let’s discuss why it is essential to know your equipment thoroughly. Familiarizing yourself with the functionalities of your video camera empowers you to:
- Maximize Image Quality: Understanding various camera settings allows you to capture videos with optimal focus, exposure, and resolution. This knowledge enables you to showcase your subject matter in the best possible way.
- Exercise Creative Control: Knowing how to manipulate different camera settings gives you the freedom to express your artistic vision. Whether it’s adjusting the aperture for a shallow depth of field or experimenting with shutter speeds for capturing motion, having command over your camera allows you to unleash your creativity.
- Troubleshoot Technical Issues: By comprehending the inner workings of your video camera, you can identify and troubleshoot technical problems more efficiently. This knowledge saves you time and helps you avoid potential disasters during important shoots.
Now that we understand the importance of knowing our video cameras, let’s explore the basics of video camera operation.
The Main Components of a Video Camera
- Lens: The lens is arguably one of the most crucial components of a video camera. It determines the amount of light that enters the camera and influences the sharpness, depth of field, and overall quality of the imagery.
- Image Sensor: The image sensor converts light into electrical signals, capturing the video’s visual information. The two main types of image sensors found in video cameras are CCD (Charge-Coupled Device) and CMOS (Complementary Metal-Oxide-Semiconductor).
- Viewfinder: The viewfinder allows you to frame and compose your shots. Some video cameras feature an optical viewfinder, while others utilize an electronic viewfinder or rely solely on the camera’s LCD screen.
- Recording Media: Different video cameras use various recording media, such as tapes, memory cards, or even built-in hard drives. Understanding your camera’s compatible recording media ensures seamless capturing and storing of your footage.
Essential Camera Settings
- Exposure: Exposure refers to the amount of light that reaches the camera’s image sensor. The exposure settings include aperture, shutter speed, and ISO. These three parameters must be balanced to achieve proper exposure.
- White Balance: White balance ensures accurate color representation in your videos. It allows the camera to adjust for different lighting conditions, such as daylight, fluorescent, or tungsten.
- Focus: Achieving sharp focus is vital for capturing clear and professional-looking videos. Most video cameras provide manual and autofocus options, allowing you to choose the appropriate focus mode based on your subject matter.
- Audio Control: While visuals are crucial, audio quality should not be neglected. Understanding your camera’s audio control features enables you to capture clear and balanced sound, enhancing the overall viewing experience.
Tips for Better Video Camera Operation
- Practice Makes Perfect: Familiarize yourself with your video camera by experimenting with different settings and shooting environments. The more you practice using your equipment, the better you will become at capturing exceptional footage.
- Utilize Manual Mode: While auto mode can be convenient, exploring manual mode provides greater control and creative possibilities. Experimenting with manual settings will help you enhance your skills and produce more professional-looking videos.
- Invest in Accessories: Consider investing in additional accessories that complement your video camera. Equipment like tripods, external microphones, and interchangeable lenses can greatly enhance the quality of your footage.
Conclusion
By knowing the basics of video camera operation, you can elevate your video capturing skills and produce high-quality content. Understanding your equipment empowers you to maximize image quality, exercise creative control, and troubleshoot technical issues effectively. Remember to practice regularly and experiment with different settings to become a proficient video camera operator. So go out there, embrace your inner filmmaker, and capture the world through your lens!
Controlling the Camera: Exploring the World of Camera Gear
Introduction
Controlling the camera is essential for capturing the perfect shot. Whether you are a professional photographer or a hobbyist, having the right equipment is crucial. In this article, we will explore the various tools available for controlling the camera, including monopods, tripods, rolling tripods, dolly systems, jib arms, and microphones. These tools not only enhance stability but also add versatility and creativity to your photography and videography projects. So, let’s dive into the world of camera gear and discover how these tools can elevate your craft.
Why Use Camera Support Devices?
Camera support devices, such as monopods, tripods, rolling tripods, dolly systems, jib arms, and microphones, play a vital role in ensuring stability and control while capturing images or videos. These tools provide a sturdy and steady platform, eliminating the chances of camera shake, resulting in sharper and more focused visuals. Additionally, camera support devices also allow for precise framing, smooth panning, and dynamic movements, adding depth and dimension to your shots.
Monopods: The Portable Assistants
What Is a Monopod?
A monopod is a lightweight and portable camera support device equipped with a single pole. It offers stability for your camera while allowing you to move more freely compared to tripods. Monopods are an excellent choice for situations where you need quick setup and mobility, such as sports photography or documentary filmmaking.
Features and Benefits
- Portability: Monopods are compact and easy to carry, making them ideal for outdoor shooting.
- Quick Setup: With their one-legged design, monopods can be set up in seconds, saving time during shoots.
- Improved Stability: Using a monopod reduces camera shake, resulting in sharper images and smoother videos.
- Versatility: Monopods can be used in a variety of shooting scenarios, making them an essential tool for photographers and videographers.
Tripods: The Ultimate Stability Solution
What Is a Tripod?
A tripod is a three-legged camera support device that provides exceptional stability and control. It is a must-have tool for photographers and videographers who require precision and long exposure capabilities. Tripods come in various sizes and materials, offering flexibility and reliability for all your shooting needs.
Features and Benefits
- Stability: Tripods offer rock-solid stability, eliminating camera shake and allowing for longer exposures and sharper images.
- Height Adjustability: Most tripods have adjustable legs, allowing you to adapt to different shooting situations and angles.
- Multiple Mounting Options: Tripods come with a mounting head that can accommodate different camera types and sizes.
- Versatility: Tripods are suitable for a wide range of photography genres, including landscapes, portraits, and macro photography.
Rolling Tripods and Dolly Systems: Unleashing Creative Movement
What Are Rolling Tripods and Dolly Systems?
Rolling tripods and dolly systems take camera control to the next level by introducing smooth movements and tracking shots. These devices consist of wheels and provide the ability to move the camera horizontally, vertically, or in circular motions with ease. They are commonly used in videography and cinematography to add drama and dynamism to shots.
Features and Benefits
- Smooth Movements: Rolling tripods and dolly systems offer fluid camera movements, enhancing the visual appeal of your videos.
- Versatile Shots: With these tools, you can achieve straight tracking shots, curved movements, or dynamic pans.
- Stability on Wheels: Rolling tripods and dolly systems provide stability while enabling easy movement across different surfaces.
- Precise Control: The wheels and adjustable handles allow for precise control over camera movements, catering to your creative vision.
Jib Arms: Reaching New Heights
What Is a Jib Arm?
A jib arm is an extendable crane-like device that extends the reach of your camera, enabling high-angle, low-angle, and overhead shots. Jib arms are commonly used in filmmaking and event videography to add a cinematic and grandiose feel to the footage.
Features and Benefits
- Cinematic Shots: Jib arms allow you to create sweeping, high-angle shots or dramatic low-angle shots that add visual interest to your videos.
- Increased Reach: With the extendable arm, jib arms provide an extended reach, capturing shots from unique perspectives.
- Stability and Control: Jib arms offer stability and smooth movements, allowing you to achieve precise camera control.
- Easy Setup: Despite their complex appearance, modern jib arms are user-friendly and can be set up quickly.
Microphones: Capturing Crisp Audio
Why Are Microphones Essential?
While focusing on visual perfection, it’s crucial not to overlook audio quality. External microphones significantly improve the overall audio experience by capturing clear and crisp sound. When using a microphone alongside your camera gear, you elevate the quality of your videos and ensure that your message is heard loud and clear.
Types of Microphones
- Shotgun Microphones: These directional microphones capture sound from a specific direction, reducing background noise and enhancing audio clarity.
- Lavalier Microphones: Also known as lapel microphones, lavalier microphones provide hands-free audio capture, making them perfect for interviews and presentations.
- Wireless Microphones: As the name suggests, wireless microphones offer freedom of movement while maintaining high-quality sound transmission.
Conclusion
Controlling the camera is essential for capturing stunning visuals and captivating stories. Whether you opt for a monopod, tripod, rolling tripod, dolly system, jib arm, or microphone, each tool serves a specific purpose in enhancing stability, controlling movement, and capturing high-quality audio. By understanding the unique features and benefits of these camera support devices, you can elevate your craft and produce outstanding photographs and videos that leave a lasting impression. So, embrace the world of camera gear and unlock your creative potential!
Basics of Lens Angle, Zoom, Depth of Field, Exposure, Sharpness, (Auto) Focus, Framing, Panning, Tilting
Introduction
Are you new to photography? Do you want to learn about the basics of lens angle, zoom, depth of field, exposure, sharpness, (auto) focus, framing, panning, and tilting? In this article, we will explore these essential concepts that every photographer, whether a beginner or a professional, needs to understand. By the end of this article, you will have a solid foundation of knowledge to enhance your photography skills. So let’s dive in!
Lens Angle: Capturing the Wider Picture
When it comes to lens angle, it refers to the width of the scene that the lens can capture. A wide-angle lens has a shorter focal length, allowing you to capture a wider angle of view. This type of lens is perfect for landscape and architectural photography, as it allows you to include more of the scene in your frame. On the other hand, a telephoto lens has a longer focal length, allowing you to zoom in and capture distant subjects. This type of lens is commonly used in wildlife and sports photography.
Zoom: Bringing the Subject Closer
Zooming allows you to adjust the focal length of your lens, which in turn changes the magnification of the subject. It gives you the freedom to bring distant subjects closer or to compress the perspective for creative effect. Zoom lenses are versatile and widely used in various genres of photography. They offer the convenience of adjustable focal lengths, allowing you to be flexible in your composition without constantly changing lenses.
Depth of Field: Creating the Perfect Focus
Depth of field refers to the range of distance in an image that appears acceptably sharp. It is controlled by the aperture setting of your lens. A wide aperture (small f-number) creates a shallow depth of field, resulting in a subject that is sharply in focus while the background or foreground appears blurred. This technique is commonly used in portrait and macro photography to isolate the subject from its surroundings. On the other hand, a narrow aperture (large f-number) creates a deep depth of field, making both the subject and background appear sharp. Landscape photographers often use this technique to capture the entire scene in focus.
Exposure: Balancing Light and Shadows
Exposure is the amount of light that reaches the camera’s image sensor. It is determined by three factors: aperture, shutter speed, and ISO. Aperture controls the amount of light that enters the camera through the lens. Shutter speed regulates the duration for which the sensor is exposed to light. ISO measures the sensitivity of the image sensor to light. The right combination of these three settings ensures a well-exposed image. Understanding exposure is crucial to capture correctly lit photographs, whether you want to freeze action or create long exposures.
Sharpness: Ensuring Clarity and Detail
Sharpness refers to the clarity and detail in a photograph. Achieving sharp images requires proper focusing techniques, stable camera support, and the right choice of aperture. Autofocus systems in modern cameras make it easier to attain sharp focus, but understanding manual focus can be beneficial in certain situations. To minimize camera shake and achieve sharper results, using a tripod or stabilizing the camera against a solid surface is recommended. Additionally, selecting an appropriate aperture that strikes a balance between depth of field and diffraction is crucial.
(Auto) Focus: Locking onto the Subject
(Auto) focus is the process of adjusting the lens to bring the subject into sharp focus. Autofocus systems use various focusing points to detect the subject and track its movement. They provide convenience and accuracy, especially when dealing with moving subjects or situations where manual focus is challenging. However, understanding manual focus can be advantageous in situations where autofocus struggles, such as low-light conditions or scenes with low-contrast subjects.
Framing: Composing the Perfect Shot
Framing is the art of composing a photograph to create a pleasing and visually engaging image. It involves placing the subject within the frame, considering the balance, symmetry, and leading lines to guide the viewer’s eye. Framing is a creative decision that can significantly impact the message and impact of your photograph. Experimenting with different angles, perspectives, and compositions can help you achieve unique and captivating shots.
Panning: Capturing Motion
Panning is a technique used to capture a moving subject while maintaining a sharp subject and a blurred background. It involves tracking the subject’s movement with your camera as it moves horizontally or vertically. By using a slow shutter speed and following the subject’s motion, you can create a sense of speed and dynamism in your photographs.
Tilting: Altering Perspective
Tilting refers to the intentional adjustment of the camera’s angle, resulting in a tilted horizon or perspective. This technique can be used creatively to add a sense of dynamism or to create unique and abstract compositions. Tilting the camera can also be useful in architectural photography when shooting tall buildings to prevent converging lines.
Conclusion
Understanding the basics of lens angle, zoom, depth of field, exposure, sharpness, (auto) focus, framing, panning, and tilting is essential for every photographer. With this knowledge, you can take control of your camera and unleash your creativity. So grab your camera and start experimenting with these concepts to capture stunning photographs that tell your unique story.
Selecting the Right Shot: Types of Shots and the Best Possible Selection for Your Video
Introduction:
Are you looking to create a compelling and visually appealing video? One of the most crucial aspects of video production is selecting the right shot. The shot selection can greatly impact the overall quality and success of your video. In this article, we will explore the various types of shots and guide you on selecting the best possible type for your video.
Types of Shots:
Before diving into the selection process, let’s familiarize ourselves with the different types of shots commonly used in video production:
1. Wide Shot:
The wide shot, also known as the establishing shot, provides the viewer with a context or setting for the following scenes. It captures a broad view of the surroundings and is often used at the beginning of a video to set the stage.
2. Medium Shot:
The medium shot frames the subject from the waist up, allowing for closer focus on the subject while still maintaining some environmental context.
3. Close-Up Shot:
The close-up shot focuses on the subject’s face or a specific detail, highlighting emotions or important elements. It creates a more intimate and personal connection with the viewer.
4. Extreme Close-Up Shot:
Similar to the close-up shot, the extreme close-up shot zooms in even further, emphasizing small details or specific features. It can be particularly effective for showcasing intricate objects or conveying intense emotions.
5. Over-The-Shoulder Shot:
The over-the-shoulder shot positions the camera behind one character and slightly over their shoulder, capturing both the subject and their perspective. It enhances the sense of immersion and involvement within the scene.
6. Point-of-View Shot:
The point-of-view shot allows the viewer to experience the scene through the eyes of a character. It immerses the audience into the story, creating a more engaging and interactive viewing experience.
Selection Process: Finding the Best Possible Shot for Your Video
Now that we have a better understanding of the various types of shots, let’s delve into the process of selecting the best shot for your video:
1. Define the Purpose and Message:
Start by clarifying the purpose and message of your video. What do you want to convey? Is it a promotional video, a narrative, or an instructional piece? Understanding the core objective will guide your shot selection.
2. Consider Your Target Audience:
Next, consider your target audience. Who are you trying to reach? Tailor your shot selection to resonate with their preferences and expectations. For example, a younger audience might respond well to dynamic and fast-paced shots, while a more mature audience may appreciate slower and more composed compositions.
3. Analyze the Content:
Thoroughly analyze the content of your video. Are there any critical elements or specific details that need to be highlighted? Depending on the subject matter, different shots can help convey your message more effectively. For example, a demonstration may require a combination of close-ups and over-the-shoulder shots to clearly depict the steps involved.
4. Explore Shot Sequences:
Consider the sequence of shots. How will they flow together to tell a cohesive story? Experiment with a variety of shots to create visual interest and maintain viewer engagement. Pacing and transitions between shots can greatly enhance the overall impact of your video.
5. Test and Refine:
Once you have a selection of shots, test them out and gather feedback. Pay attention to how each shot contributes to the overall narrative and whether they align with your desired message. Make adjustments as necessary to ensure a seamless and impactful video.
Conclusion:
Selecting the right shot is a vital part of the video production process. By understanding the various types of shots and following a systematic selection process, you can create compelling and visually captivating videos that effectively communicate your message. Remember to consider the purpose, target audience, content, and shot sequences to ensure the best possible shot selection for your video. Happy shooting!
The Application of Laws/Rules of Photography/Videography
Introduction
Photography and videography are highly creative and technical fields that require a solid understanding of the laws and rules governing them. Whether you are a professional photographer/videographer, an amateur enthusiast, or someone who simply wants to capture beautiful moments, it is crucial to be aware of these laws and rules. In this article, we will explore the application of laws and rules in photography/videography, providing insights and tips to ensure you navigate these domains with confidence.
Understanding Copyright Laws in Photography/Videography
One of the most fundamental aspects of photography/videography is copyright protection. Copyright laws are in place to protect the photographers/videographers’ creative work from unauthorized reproduction, distribution, or public display. As a photographer/videographer, it is important to understand the following:
What is Copyright?
Copyright grants exclusive rights to the creator of an original work, such as a photograph or video. These rights include the right to reproduce the work, prepare derivative works, distribute copies, and display or perform the work publicly.
How Does Copyright Apply to Photography/Videography?
When you capture a photograph or shoot a video, you automatically hold the copyright to that work. This means that other individuals or organizations cannot use your work without your permission, except under certain circumstances such as fair use or public domain.
The Importance of Registering Copyrights
While your work is automatically protected under copyright law, it is still advisable to register it with the appropriate authorities. Registering your copyright strengthens your legal position if infringement occurs, allowing you to seek damages and take legal action if necessary.
Ensuring Privacy and Consent in Photography/Videography
Respecting the privacy and obtaining consent from individuals you photograph or film is crucial to ethical and legal practice. Understanding privacy laws and obtaining consent shows professionalism and ensures that everyone involved feels comfortable. Here’s what you need to know:
Privacy Laws and Public Spaces
In public spaces, individuals generally have a limited expectation of privacy. This means that you can capture photographs or videos of people in public without obtaining explicit consent. However, it is always a good practice to use your judgment and respect the privacy of individuals who may not want to be photographed or filmed.
Importance of Consent
When capturing images of individuals in private spaces or situations where they have a higher expectation of privacy, obtaining consent becomes essential. Ensure that you explain the purpose and potential use of the photographs/videos and obtain written consent whenever possible.
Complying with Commercial Photography/Videography Regulations
If you plan to use your photography/videography commercially, whether selling prints or providing services, there are additional regulations to consider. These regulations aim to protect consumers, maintain fair competition, and ensure ethical practices. Here are some key points:
Business Registration and Licensing
Before engaging in commercial photography/videography, it is important to register your business and obtain any necessary licenses. This helps in establishing your legitimacy and ensures you comply with tax regulations.
Model Releases
When using photographs/videos for commercial purposes, it is essential to have signed model releases from individuals featuring prominently in the images. This grants you the legal right to use their likeness commercially and protects you from potential legal issues.
Intellectual Property Considerations
In addition to obtaining permission from individuals, it is crucial to respect intellectual property rights. Avoid using copyrighted materials, such as logos or trademarks, without proper authorization.
Conclusion
By understanding and applying the laws/rules of photography/videography, you can confidently pursue your passion while respecting the rights and privacy of those involved. Remember to always stay updated on any legal developments and seek legal advice if you have any concerns. Ethical and legal practice not only protects your interests but also upholds the integrity of the photography/videography community as a whole. So go out, capture breathtaking moments, and enjoy the art of visual storytelling while staying within the boundaries of the law.
Lighting for Video (Indoors and Outdoors): Creating the Perfect Visuals
Introduction:
Lighting plays a crucial role in the world of video production. Whether you are shooting indoors or outdoors, the right lighting setup can make or break your visual presentation. Understanding the art and technicalities of lighting for video is essential to create impactful and professional-looking videos. In this article, we will explore the techniques, tips, and equipment needed for effective lighting in both indoor and outdoor video shoots.
Lighting for Video Indoors:
Why is lighting important indoors?
Indoor video shoots present a unique set of challenges when it comes to lighting. Often, the available sources of light are limited, and the quality of light may be insufficient for capturing high-quality footage. The right lighting setup indoors can enhance the mood, visibility, and overall aesthetics of your videos.
Types of lighting setups for indoor video shoots:
- Three-point lighting: This classic lighting technique involves using three light sources to evenly illuminate the subject. The key light, fill light, and back light are strategically placed to create depth, eliminate harsh shadows, and provide a well-balanced visual appeal.
- Softbox lighting: Softboxes are popular light modifiers that create soft and diffused lighting. They help to minimize unwanted shadows, reduce glare, and provide a more flattering illumination for the subject.
- Ring lights: Ring lights are circular lights with a hole in the center, perfect for illuminating the subject’s face evenly. They create a unique, halo-shaped catchlight in the subject’s eyes, resulting in a captivating and professional look.
Essential lighting equipment for indoor video shoots:
- Lighting fixtures: LED panels, strobes, and tungsten lights are commonly used lighting fixtures for video production. Each offers its advantages and considerations, such as power consumption, color temperature, and portability.
- Light stands and boom arms: These tools allow you to position your lights at the desired height and angle, ensuring optimal lighting angles and reducing unwanted shadows.
- Light modifiers: Diffusion panels, reflectors, and softboxes help control the direction, intensity, and quality of light, enabling you to achieve the desired visual effects.
Lighting for Video Outdoors:
Overcoming lighting challenges outdoors:
Shooting videos outdoors comes with various unpredictable lighting scenarios. You may have to deal with harsh sunlight, varying weather conditions, and lack of control over natural light. Overcoming these challenges is crucial for capturing clear, well-exposed footage.
Techniques for lighting outdoor video shoots:
- Golden hour filming: Shooting during the hour after sunrise or before sunset can provide beautiful, warm lighting with softer shadows. The natural light during this time adds a cinematic touch to your videos.
- Using reflectors: Reflectors bounce sunlight back onto the subject, filling in shadows and providing a more balanced lighting. They come in various colors, allowing you to alter the light’s color tone for creative effects.
- Adjusting exposure: Proper exposure settings are crucial when shooting outdoors. Be mindful of overexposure caused by bright sunlight and underexposure in shaded areas, ensuring your subject is well-lit throughout the scene.
Essential lighting equipment for outdoor video shoots:
- Portable LED lights: These compact and battery-powered lights are perfect for outdoor shoots. They offer flexibility, allowing you to add fill or key lighting when natural light is insufficient.
- Collapsible reflector kits: Lightweight and easy to carry, collapsible reflector kits are essential for manipulating natural light outdoors. They are available in various sizes and shapes to cater to different lighting scenarios.
- Diffusers: Diffusers are used to soften and spread harsh sunlight. They help create even lighting on the subject and reduce the intensity of shadows and highlights.
Conclusion:
Mastering the art of lighting for video is essential for creating visually stunning and captivating content. Whether shooting indoors or outdoors, understanding lighting techniques, equipment, and the challenges posed by different environments is crucial. By employing the right lighting setups, you can elevate the quality of your videos, enhancing their impact and engaging your audience like never before.
Audio for Video: Understanding and Controlling Audio for Your Video
Introduction
When it comes to creating captivating videos, audio plays a crucial role in enhancing the viewer’s experience. Whether you are producing a professional corporate video or simply recording a vlog, understanding and controlling the audio is essential. In this article, we will delve into the intricacies of audio for video, offering expert advice to help you achieve excellent sound quality and seamless integration with your visuals.
The Importance of Quality Audio
Great audio can make or break a video. Even with stunning visuals, poor audio quality can leave viewers disengaged and frustrated. On the other hand, crystal clear audio can captivate the audience, creating a more immersive and enjoyable viewing experience.
Understanding Audio Formats
Before diving into audio recording and editing techniques, it is important to understand the different audio formats commonly used in video production. Among the most popular formats are WAV and MP3 files. While WAV files offer uncompressed audio and high fidelity, they tend to be larger in size. MP3 files, on the other hand, are compressed and more suitable for online streaming but may sacrifice some audio quality.
Recording Techniques for Clear Sound
To capture high-quality audio for your videos, proper recording techniques are essential. Here are a few tips to ensure optimum sound clarity:
- Select the right microphone: Choosing the appropriate microphone based on your shooting environment and audio requirements plays a significant role in sound quality. Options include lavalier microphones for individual interviews, shotgun microphones for capturing audio within a specific range, and condenser microphones for studio recording.
- Control background noise: Background noise can be distracting and detract from the overall audio quality. Minimize noise by choosing a quiet location, using soundproofing materials, and considering a directional microphone to focus on the desired sound source.
- Set appropriate levels: Adjusting the microphone levels is crucial to avoiding distorted or too soft audio. Test the levels before recording and monitor the sound throughout the shoot to ensure consistent quality.
Editing and Mixing Audio
Once the video is recorded, the next step is editing and mixing the audio to synchronize it with the visuals. Here are some key considerations:
- Remove unwanted sounds: Often, recorded audio may contain unwanted sounds such as background noise or microphone handling noise. Use audio editing software to clean up the audio by removing or reducing these disturbances.
- Balance audio levels: Achieving a proper balance between different audio elements is important for clarity. Adjust the volume levels of background music or ambient sound effects to complement the dialogue without overpowering it.
- Enhance audio quality: Audio editing tools offer a range of features to enhance the overall audio quality. These include equalizers for adjusting frequencies, compressors to control volume dynamics, and reverb effects to add depth and richness.
Best Practices for Audio Integration
To ensure seamless integration of audio and video, keep the following best practices in mind:
- Synchronize audio with visuals: Aligning the audio precisely with the corresponding video clips is vital. This can be achieved by using a clapperboard during filming or by matching key audio cues with specific visual elements.
- Maintain consistent audio levels: In video production, audio levels should be consistent across all clips to create a cohesive viewing experience. Pay attention to transitions between different shots and adjust volume levels accordingly.
- Consider closed captions and subtitles: Including closed captions or subtitles in your video is not only beneficial for viewers with hearing impairments but also for those watching without sound. Ensure proper synchronization between audio and text for optimal accessibility.
Conclusion
Mastering the art of controlling and understanding audio for video production is a valuable skill that can greatly enhance the quality of your videos. By following the tips and techniques mentioned in this article, you can create captivating and engaging videos with crystal clear audio. Remember, great visuals may capture attention, but excellent audio is what keeps viewers engaged throughout the entire experience.
Basics of Video Editing: An Essential Guide for Beginners
Are you interested in learning the basics of video editing? In today’s digital age, video content has become a powerful tool for communication and expression. Whether you want to create captivating YouTube videos, produce professional marketing materials, or simply enhance your personal videos, having a solid understanding of video editing is crucial.
In this article, we will delve into the fundamentals of video editing, providing you with a comprehensive guide to get started on your editing journey. So, grab your popcorn and let’s dive in!
What is Video Editing?
Video editing is the process of manipulating and arranging video footage to create a cohesive and engaging final product. It involves trimming unwanted sections, adding transitions and effects, adjusting colors and audio, and combining multiple clips to tell a compelling story.
Why is Video Editing Important?
Video editing plays a significant role in enhancing the overall impact and quality of a video. It allows you to convey your message more effectively, evoke emotions, and keep your audience engaged. Whether you’re editing a documentary, a short film, or a promotional video, mastering the art of video editing can elevate your content to new heights.
Choosing the Right Software
To kickstart your video editing journey, you’ll need to choose the right software. There are numerous options available, catering to different skill levels and budgets. Some popular video editing software includes:
- Adobe Premiere Pro: Ideal for professionals, offering a wide range of features and advanced editing capabilities.
- iMovie: A user-friendly option for Mac users, equipped with essential editing tools and effects.
- Final Cut Pro: Another excellent choice for Mac users, providing professional-grade features at a slightly higher price point.
- Filmora: A beginner-friendly and affordable software with a simplified interface and a plethora of built-in effects.
Learning the Editing Process
Once you’ve selected your preferred video editing software, it’s time to acquaint yourself with the editing process. Though every editor may have their unique workflow, the following steps provide a general framework for video editing:
1. Importing Footage
The first step is to import your video footage into the editing software. This can be done by connecting your camera to your computer or by transferring the files from your storage device. Organize your clips into folders or bins to maintain a structured workflow.
2. Assembling and Arranging Clips
Next, drag and drop your clips onto the timeline or storyboard area of your editing software. Here, you can rearrange the sequence of your clips, syncing them with audio tracks, and trimming any unnecessary sections.
3. Applying Transitions and Effects
To add visual appeal and seamless transitions between scenes, applying various transitions and effects can make all the difference. Experiment with different options such as fade ins/outs, dissolves, and wipes to enhance the flow of your video.
4. Enhancing Audio
Audio quality can make or break a video. Ensure your audio tracks are clear and balanced. Adjust volume levels, remove background noise, and consider using background music or voiceovers to create a more immersive experience.
5. Color Correction and Grading
To achieve a consistent and professional look, color correction and grading are essential. Adjust the brightness, contrast, and saturation of your footage to ensure a visually pleasing result. A well-calibrated color scheme can greatly enhance the overall impact of your video.
6. Adding Text and Titles
Consider including text overlays or titles to provide context or convey important information. This can be done by utilizing built-in text tools within your editing software or importing custom-designed graphics.
7. Finalizing and Exporting
Once you are satisfied with your edits, it’s time to finalize your video. Preview it to ensure all elements are in sync, make any necessary adjustments, and then export it in your desired format and resolution.
Tips for Successful Video Editing
To become a proficient video editor, consider the following tips:
- Stay organized: Maintain a tidy file structure and label your clips for easy access.
- Experiment with different techniques: Don’t shy away from trying out new effects, transitions, and editing styles. It’s through experimentation that you’ll find your unique editing voice.
- Pay attention to pacing: A well-paced video keeps the viewer engaged. Know when to cut and when to let a shot breathe.
- Optimize for different platforms: Tailor your editing style to suit the platform or medium on which your video will be displayed. Keep in mind that the aspect ratio, resolution, and video length may differ across platforms.
- Seek feedback: Ask for constructive criticism from friends, fellow editors, or online communities. Feedback can help you identify areas for improvement and grow as an editor.
In conclusion, video editing is a skill that can be acquired with practice and dedication. By mastering the basics of video editing, you can bring your creative vision to life and create videos that captivate and engage your audience. So, grab your editing software of choice and start exploring the endless possibilities that video editing has to offer!