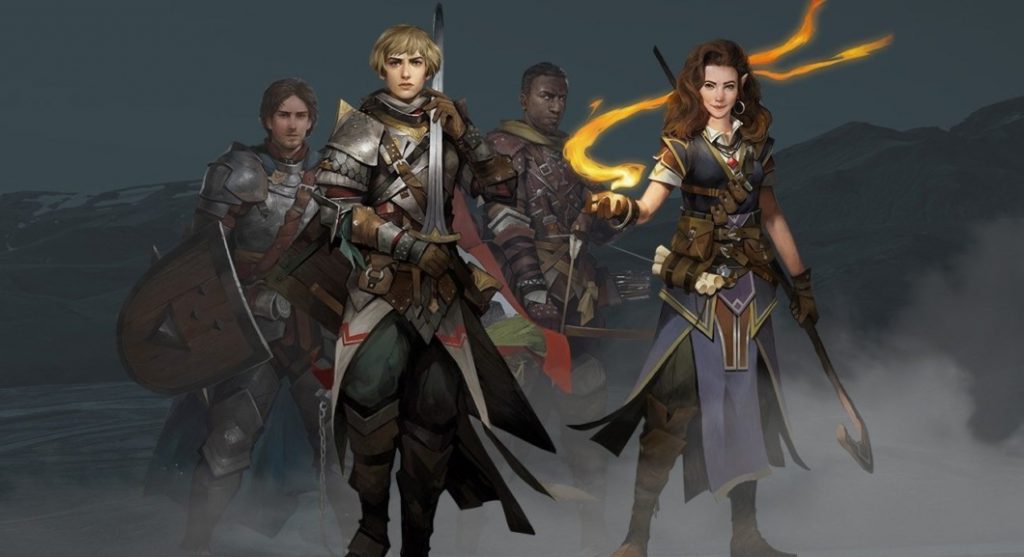
The release date for Dragon Age: The Veilguard is October 31, 2024.
Developer: BioWare . Publisher: Electronic Arts .
The story is 15 hours long. 100% completion time is 40 hours.
Dragon Age: The Veilguard System Requirements . When was it released?
| Characteristic | Minimum requirements | Recommended requirements |
| CPU | Core i5-8400 Ryzen 3 3300X |
Core i9-9900K Yzen 7 3700X |
| RAM | 16 GB RAM | 16 GB RAM |
| Video card | NVIDIA GTX 970/1650 AMD Radeon R9 290X DirectX 12 |
NVIDIA RTX 2070 AMD Radeon RX 5700XT DirectX 12 |
| Disk space | 100 GB | 100 GB SSD |
| Operating system | Windows 64-bit: 10/11 | Windows 64-bit: 10/11 |
Walkthrough
Solas, the Dread Wolf, captured the elven gods and created a veil that separated our world from the primordial magic of the Fade. But after this, the elves lost their magic and immortality. Now Solas wants to destroy the veil and undo what he did, but this will lead to the destruction of the world. We must stop him. Choose a hero:
– Race (elf, qunari, people, gnomes);
– Appearance (gender, head, body);
– Class (warrior, rogue, mage);
– Faction (Grey Wardens, Veil Walkers, Shadow Dragons, Lords of Fortune, Sorrow Watch, Antivan Ravens);
– Game style (history, adventure, hardcore);
– Complete (name, surname, voice, tone).
1. The End of the Beginning in
Dragon Age: The Veilguard. Guide
Minrathous is the capital of the Tevinter Imperium. To find Solas in the big city, you need to interrogate the innkeeper in the tavern. Choose: This Isn’t Just a Demand (Combat) / Let’s Talk It Over (Conversation). With us is the dwarf Varric , the storyteller. Together, we’ll set out to find Nev Gallus, the contact.
The streets of Minrathous. Outside, we descend the steps. We’ll see that Solas has already begun the ritual. Demons will begin to penetrate the veil. We run after the dwarf.
Market square. We cross the bridge and climb over the obstacle (press F). We meet the dwarf Harding . The three of us fight the ghosts.
Observation Building, Overlook, Terrace. Further along the road are Venatori mages; kill them. On the right, you can climb onto the hanging platform to grab some gold. Break through the crystal field and roll down the slope.
Dumat Square. We learn to use skills in battle (press the number keys 1, 2, 3, 4). We’ll meet the sorceress Nev .
Access to the rooftops, Canals. The four of us fight our way to the huge statue where Solas might be. We slide down the rope and break through the barricade. Use a ranged attack (Q or RMB).
A secret hideout. We make our way through the ruined prison. Climb up to the locked door and pull the lever on the balcony . Behind the door, we’ll find a large portal that will transport us to the Arlatan Forest.
Approaching the ruins, Ruins. In the distance, Solas is performing a ritual. We fight ghosts along the way. We climb the paths up to the glowing crystals. In a large clearing, the boss, Demon of Pride, will attack . Jump away from the red attack zones in time (spacebar). Afterwards, Varric will decide to fight his way through to Solas alone. He will try to persuade him in a friendly manner, but it won’t work.
The ritual site. We need to climb up to bring down the statue. We’ll choose who to take with us: Nev or Harding. We’ll make our way along the catwalks on the left, and beyond them, we’ll bring down the column. At that moment, Solas will strike Varric. Large creatures will appear around Solas, and we’ll be knocked unconscious.
We’ll find ourselves in a shadow space. Solas will explain that after the ritual, he was imprisoned, and the old gods have broken free from the veil. He’ll task us with destroying two deities.
2. Shadows of Ancient Arlathan
We wake up in the infirmary, next to a wounded Varric. The girl who came with us was also injured. There’s a chest in this room, containing the pre-order armor .
We go explore the lighthouse where we ended up with the squad. Outside, we’ll see we’re in the Fade, near the ruined towers. We’ll be able to customize the hero’s skills and view the map. We can also chat with Nev and Harding (timed quests are marked with a “clock” icon; if you don’t complete them immediately, they’ll expire).
Secrets. Go around the building in the north; there’s a mysterious note (1) behind it . You need to turn three pairs of statues so they face each other. The first pair is behind the northern building. Under Nev’s building, outside, go down one floor to find a chest and a note . The second pair of statues is on the southern semicircular staircase and near the eastern building. The third pair is nearby, between the semicircular staircases. This will open the building on the northern island; inside are resources and a note . To the east, through the dining hall building, you can reach a side balcony; there’s a chest there. To the south is the Harding greenhouse; there’s a chest around the corner to the right .
Let’s return to base. We’ll all discuss Solas and his mission. Elgar’nan and Ghilan’nain are two other elven gods who are now free. We support the opinion of one of the girls.
From the hall, we descend down the corridor and return through the portal to the site of the ritual, the Arlatan Forest. We’ll meet three more heroes: Irelin, Strife, and Tarith. They’re searching for artifacts that have been activated since the awakening of the gods. They need to find their most experienced colleague, Bellara.
3. In the grip of entropy
In the forest, we’ll be attacked by mobile armor. During the fight, we’ll encounter the specialist Bellara , who will absorb the animated artifacts. Together, we’ll search for the core of the artifact that created the magical bubble around us. We’ll pass through the ruins of the elven temple and search the chests inside.
Forest path, approaches to the ruins. Further into the forest, there’s a cliff. On the right, pick up the crystal, insert it into the stand, and create a bridge. On the other bank, repair the first broken magical device . Afterwards, we’ll be attacked by a squad of ghosts.
Elven ruins. We pass through the temple ruins, inside there is a chest .
Mountain path. Climb the rise ahead. We can turn around and jump to a separate platform on the right behind us, below; there’s a chest on it. From the rise, we head to the western cliff; there’s a tattered note (2) lying by a sparkling rock .
Wolf Temple on the cliff. We go to the next building and kill the armor. Inside, there are two tunnels and only one crystal that opens the doors. Search the dead end on the left, move the crystal to the right, and behind the doors we’ll get a new weapon . In the hall, there’s a large squad of living armor.
Outside, in the ruins, we’ll encounter some darkspawn—ghouls. Upstairs, we repair the second device . There’s a chest on the lower floors . Break the boxes in the corners; they might also contain rewards. A little further in the courtyard, we’ll find a large ballista. Stand behind it and shoot it to destroy the gate and the enemies behind it. Enter the Abandoned Camp.
Broken staircase. In the southeastern dead end, you can break through the boxes and barricade; behind them is a secret room with a cracked scroll inside (3) . At the edge, hit the wooden post, cross it to a separate island, and grab the chest . The main path is to the west.
We’re heading to the third device . In the circular square, there’s a squad of armored warriors, ghouls, and a powerful enemy, the Enraged Sentry . There are locked doors ahead; grab the crystal near them, carry it back, and unlock the side doors. Climb to the top of the wall, destroy the living growth, and fire the ballista at the white wall and the enemies. After that, we can reach the dead end on the left, where we can grab the second crystal. Insert both crystals in front of the doors ahead.
A floating temple of the archives. There are two chests along the way . In the temple, Bellara will begin absorbing a large artifact. At this point, an Ogre boss will attack . Use a powerful ability against it (key 4). Once defeated, Bellara will extract the crystal, revealing the Spirit of the Archive. Search the entire room and speak with Bellara again.
4. City of Shadows
Let’s return to the temple in the forest; the Veilwalkers have set up camp here. It’s best to choose “We need to save the Dalish first” in the conversation; everyone will approve. We’ll be tasked with finding the missing Veilwalkers. There’s a recording (4) in the camp near the stairs . We leave, climb onto the ship at the corner to the right, and find the Herald newspaper (5) .
Observation point. We head out into the forest towards the marker. There’s a broken device with a crystal on the way; we repair it with Bellara (Tab). We take the crystal and grab the chest behind the force field . Insert the crystal into the socket on the shore behind the rock. This will create a bridge to the island, where we can collect resources . At the fork, we go right and grab the chest and note (6) on the hill. We drop the ladder down to the camp.
Ruined Frontier. At the fork, go straight ahead and meet the sorceress Nev on the pier by the water. Together, we’ll take a boat to an empty settlement.
D’Meta Crossing. There’s a barricade on the main road. From there, head right and climb over the barrier. Destroy the red growths on the walls. There are a couple of survivors in the courtyard, but they’re zombified. Together with our allies, we examine several bodies. In the square, break through the red growth on the left to find the entrance to a secret area. Inside is a torn note (7) .
The main path is on the right, along the edge of the red chasm. We break the red growth and crawl behind it into the cave. Inside, the dying elf Jahel will warn you that the gods have returned. They’ve used blood magic. We break through another growth.
Outside, we’ll encounter the dragon Ghilan’nain. He won’t attack, but will fly away. Inside the cocoon, Elder Julius is dying. We ask him what happened. The gods used his greed to kill the rest of the villagers. We have a choice: save him (Nev+) / send him to the Grey Wardens / leave him to die (Bellara+).
Let’s return to camp. We’ll tell the others about the destroyed village. The travelers have called upon the witch Morrigan for help. She’ll advise them to find Solas’s dagger so they can attack the gods.
5. The Singing Blade
Dragon Age: The Veilguard (2024)
Together with Harding and Nev, we’ll head to the Ritual Site. We enter the building, and a demon with a dagger will run away from us. We’ll pierce the red growth on the left and climb the stairs.
A hidden passage. We fight off the darkspawn. We climb through the ruins and, on the balcony, direct the beam at the crystal to the right. This will open a gate. Inside, we find the chest marked on the map.
Observation deck. We kill demons in the fire clearing.
An ancient bridge. We break through the growth and grab the chest behind the stream . In the dead end on the right, we break the crates and search the small chest under the arch. We’ll see a demon running away with a dagger again. There’s a crystal behind the bridge; take it out, turn around, and destroy the first growth under the bridge. There’s a second growth on the left wall ; shoot it with any long-range spell. After this, the growth behind the bridge will become vulnerable. Destroy it, insert the crystal behind it, and grab the chest .
A passage by the cliff. We fight off enemies on the stairs. Aim the first beam at the recess in the wall. Below, we find a wooden barricade in the wall, break through it, and then climb the stairs behind it, aiming the second beam . Two beams will open a gate to a dead end; inside, we grab a chest . At the top, we walk along the fortress wall and find the chest.
Old ruins. Near the monument, we break through the growth in the wall. Along the way, we jump down to the platform below and grab the chest. Clear the corridor with enemies. On the way, we jump over the chasm (F). Search the chest in the right corner.
An old quarry. Go down under the bridge to the stream where you’ll find a chest. Follow the stream back under the bridge. There’s a chest in the dead end under the waterfall . Ahead in the clearing, you need to kill the Lyrium Ghoul boss . This is the first serious enemy you’ll encounter if you’re on the hardest difficulty.
When the dwarf Harding touches lyrium, the spirit of the earth will speak through her. She will learn a new spell—turn enemies to stone. During the battle, we will learn spell types: preparation effects, detonators. The lyrium ghoul will attack again , along with several lesser demons. In the end, we will retrieve the blade.
Lighthouse. At the base, we’ll discuss Harding’s new abilities.
6. The enemy of my enemy
A new Meditation Room has opened in the lighthouse. Place four of your personal items inside. Meditate on the couch in the center to connect with Solas. We learn that the gods want to take over the world with the help of the Corruption and their followers.
We go to the infirmary to consult with Varric. Outside, we can talk to Harding, and then we must speak to Nev. She’ll tell us where to find allies for the upcoming battle. There are three allies, each with its own task. We head to the portal. Bellara will set it up so we can choose where to go.
7. At the Crossroads
in Dragon Age 4: The Veilguard. Walkthrough in Russian
The spirit of the crossroads will appear and help us figure out where to go. We go to the dead end on the right with the graves, and an airboat will arrive. The spirit will transport us to the souls of the deceased.
A merged city. We fight animated armor in the square. Further along the path is a barricade created by blood magic. To open it, we need to find a champion of this magic.
To the east, we climb the cliffs between the rocks. At the top, we destroy the Corruption Node, from which the boss Sirin the Reforged will attack . After defeating him, we’ll loot his essence. Destroy the small growth near the wall to find a chest . Return to the red gate and use the essence to open the barricade.
Secret. Bellara must be in your squad to repair the devices. You can change squad members near the blue pillars. The pillar here is in the eastern dead end, with a chest nearby . To the west, climb the wooden bridge and repair the crystal at the top. Nearby, aim the first beam at the receiver above the red gate. To the east, climb the same wooden bridge, activate the second beam , and aim it at the second column. There’s a note near the laser .
In the southeast, at the top, there’s a statue of the wolf Fen’Harel. When we approach, the wolf statue will turn toward the secret. Climb the high cliff nearby to find a blue statuette (+1 skill point).
The main path is to the south. There’s a chest on the steps . There are four portals ahead, but only two are accessible, and they lead to different allies. You can choose any one. Enter the left portal.
8. Sea of Blood
Treviso. Through the left portal, we’ll enter the city, where we need to find the Order of the Ravens. Our guide, Teia, will lead us to the meeting place. We go through the Great Market and pick up a memento (+ to Overseer’s strength) in the northern dead end.
Rooftops with Raven passages. Climb the net on the wall. The navarkh can go left along the ledge near the wall and drop down into the room with the chest . At the top of the roof, slide down the rope.
The “Diamond” of House Cantori. At headquarters, we’ll meet the most important Ravens. Old Lady Katarina will tell us that her grandson, Lucanis, can help us. We’ll continue across the rooftops. We’ll take a boat out to sea and be transported to magical corridors on the seabed.
Vestibule, Main Entrance, Cliffs. Collect resources at the bottom, read the note in the far left corner . Enter the underwater prison, the Ossuary. Roll down the slope and cross the pit along the narrow wall. There are two chests in the dead end on the left .
Maximum Security Block. Before the red gates, shoot the unprotected red crystals in the air; their defenses will deactivate one by one. At the end, we can unlock the gates. To the right of the gates is “Prison Warden’s Orders .” To the left, jump over the pit and grab the chest . In the southern dead end is a chest , “Prisoner’s Scribbles . ”
Lucanis’s chamber. Fanatics will attack us near the large blue crystal, but the hero, Lucanis , with purple wings, will kill them all. He is possessed by demons. To get him out of here, you need to break the vial containing his blood. We explore the rooms, destroying the red crystals on the walls and ceiling. On the table near the stairs, we pick up the memento , “Notes . ”
Exterior chambers. Kill the fanatics along the way. In the left side room, take the blue crystal to build a bridge across the path.
Main entrance. There’s a pink crystal hanging behind the wide bridge. Use Lucanis’s “Veil Instability” ability on it. A magical island will appear; jump across it to cross the chasm.
Observation deck. The boss, Fabricant , is in the large hall . After defeating him, you’ll receive a rune, allowing you to insert up to three runes into your dagger. Climb the stairs to the second floor of the hall; at the top is a chest , “Orders from Above .” Down below, we break through the red gate.
Upper and Lower Inner Chambers. There’s a chest on the way. There’s a memento against the side wall near some crates . Further on, there are a few more demon battles. At the exit, there’s a chest in the corner . Clear several sandy areas of enemies.
Approaching the tower. A large chasm lies ahead. To the left, you can drop down to grab a chest . Look to the right, use your ally’s ability, and jump across the newly formed islands. At the top, roll down the slope, search the side passages for resources, and return to the main path.
Blood Storage. In the large hall, destroy all the red crystals. On the left, go to the far warehouse; there’s a chest there , the first vulnerable crystal . Follow the chain of crystals behind it and return to the center. On the right, place a temporary island; on the other side is the second vulnerable crystal . In the far left corner, break through the barricade; there’s a chest behind it . In another dead end, behind a fallen statue, there’s another chest . In the center, on a table by the cliff, there’s a memento . After destroying the red barrier, destroy the vase containing Lucanis’s blood. Nearby, on the table, is the “Venatori Correspondence” and a chest . After this, we can take the elevator up.
Observation post. The boss, Kalivan , is in the upper arena. He’s a mage who will transform into a large demon, Kalivan’s Pride, during the fight . Once defeated, we learn that Lucanis has a shadow double. In the center of the hall, examine the chest . On the table on the upper platform, read “Ossuary Research” and “Ossuary Documents.” Behind the red gate, examine the chest .
Let’s return to the Ravens’ headquarters. Zara Renata of the Venatori attacked here in our absence. Katarina died during the attack. Together with Lucanis, we’ll set off to avenge the old woman’s death. At the lighthouse, we’ll discuss the demon influencing Lucanis. We can speak with him privately.
| Unfamiliar Feeling (Harding 1)
(The quest is available after rescuing Lucanis.) You need to go with Harding to train her abilities. We take Harding and Bellara into our party and head to the Crossroads on the global map. From the starting island, head to the central pier and read “Myriad Mirrors . ” Elvenan’s Shelter. There’s a chest by the left wall . Take the blue crystal by the right wall and place it forward to form a bridge. Beyond the bridge is the note “Memories of the Forest .” Take the main path to the right, where you’ll find “Light in the Distance” and a chest . On the lower-right path is “Reflections.” Enter the portal. Veilwalker Camp. A note “From Irelin’s Diary” has appeared on the table here . Head to the clearing by the water; the quest will begin in the left corner. (There’s another local side quest nearby on the right.) Rocky Shore. Give Harding three hints, and she’ll learn to lift rocks from the ground. Use this ability to climb higher. Coastal Ruins. Lift the rock to jump across the river. There are three rocks in the center of the clearing; push them all out and climb up them. At the top of the platform, grab the chest , push the pillar, and cross to the next platform. Grab the blue crystal and build a bridge. Go through the Nameless Building. Coastal courtyard. Activate the wolf statue to the east. In the center of the clearing, push out the rock and climb the wooden platforms above. At the top, cross the bridge, find a fallen man, and rescue a Veil Wanderer. There’s a statue nearby ( +1 skill point ). At this point, Harding will hear the Oracle’s voice. Reward: blue item, 200 gold, +100 Veil Wanderers, + Harding . |
| Spirits of the Dalish (Arlathan Forest)
In a clearing by the water, we examine a boat; a Troubled Spirit is in it. We need to find all the deceased nearby to put the spirit to rest. Ruined Boundary. You need to find five bodies and their mementos. Take the eastern path. In the search zone, go to the southern cliff, look under the large rocks, and you’ll find a crushed man with the first memento . There’s a chest in the dead end on the left . Enter the Nameless Building; inside there’s a travel point and a memento . Broken Bridge, Shady Grove. From the building, climb the stairs; outside, at the top, is “Blood-Splattered Diary , ” the second item . Ruins by the river. In the corner behind the rocks stands a tall elven statue, the “Altar of the Evanuris.” Activate it. This will cause several plates to appear in the air nearby. Destroy them all to receive a reward of +100 health . Look into the cave; inside is a chest , the “Neatly Folded Note , ” the third item . Ancient Aqueduct. From the shore, jump onto the shipwrecks. On the far wreckage, you’ll find a chest , the fourth item . Further on, unlock the gate to the forest on the side, but cross the ruined bridge. At the crossroads, examine another owl statue. Behind the doors outside is a chest . Inside the hall are the “Research Notes .” Go to the next crossroads, to the west, where you’ll find a chest . At the northern crossroads, break through the wall and see an island beyond the breach. You need to circle around the area, deactivate the crystal on the adjacent bridge, insert it into the laser on the bridge, aim it at the island, and grab the chest . Shady Grove. In the forest, go to the southeast corner. There ‘s a chest and an altar with +100 health . On the east wall is a memento , and the fifth item is a plaque . In the southwest corner, examine the broken mirror; next to it is a “Torn Page . ” Ruined Boundary. Return to shore and speak with the ghost in the boat. All that remains is to perform the ritual. Head to the eastern cliffs and use Harding’s ability to move the rocks. Inside, repair the artifact with Bellara’s help. Climb higher and jump from the rock into the portal that appears. We’ll find ourselves on the island above, leaving all our items on the altar. Reward: +100 Veilwalkers, + Harding, + Bellara . |
| Magic of the Ancients (Arlatan Forest)
Broken Bridge. Descend from the bridge via the side ladder, break through the wall in the gap behind the bridge, and collect resources inside. Climb to the western part of the bridge, grab the chest and the blue crystal , and insert it nearby. Cross the bridge to the laser and aim it at the receiver on the second floor ceiling. Insert the crystal into the southern slot, climb to the second floor to the laser, drop a wooden pole on the side, grab the crystal, and remove the bridge. Cross the pole to the laser and aim it at the receiver below near the cable car. A bridge will form below, allowing you to grab the chest . Unlock the blue barrier, revealing a shortcut back. Jagged Ruins. Follow the Broken Bridge west to the end, where you’ll find a large statue holding an artifact. You need to find three crystals to charge the artifact. On the left, climb up the semicircular path. At the top, there’s “Collected Notes .” Take the blue crystal , turn on the laser, and aim it upward, under the wolf statue. Repair the first crystal along the way. A second crystal is visible in the pit below ; it can be repaired from afar without descending. You can jump down to the island below; there’s a chest on it . At the top, cross the bridge into the building. A mysterious tower. Inside, there’s a chest, a memento . Activate the wolf statue and head in the direction indicated. Outside, descend to the platform at the statue’s head; a blue wolf statue lies on it . Return and aim the laser at the right receiver. A bridge will appear below. Cross it to the room above. Inside is a chest containing a memento , “Torn Page.” Repair the third crystal here . At the bottom, approach the statue. Reward: 200 gold, materials, +100 Veilwalkers , “Bloodstained Letter . “ |
| Slow-Acting Poison (Treviso)
At the Lighthouse, in the library, we’ll find “Message from the Ravens.” We return to them in the city of Treviso. We explore the headquarters; a memento , “Letter to the King,” has appeared here . In the city, we head south. Flooded district. There’s a chest at the entrance to the building . Climb the stairs; there ‘s a memento at the top . Climb the beam into the next building; there’s a small chest there . You need to help the Raven scout kill the Antaam warriors. Read the note “Antaam Invasion” and free the boy, Yakov, from his cage. Examine his uncle’s body nearby; he has a “Blood-Splattered Note . ” We exit into the courtyard; there’s a memento at the entrance . Use Lucanis’s ability to jump onto the house in the center; there’s a chest on it . Go into the house next to it and grab the chest . Exit the block to the east, open the door in the hallway, and inside is a memento and a chest . Heart and center. We walk through the city, looking for purple “raven” signs on the walls. There’s a chest on the wooden platform to the right . Further on, near the large barrels, there’s “Antaam Warlords .” In the center of the city, we climb the grate on the wall, and on the roof, we pass through the broken windows. In the room along the way, there’s a “Raven Contract . ” Rooftops with Voronov passages. We’ll pass by the headquarters; there are two souvenirs on tables nearby . We’ll continue on the cable car. Antaam Garrison. In the enemy building, jump off the balcony. In the room, you’ll fight the Kamek Maker boss . This is a large, horned demon that constantly jumps and attacks with fire. After defeating it, fire at all the poison vials. In the corner room, there’s a chest , “Diary Page .” When we return to base, we’ll witness the “crows” negotiating with the Governor of Ivenchi. Reward: 750 experience, +250 Antivan Crows . |
| Coffee with Crows (Loucanis 1)
Speak with Lucanis at the Lighthouse. We’ll teleport to Treviso and begin the quest at the Grand Market. We need to go shopping together. We’ll buy herbs at two shops. Go to the coffee shop, talk to Lucanis and his informant, and then speak alone. Reward: 150 gold, a blue item, and Lucanis . |
9. The Case of the Smuggled Relic
Dragon Age 2024. How to complete
Port City. At the crossroads, go through the middle portal. You’ll find yourself in a gloomy city, where you’ll meet agents Tarquin and Snake. Together, you need to find a red lyrium relic.
Glandivalis Square, Boatman’s Lane. We walk through the streets, past many beggars. The main path is closed, with signs on the doors reading “Church Announcement” and “Wall of Light .” We make our way through the alleys.
Razikal Alley, Temple of Andraste. There’s a chest along the way , but the larger chest is out of reach for now. Inside the room, you’ll find a body with “Unsent Letter” on it .
Temple courtyard. Ghosts and fanatics will attack. Further on, there are more dead people in the rooms, with a “Blood-Spattered Note” on them . Search all the dead-end rooms, collecting resources. In the corner room to the south, you’ll find the first Echo and see the image of the smuggler. In the next dead-end to the east, there’s a chest . Break the door with Nev’s help and you’ll reach Beggar’s Alley.
Central Market. In the square, you need to climb onto a high balcony. Head east, jump across the cliff to a separate platform on the right, and climb up it. You’ll find the second Echo on the balcony . Return east and examine the locked gate with bars. Go to the western gate and hack it with Nev. In the narrow corridor , there’s a chest .
Slums. Jump across the chasm, kill the ghosts. Jump further along the rooftops. There’s a chest in the northeast . Near some stairs is a “Note in Illegible Handwriting .” Below, go through the building, slide down the rope, and across the rooftops.
Smuggler’s Docks. There’s a chest at the entrance , “Assignment .” On the way, examine the third echo . The thief Rana Savas will tell you that the artifact will be sold to the master’s son. Climb the two ladders to the roof and shoot the red crystals. One crystal is below. Look into the abyss; there’s a “Warning” lying on the edge nearby .
Spillway. We enter the building and roll down to the platform. Boss Albin Bataris . Once we defeat him, the smuggler’s son’s influential father will intercede for him, and they will leave together. We speak with Knight-Commander Lenos. We return to the base.
| Echoes of the Past (Bellara 1)
Arlatan Forest. You and Bellara must return to the forest to check the functionality of the dangerous artifacts. Bellara will open the vault behind the blue force field. Artifact Storage. While Bel repairs the main artifact, you need to bring her blue crystals. You can examine three notes around the area, each with a name . Search the adjacent rooms for two crystals and bring them back. In the courtyard you need to find 3 crystals : 1) break the boxes in the corner at the back, 2) climb the stairs up, 3) in the corner with sloping platforms. We follow Bellara further. Jump over the chasm on the right and grab the chest . Next, we need two crystals : 1) Drop the wooden pole and use it to cross the chasm; 2) Insert the first crystal into the socket on the far wall, cross the new bridge, and grab the second crystal. At the end, Bellara will tell us about her brother’s death. |
| Faithful Friends (Arlatan Forest)
Ruined Boundary. You need to destroy a red growth along the way. Backtrack a bit and shoot two unprotected growths. 1) In the clearing behind the growth, you’ll find a table with a “Note in Illegible Handwriting” on it . 2) Climb onto the islet in the ruins, where the second growth is. Head to the main growth. Coastal Ruins. From the shore, enter a narrow tunnel with a growth. On the other side, a corrupted Taynor will attack. After defeating her, explore the shore behind the rock and find Gus’s pet. Return to camp by any means necessary and put Gus back in his cage. Reward: valuable item, +100 Veilwalkers . |
| Just Right for the Veil Wanderer (Bellara)
You need to buy a gift for Bellara in the store and give it to her. |
| Farewell (Lukanis 2)
We need to help Lucanis organize his grandmother’s funeral. Just join the conversation and answer three questions. |
Friends Hiding in the Shadows
At the Lighthouse, Nev will recommend contacting the Shadow Dragons in Port City. We travel there through the Crossroads.
10. Shadows of Minrathous
We speak with the Serpent. We learn there have been several darkspawn attacks. We go to the square, enter the Shady Courtyard, take the chest , and kill the Ventori fanatics. Behind the panel on the wall, we descend into the secret compartment.
Anvallenim. There’s a red growth on the way; you need to destroy part of it in the left dead end; there’s also a chest there . Below is a large group of enemies, another growth with branches in the side rooms. Climb the ladder and find a chest . In the northern dead end, break through the boards; behind them is a memento . Further down, you can lower the ladder; it’s a shortcut back. Explore all the rooms in the building. Return to headquarters and speak with Zmey and Tarquin.
Smuggler’s Docks. In the market, go to the barred gate, pull the lever, and take the elevator down to the docks. We fight some fanatics. One mage is protected; first, you need to break the red crystal to make the enemy vulnerable. The door you need is locked; there’s a “Wet Ad” in front of it . We break the crystal in the gate on the right, climb the ladders to the roof, look for a hatch, and descend into the building.
Warehouse. Break through the wooden barricades between the shelves. In the basement, kill the fanatics and the summoned demon, Bound Hurlock . There are two chests on the shelves . After defeating them, examine the evidence: 1) the floor is stained with filth by the western wall , 2) behind the shelf in the northwest corner, read the note “Instructions” , 3) in the center on the floor between the shelves , a note “Warning” , 4) in the southeast, on the table, a note “Message from the Venatori” . Go outside, where the Serpent awaits.
11. Vigilance in the World
of Dragon Age: The Veilguard. Walkthrough
In Port City, we seek help from the Grey Wardens. On the southern streets, we’ll reach the Quay Crossing. We’ll meet with the First Warden. He’ll listen, but won’t help; he’ll decide to arrest us. The mage Dorian will intercede for us.
We return to the Lighthouse and speak with Varric. We’ll discuss the red lyrium artifact. Harding will intervene, offering to communicate with the Grey Wardens through other people. (There’s also a temporary conversation with Bellara and Nev.)
| Just right for a detective (Nev)
In the Port City, at the Allied Base, you can buy Nev’s gift. |
| In Memory of the Departed (Port City)
Razikal Alley. On the wide street, you’ll find a seated body pierced by a sword. Demons and the boss, Uynie , will appear nearby . After defeating him, you’ll see the spirit, Compassion. In the southwest corner, look for “Hortensia’s Garden Journal .” You need to find a couple more dead people in the city. Andraste’s Gaze. In the north of the city, before the quarry, examine the round wooden platform; there’s a second body on it. The boss, Remorse, will attack . Urthemiel Square. Descend the stairs; the third body is under the bridge below. The boss, Solitude, will attack . After defeating him, climb the stairs higher and higher. Near the western stairs is the “Charcoal Market ,” above which is the second drawing , and at the top is the third drawing . We learn the name of the artist who saw the demons. Reward: 200 gold, blue material, +100 Shadow Dragons . |
| Gate of Lost Ages (Port City)
We’ll receive this quest at the lighthouse, but we’ll be able to complete it much later, once we’ve unlocked the Port City and reached at least level 20. Andraste’s Gaze. In the city, head north to the quarry. On the table to the left, read “Property of the Scholar Marcus .” Activate the wolf statue nearby, causing a downward slope to appear. Slide down it, jump, and carefully drop down the platforms to the bottom. Lost Mine. At the bottom, first defeat the demon squad, leaving the Corruption Node alone. On the round platform, grab the blue wolf statue (+1 skill). Break through the wooden wall, behind it is a “Water-Damaged Leaflet.” A shortcut leads up through a hatch. There’s a chest along the way . We descend to the bottom again. After we destroy the red growth, the boss, Quinn the Sparklord, will appear , level 20. On hard difficulty, he can’t be defeated until we reach his level. It’s best to attack with fire. Reward: 5 Ethereal Echoes, +50 Grey Wardens , Essence of the Champion (opens a new area in the Crossroads—The Merged City). |
| Exploring the Port City (Nev)
At the Lighthouse, Nev will tell you she wants to hear the news of her city. We’ll travel with her to the Port City, then visit all the shops in the west, pick up the latest newspapers, and find four recordings . Finally, we’ll reach the office of the “Weekly Truth” newspaper, where we’ll find two more recordings . Nev, the spy, is working here. South of the Dock Crossing. You need to buy two more newspapers. In the narrow dead end to the south, there’s a Record and a chest . The shops you need are in the center; buy two Records there . Reward: 500 XP, 150 gold, +Nev . |
12. The Guardian’s Best Friend
From the portal intersection, head left and sail to the snow-capped mountains of Atim Heights. Fight your way through the ghost squads, destroy the growth in the tunnel with the rails, and enter the right portal.
Anderfel Highlands. We’ll hear a distant explosion in the mountain gorge—Evka and Antoine have killed the demon. When we reach the camp, we’ll meet the guard Davrin with his tame griffin, Assan.
A ruined Guardian camp. From the camp, follow the cliff to the ruins. Climb the side ladder to the tower and jump across the chasm. Inside the tower, hidden behind some crates, is a chest . Along the way, there’s a “Tightly Rolled Note .” From the high wall, turn left, climb the rocks, and grab the chest . Look around and see a chain above you; direct your griffin toward it. This will cause a load of planks to fall, and you can climb up it.
Training ground. In the courtyard, we fight ghouls. They will spawn endlessly until we destroy all the growths. After defeating them, examine the wounded Remy. To the left and right, there are two statues with levers; turn them toward the yellow shields with the same emblems.
Griffin Ruins. We cross the stone bridges. Ahead, on the right, there’s a cliff. To the left of it, look for a chain and break it with the griffin. At the top, we fight demons. We break through the growth in the wall, grab the chest inside , and take the elevator up.
The edge of the canyon, an abandoned construction site. We slide down the cliffs along a rope. In the ruins of the fortress, we fight demons. Here, monsters attack, exploding around us. We jump away from them in time.
Griffin Nest. We run past the griffin cages and break through the growth. There’s also a squad of kamikaze demons and an Enraged Ogre on the platform. We break through all the red growths and climb up.
We’ll watch as the Grim Weeper kidnaps the remaining 12 griffins. We won’t have time to stop her. Only the last griffin will remain with Davrin. Back at base, we choose which city to save: Minrathous (+Nev) or Treviso (+Lukanis) .
13. On the Wings of Death
: Dragon Age: Vilgard. Walkthrough gamesisart.ru
If you chose Treviso, we’ll travel to the Canal Quarter. We need to defend the city from a dragon attack. We’ll descend from the rooftops, enter the doors beyond the abyss, and kill the demons inside. Below, in the garden, we’ll meet Lucanis and Theia.
Antaam Garrison. The goddess Ghilan’nain will unleash the boss dragon, Corius the Chilled One, on us . Dodge its shots and icy breath from afar. Approach the dragon’s hind legs and attack them. If the boss jumps in place, temporarily run away from the ground impact. It’s best to stay to the dragon’s side at all times. Once we’ve dealt 1/6 of its health, it will retreat.
Corrupted Minrathous. We’ll move to another city, but it will already be destroyed, and we won’t have time to help. Speak with the wounded Serpent. Reward: 400 gold, a rune, +400 Antivan Crows . (There’s a temporary conversation with Davrin.)
14. The Veil Guard in full force
We go talk to Solas. He’ll recommend finding shadow magic specialists and dragon hunters. We’ll discuss all this at a general meeting. Then we go talk privately with Bellara and Harding. Bellara will recommend finding a professor studying shadow magic. Harding will recommend finding the huntress Taash. Choose one of the two quests. Side quests will appear.
| How to Tame a Griffin (Davrin 1)
At the Lighthouse, we inspect the new Guest House for Davrin and his griffin. Together, we move on to the Arlatan Forest. Ancient Aqueduct. On the way past the doors, activate the long statue. Search and destroy four tiles in the air: 1) on the rock behind you on the right, 2) above the wolf statue on the left, 3-4) inside the round building. You’ll receive +100 health . Outside, jump over the stream and grab the chest in the central dead end. A memento is hidden behind some ruins in the round building . Forest Swamp, Coastal Meadows. In the red clearing, search all the bushes to find truffles. Further on, behind a broken wall, there’s a chest . At the end, you’ll find a clearing full of rabbits; here, the griffin will find truffles. Reward: 500 experience, +Davrin . |
| Arlatan Forest
Forest Swamp. Here, you’ll need to bring Harding with you to move the rocks. There’s a blue marker for this in the northern part of the area. Coastal Meadows. There’s a chest near the western wall . Destroy the boxes near the pillar to find a blue crystal . Insert the crystal into the socket nearby on the shore and aim the first laser at the receiver on the large arch. Go to the other shore and aim the second laser at the receiver on the side wall. The third laser is slightly higher, behind the bushes, and there’s a chest near it . Aim the laser at the turret above the water. Near the stream, you can push out a rock to reach a regular chest . On the northern path, head to the gate, unlock it with the lever, and cross the pit along the narrow beam. Take the blue crystal , open the blue gate, and behind it, activate the fourth laser and aim it at the tall turret behind the water. Once all the lasers are activated, a bridge will appear over the water in the center to the central island. On the island, there’s a boss, the Guardian of Secrets , and a huge chest . Inside, you’ll find a unique “red” item. A memento is hidden behind the chest . You’ll hear a strange voice nearby. Corrupted Thicket. At the entrance to the thicket, activate the long statue. There’s a chest in the dead end on the right behind you . The tiles are located: 1) in the east by the stone wall, 2) in the center behind the head of the large statue, 3) near the blue pillar, slightly south, 4) near the pillar, on the road below. You’ll receive +100 health . At the end of the thicket, push the rocks out of the ground, enter the building, and kill the demon squads inside. Climb up, destroy the small growths, and the path up will open, revealing a huge chest . Use the blue crystal to build a bridge back. |
| Gate of Tarnished Glory (Arlatan Forest)
Corrupted Thicket. At the bottom of the ruins, destroy the Corruption Node last. It will spawn the boss Entarus the Reborn , level 25. It’s best to attack him with Fire or Lightning. Reward: 5 Ethereal Echoes, +50 Grey Wardens . For this, you’ll receive the Essence of the Champion , which will unlock a new area in the Crossroads—Elvhenan’s Retreat. |
15. Where do the dead go?
A large necropolis. We go look for the professor in the ancient crypt. We’ll see Professor Emmrik reanimating skeletons to help with excavations. We’ll go with him to explore the Hidden Halls. You can return to the starting dead end; there are resources there, including the “Gold of the Deep” recording .
Wing of the Lost Watcher, Hollow Bell Tower. We destroy the Demon of Despair. We cross the bridge and fight a squad of ghouls in the large hall. To open the doors, you need a blue light ; bring it to the recess near the door. The principle is the same as with the blue crystals, but you need to get the fireflies quickly before they disappear.
The Trail of Sighs. We fight skeletal mages. We avoid areas with ice magic.
Precious Storage. There’s a locked door ahead on the right; take the first Light to the left of it . Return to the beginning of the corridor and take the second Light in the corner . Go to the end of the corridor, follow the narrow path on the left, and go around the frosty area to get the third Light . There’s a memento in the northern central dead end . Take the chest behind the door on the way .
Waterfalls. Fight the skeletons. Outside, you’ll find yourself in a lowland. Follow the path on the left and climb the rock behind the column. Climbing isn’t possible elsewhere. Cross the wooden walls to the right-hand elevation. At the southern edge, you can use magic to extend a platform. Climb up it, grab the chests , and drop the ladder down. At the bottom, follow the wooden beam, jump to the raised platform with bars, and grab another chest, a memento .
Haunted Courtyard. Light four braziers in different corners . There are two inscriptions on the walls and a chest . The professor will revive the skeleton of a sentry, who will tell you about the Venatori invasion. Unlock the doors ahead, and in the next room, fight Venatori fighters. There’s a chest on the way . Follow the path and examine the wounded slave under the awning. Nearby, behind some crates, is a chest , “A Clumsily Scratched Note . ”
Hollow Bell Tower (upper level). Here, you need to destroy the red crystals with chains holding the bell in the center. Fanatic units will hinder us. After removing all the chains, we descend back to the lower level.
Emmrik will begin the ritual, and we’ll need to hold out for 3:00 minutes until he finishes. We’ll kill demons and ghosts, avoiding the frosty areas. At the end, the bell will ring, and the ghosts will calm down. We’ll explore the hall, collecting the chests . We’ll talk to Emmrik, and he’ll agree to come with us.
| Restless Spirits (Emmrick 1)
Necropolis Halls. At the Lighthouse, speak with Emirk and return to his location together. Around the central hall, you need to explore all the side corridors behind the bars to collect four lights. 1. Behind the western door we read “General Introduction” , next to it we use Emmrik’s ability to calm the mischief of the 1st spirit . 2. In the left rooms, break the boxes and pull two levers behind them. The southern room contains a memento , “Crumpled Parchment .” Two levers need to be positioned to open two more side doors. Destroy the boxes behind them, break the crystals through the windows, and you’ll find a chest containing the second spirit . 3. In the eastern rooms, you need to find and activate six lighted hexagons. Some are hanging on the walls, others are lying on the floor behind the boxes. Once you’ve activated them all, approach the lit candles by the wall and collect the third spirit . 4. In the hall itself, look up to the south, a pink dot has appeared in the air, use the blade on it, climb up the ghostly platform and take the 4th spirit . The Chambers of the Unforged. All four spirits will open the gate to a new area. Inside, you must kill a group of enemies, including a Whirling Envy Demon. This corridor contains two memorabilia and a large chest. Reward:
The Strongest of Its Kind (Halls of Necropolis) After completing the side quest “Restless Spirits,” examine the sealed doors in the side corridor. In the dead end opposite, near a chest, is a “Blood-Splattered Note .” From the note, we learn of the existence of three demons in other locations that are preventing these doors from opening. 1. Arlathan. At the “Broken Bridge” point, light the green brazier; this will cause the Formless boss to appear on the platform . 2. Port City. The “Spillway” is in the southeast. Light the green brazier on the column at the entrance. The Formless boss will appear . 3. Hossberg. “The Shore of Solitude.” Light the green brazier near the stairs below. The Formless boss will appear . Return to the Necropolis to find the main demon. Proceed to the “Unforged Chambers.” The boss is a level 40 Formless dragon . Attack with Necrosis. During the fight, he will restore armor twice and summon a squad of minions. Reward: +200 Sorrow Watch, +300 Lords of Fortune, 2 chests , recording . |
| Trail of Sighs. From the center, head to the northern corridor. At the northern dead end, where a large chest is locked by a skeleton, there’s a memento , “Tightly Rolled Scroll,” near it . In the wide corridor, you need to defeat all the skeletons and other enemies. Afterward, press the buttons near the six red candles; they will light up, and the skeleton in the dead end will disappear, allowing you to loot the chest . |
| Ghosts: Murderous Curiosity (Halls of the Necropolis)
Return to the Necropolis. In the center of the main hall, you’ll meet Myrna and her ghost. There’s a shop nearby, with a note titled “On the Ailments of the Dead.” They’ll task you with killing a powerful enemy. Head to the southeast hall, where a level 30 skeletal mage, Blooming Evil, will attack . Reward: 400 gold, +250 Sorrow’s Watch .
Ghosts: Restless Dreams (Halls of the Necropolis) The Sorrow Watch will ask you to destroy the second powerful wraith. He’s in Arlathan Forest. Head to the save location at the “Nameless Building” and kill a level 30 Nocturnix in the nearby “Ruin Reach” forest . Reward: 400 gold, +250 Sorrow Watch . |
| Invaders (Halls of the Necropolis)
The Sorrow Watch will ask you to eliminate two groups of remaining Venatori. The first group is in the southeast hall. The second group is far to the north. There are several red crystals near the enemies. First, smash the crates to the left and right, destroy the two hidden crystals, then the one in the air, and finally all the crystals near the red force field. Behind the deactivated fence is a memento , a recording . |
| Just Right for a Necromancer (Emmrik)
In the Necropolis we buy a gift for the necromancer. |
16. Dragon Hunter
Rivain Coast. At the portal intersection, enter the far right portal. We’ll meet the Qunari warrior Taash . First, we need to help her lure the local dragon. Together, we fight the Antaam warriors.
The winding shore. We pass through the building; there’s a chest inside . Beyond the door, crawl along the ledge along the left wall. On the right, you can jump down to the bridges below; there’s a chest on them .
Dragon Beach. We go to the beach and kill the lizard monsters that jump out of the sand. After defeating them, light a fire and roast the lizard carcasses as bait. Follow Taash, climb up the wooden platforms near the waterfall, and use the horn on the table. A dragon will fly at the sound. We go higher and knock down the wooden door. To the side of the bone bridge, there’s a platform with a tent, and a chest nearby ( page 4 ). Jump onto the island in the center and go higher into the castle ruins.
Cliff tops. Under the stairs is a “Fallen Diary Page ,” and in the side cave is a chest and a “Bloodstained Diary .” At the edge of the castle, memorize the combination of three small statues. Descend to the larger statues, and rotate them in the same way: right, left, and back . A staircase will appear leading up to a locked room with a chest .
The Guardians’ Castle. We continue through the ruins and slide down the rope. In the castle, we kill a squad of demons. We go into the southern room, where there’s a chest , “Antaam’s Note .” In the next room is “A Tattered Page .” There’s another squad on the castle walls, and there’s a chest in the corner . After defeating them, we break through the wooden barricade and slide back to the shore.
Dragon Beach. We’ll see warriors surrounding a prostrate dragon. Taash will use fire breath against them. We finish off the remaining warriors. Once we’re victorious, Taash will free the dragon. At headquarters, we’ll discuss the new ally. (If you didn’t help Nev earlier, she’ll become embittered, and your relationship with her will deteriorate.)
| Rivain Coast
The winding shore. Search the beach at the beginning; there’s a memento near the broken boat, and a “Wet Note” at the corner near the wrecked ship . Behind the waterfall in the dead end is a chest and “Dropped Diary Page 2.” Before the sandy arena is “Dragon’s Breath . ” In the center of the beach, you need to use Harding to push the rocks out of the ground; this is the only way to climb into the tall ruins. At the top, there’s a “Tattered Page , ” a chest , and a wolf statue. From the activated statue, head to the western edge of the beach. A wolf statue (+1 skill) will appear in the rock in front of the locked door . Cliff tops. Near the northern cliff, there’s a pink orb in the air. Use your dagger on it, and large bones will appear. Cross them like a bridge. At the top of the cave, there’s a chest and a tall statue . Around the statue, look for four tiles: 1) to the right of the exit, high in the sky, 2) to the lower left on the lower tier, and 3-4) to the lower right. This will grant you +100 health . There’s a locked door in the rocks near the southern border, with skulls and “Taash’s Tales: Puzzles” near it . You need to light the fires with Taash, in the order in which the skulls are located. Solution: 1) in the east, on the elevated area in the center, 2) in the northwest, 3) in the south by the doors. Reward behind the door: 2 chests, a chest , and “Pirate’s Grave Marker . ” Grab the chest on the east side and climb up the rocks. There’s a wolf statue at the top; activate it. Go to the northwest corner and pick up the wolf statuette (+1 skill) under the waterfall. |
| Fire on the Sand (Taash 1)
At the Lighthouse, we speak with Taash, who invites us to walk along the coast again. We’ll be transported to the Guardian’s Castle. Together with Taash, we’ll find ourselves in a separate part of the area where we need to feed the birds. Lava flows. Follow Taash along the shore. Carefully approach the flocks of birds and feed them. If we scare the birds away, we’ll ruin your relationship. If we feed them, we’ll improve your relationship with Taash. Burn the enemy totems with fire breath. Next, burn the steel wall. You’ll meet the Qunari hermit, Karash, whom you need to feed. Here, pick up the memento . There are two recordings in the stone tower . Walk along the wall. At the exit, speak with Taash’s mother. Reward: 500 experience, blue item, 150 gold, +Taash . |
| Vault of the Guardians (Rivain Coast)
Guardian’s Castle. In the initial corridor, Taash sets fire to the bomb and breaks through the side wall. In the side room, destroy all the crates; behind them are three shields with torches. You need to light them with the correct combination: 1, 3, 2. Next, enter the upper part of the building, and under the same three torches, a lever will activate, opening the room to find a chest inside . Here, press the first lever on the shield to begin the quest. You need to open two more locks. In the main hall, go down the steps to the right and burn the red crystals with fire breath. Inside are three shields, which activate in other locations. Nearby is the “Thief’s Diary . ” We move through the rooms to the south. On the right, you’ll see the first skeleton with butterflies flying above it. A ghost will appear here and fly back. You need to run after the ghost, around the walls, to visit several more bodies with butterflies: 2) in the courtyard, jump down lower, in the corner, 3) in the next room to the north, 4) in the room near the wooden post. Finally, the ghost will fly into the main hall and open a hidden door there. Inside is the second lever . Castle walls. At the southern exit of the castle, look up to the right. There’s a red bomb on the second floor. Detonate it with fire breath, and a ladder will fall down. At the top, first walk along the entire fortress wall, descend, and grab a memento, a large chest . Climb back up, cross one wooden beam, and grab a firefly on the side of the roof. Quickly jump down with it, return to the castle, and run through the southwest corridor to a gap in the wall. The reanimated skeleton will press a lever; in the room, you’ll find a memento, a chest , and a third lever . Return to the main hall; all three shields in the lower room are lit. Unlock the large doors, revealing a huge chest, two other chests, and a memento . Reward: +50 Grey Wardens . |
| For Gold and Glory (Rivain Coast)
At the Lighthouse, in Taash’s room, there’s a message about missing “ravens.” We’ll travel to the coast. On the Looping Shore, we need to kill the Antam warriors on the circular platform. After defeating them, examine the pile of bodies in the southeast corner; among them lies the “Bloodstained Note . ” Cliff tops. Near the waterfall, we’ll find a note reading “Antaam’s Orders . ” Castle walls. We’re going through the entire castle. In the southern courtyard, you need to kill a group of enemies, including the boss Penshanek the Bloodthirsty . Once defeated, examine the cage in the corner; the missing “raven” is locked inside. Reward: +50 Antivan Ravens, +100 Lords of Fortune . |
| Hall of Valor
Taash will invite us to participate in arena fights. We’ll move to a separate area of the arena. There’s a shop here, and near the hammocks, there’s a recording called “Ballad .” Downstairs, examine the bookshelves; behind them, there’s a secret compartment and a chest . Upstairs, pick up the recording called “Isabella and the Lords,” speak with Isabella herself, and we’ll be able to enter the arena. You’ll need to complete 10 rounds in total: 1. Creatures from the deep paths are small lizards. 2. Antaam – 3 warriors, 2 shooters. 3. Spawn of Darkness – 2 warriors, 1 mage, small monsters. 4. Shadow-touched creatures – 2 armor, small living plants. 5. Demons – 1 ghost, 4 magicians. 6. Shadow-touched creatures – 2 spearman armor, small plants. 7. Mercenaries – 1 assassin, 3 mages. 8. Creatures from the deep roads – 1 construct, many small lizards. 9. Venatori – 2 warriors with blades, 2 mages. 10. Spawn of Darkness – 2 large demons with axes, 1 ghost. Reward for each victory: +50 Lords of Fortune, + Taash . Reward for 10 battles: red ring “Call of the Hall of Valor .” After that, you can continue fighting indefinitely. |
| Just right for a dragon expert (Taash)
You can buy a gift for Taash in the shop in the Hall of Valor. |
Veil Wanderers Camp
| The Difficulties of the Veil Wanderers (Taash)
At the camp, the elf Elio will ask us to find the missing Wanderers. An ancient aqueduct. From a distance, we’ll see an artifact explode, and three people nearby will disappear. Forest swamp. Head east, cross the bridge near the chasm with portals and birch trees, activate the small artifact near the chest, and the portals will deactivate. Return to the other bank, where you’ll find the first Wanderer under the arch . Coastal Meadows. Near the collapsed southern dead end, you need to dig up a mound of earth. You’ll need a griffin for this (but if the whole team is already assembled, we can perform all the companions’ unique actions with our blade). The griffin will dig up the dead end; inside is a memento , “A Note in Illegible Handwriting .” Climb the stairs, past exploding artifacts. Near the blue force field, look for a small artifact; beyond the field, you’ll find the 2nd Wanderer . Corrupted Thicket. There’s another force field near the statue of two deer. A small artifact is hidden at the top of the arch behind it; destroy it. Behind the field is a chest containing the 3rd Wanderer . Reward: 200 gold, 5 Vendahl Tears, +100 Veilwalkers . |
| Ruins by the river. Climb into the northern ruins and kill two strong monsters. Break the crates near the western cliff to find a blue crystal behind them. Take it to the nearby hollow. The activated blue field will block the laser. Go around the field to the left through the breach in the wall, use the blade, and jump across the ghostly platform to a separate island with a chest on it . |
Crossroads
| Elvenan’s Retreat (you need to kill the boss in Arlathan Forest to enter). There’s a note at the entrance that says “Empty Forest .” In the center, grab the wolf statue, but it turns out to be a trap; level 25 monsters will attack. At the cliff, descend the stairs. Inside, there’s a memento , a large wolf statue that points to a nearby island. You need to turn the elven statues toward each other to create bridges between the islands.
On the eastern island, we destroy another group of enemies. Activate the statue, destroy four tiles, and gain +100 health . Here, on the cliff, we rotate another statue. Return to the west and rotate the statue behind the broken wall. This will create a bridge to the northern island. At the top, we’ll find a wolf statuette ( +1 skill point ). There’s a chest on the other side of the island . At the large intersection, you need to turn three statues toward the destroyed bridge. Two statues are above, and one statue is in the arena below. After this, a temporary bridge will be built. Cross it to the island, save your save, and lower the ladder down. At the top, grab the chest and recording . In the backyard, descend to the building’s underground floor. Inside is a chest , recording , and an Evanuris Altar ( +100 health ). At the crossroads, head west and grab a chest under the cave . There’s another chest above, but you can only reach it by going around to the left. Climb the rocks on the left and inspect another chest .
Call of the Wolf (Crossroads) A side quest will begin on the southern route of Elvhenan’s Retreat. Beyond the ghostly gates, we’ll see a memory of how the Wolf gathered a squad to free the captive elves. Inside the fortress, we’ll kill the enemy squads. After the next gate, go right and aim the laser at the first receiver to the right of the steps. To the left of the steps, find a crystal and insert it into the second receiver. In the locked room under the stairs, grab the firefly and carry it to the gate above. Free the prisoners. Head to the chasm on the right; a ghostly bridge will appear over it. Kill a powerful warrior and a mage on the island. You’ll see the rescued ones thank the wolf. Take the wolf statuette from the altar . On the right, pass through the cave we saw earlier from below; you can grab a chest . |
| The Merged City (you need to kill the boss in Port City to enter). Inside, there’s a large planetarium on the platform, surrounded by three lines of red crystals. Kill the enemies, including a level 15 Smoldering Blood Creature . Then, go around the side heights and destroy the initial crystals there. Use the dagger, jump along the pink platforms, and grab the chest . On the western cliff, descend lower and jump along the pink platforms to the chest . In the center of the platform, in the wall, there’s an altar, four tiles, and +100 health .
The next area contains large snake statues, powerful mages, and another line of crystals. Activate the wolf statue, climb up, and jump across three pink platforms to the statue ( +1 skill point ). Once we clear all the crystals, we’ll be able to grab a memento, a chest , and a wolf statue .
Lower Laboratories (Crossroads) In the Merged City, head east through the fog gate. You’ll see a memory of the Wolf fighting Ghilan’nain. There’s a memento in the dead end on the left . In the hall on the right, rotate the statue in the center to unlock the green side doors. Behind the doors, you need to destroy several red growths. We go higher and see how Ghilan’nain controlled the filth. Outside, in the rocks, we kill squads of exploding monsters. At the end, we see Solas destroy the laboratory and his corrupted agent. We get a chest and a wolf statuette . |
17. Ghosts of Mora
Dragon Age: Vilgard. Walkthrough, guide, wiki
We’ll travel through the portal to Port City to meet Morrigan at the Cobbled Swan. The entire city has now been overrun by Venatori warriors, and many new side quests have appeared. In the starting building, we’ll be attacked by an Unstoppable Executioner.
We pass through the shopping street. In the southern area, in the last building, we’ll meet Morrigan and the Lady Inquisitor. She has a bluestone wolf statuette, somehow connected to Solas. We’ll get it and go our separate ways.
| A Veil Closing the Light (Port City)
The allied base is in ruins. We collect all the notes left behind. We search the market for clues. There’s a Note in the southeast corner . We then proceed to the port prison in the east. At the dead end, we kill a squad of enemies and examine the dead Ravens. At the exit, we speak with a local. Port Parthenius. We kill a squad of Venatori, destroying their red crystals in mid-air. Beyond the red field, we examine the desiccated bodies. Mission accomplished. |
| Port Parthenius. You can find a chest on the western pier , and next to it is the entrance to the building containing the “Lamp Golem’s Message . ”
South of the Mooring Crossing. There’s a chest locked behind a large grate. To the right, blast the red barrel with fire, creating a hole in the wall. Freeze the right mechanism through the hole and pull the lever. Pull another lever on the left, and then freeze the left mechanism from the balcony to the left. Inside are “Old Leaflet,” “Proof of the Deal , ” and a chest . |
| Trap in the Catacombs (Port City)
On the southwest street, we speak with the seated Grey Warden. She’ll tell us about the enemies in their secret tunnels. The nearest ones are locked; we need to go around them, through the boats on the shore. Catacombs. At the entrance by the water lies a “Wet Letter .” It’s impossible to get to the other bank, so we go around it. We destroy the growths on the ceiling. Ghilan’nain’s Shrine. There’s an altar on the large platform; destroy four tiles around it to gain +100 health . At the top, destroy more growths to find “Wet Letter 2. ” After clearing all the growths, you can pass through the wall to find “Unsent Letter .” There’s a large growth on the open ceiling; only a griffin can reach it. After hitting the ceiling, quickly destroy the four growths below and on the side ceilings. Catacombs. In the tunnel with water, we move the rocky platforms to allow the laser to reach the receiver. At the end of the tunnel lies the “Torn Scroll .” We can emerge onto the surface, between the wall and the rock, and destroy the remaining corruption here. This will open the main exit from the catacombs. Reward: +50 Shadow Dragons, +50 Grey Wardens . |
| Rituals in honor of the risen gods (Port City)
Glandivalis Square. In the square, examine the destroyed furniture and find the “Mysterious Note .” Head east, killing a squad of Venatori. Next, you need to reach the covered bridge, but the path is blocked by a red crystal. We take the left detour through the central market. Above the abyss, we need to smash the unprotected crystals from afar. One crystal is under the balcony; use your dagger to smash it and jump across the ghostly platform. After smashing the crystals, we can reach the bridge. Here, we kill the enemies, examine the bodies, and pick up the note “Venatori Ritual .” The task is complete. |
| The Deal at the Snake’s Nest (Port City)
Boatman’s Alley. A woman named Sabina will ask you to find her husband, who hasn’t returned from the tavern. Inside the tavern, talk to the clerk and collect the notes. Exit south and climb the stairs outside. Along the way, you’ll find “Faded Child’s Drawing .” On the balcony, you’ll find some bloody clothes. To the side is the tavern owner’s apartment, containing “Linus’s Diary” and “To-Do List . ” Return to the tavern and speak with the shopkeeper again. She’ll give you the warehouse key. Inside are “Notes on Linus’s Warehouse” and “A Crumpled To-Do List .” Jump into the center of the spiked pit, slide down below, and examine the three notes and the chest . Blow up the barrels, destroy the wall, and knock down the pillar, allowing you to walk over the water. Find the spot where the two blue crystals are and take them through the portal to the receivers. Slide down the rope. Catacombs, Cursed Dead End. Blow up the red barrels around the locked grate below, climb up, and pull the lever. Grab “Wet Letter 3” and a chest . A grate will rise in the center of the hall, revealing a chest and “An Old Note.” We learn that the owner contacted a demon to revive his daughter and killed many visitors. Return to Sabina. Reward: +100 Shadow Dragons . |
18. Something is wrong
Hossberg Bog. We’ll travel through the portal to the Grey Wardens’ location. We’ll meet allies Antoine and Evk. We’ll go looking for the Corruption in this area. We’ll enter the cave and destroy the red growths. Along the way, we’ll need to collect five Corruption samples.
Ancient Crossroads. In the shallows, we destroy a squad of demons. (If we destroy the large corruption node, a boss demon, the Festering Adept, will attack . He’s not relevant to the storyline, and on hard difficulty, he’s not easy to defeat.) We destroy the remaining growths.
Flooded farms. There’s a ballista on the platform in the center; use it to destroy one of the growths. A large demon will attack through the wall; use the same cannon to shoot it. At the end, behind the red growth, unlock the gate.
Lavendell. We’ll return by a different route and speak with Evka and Antoine. The First Guardian will forbid them from working with us, but they’ll keep us informed.
| Lavendel. To the left of the starting point, go to a dead end and pick up a memento . There’s another memento in the eastern house in the village . The southern house contains a note titled “Strange Lights . ”
Flooded farms. There are two chests near the farms . The buildings contain two memorabilia . Near the eastern cliffs, there’s a wolf statue. From there, head to the ruined house. Behind it, pull out the stone platform. On the roof, pick up the statue ( +1 skill point ). Shady Meadow. From the village, head west. On the high platform, destroy the growth with the griffin, then quickly destroy the two growths to the left and right of it. You’ll need to stand on other elevated areas to reach it. A ladder will fall from under the growth. At the top, you need to rotate three knight statues. Solution: turn the western one north, the northern one east, and the southern one west . The statues will open a door, revealing a chest . |
| Just right for a Grey Warden
In Hossberg Marshes you can buy a gift for the griffin’s owner. |
| Gate of Scorched Hopes (Hossberg Marshes)
Ancient Crossroads. Destroy the Corruption Node in the water, and a level 30 Festering Adept boss will attack . Reward: 5 Ethereal Echoes, +50 Grey Wardens , and Essence of the Champion . |
| Just an Echo (Hossberg Marshes)
In the village, a girl named Ida will ask you to visit the Voss family. Flooded farms. You need to search all the surrounding buildings to find all the Voss family records . Finally, approach the well in the south and collapse it to destroy the magical echo. Reward: 200 gold, 5 ore, +50 Grey Wardens . |
| Academic interest (Hossberg Marshes)
In the village to the south, speak with Bastian; he’ll ask you to search Gaspin’s mansion. From the Ancient Crossroads location, head east into the Cave Tunnels. You’ll need to destroy a lot of red crystals along the way. There’s a memento, a chest, in the dead end behind the blue field . Gaspin Mansion. There’s a Venatori squad in the courtyard. Here, too, you need to destroy multiple crystals, from three different sides. At the end, a path to the basement will open. Inside, read two notes . A ghost, “Unrelenting Obsession ,” will attack . Further on, there are two more notes and a chest . In the center of the basement, examine the seated skeleton; examine the book in front of him. At the top of the mansion, climb up to the platform, jump across the pit, and reach the chest . There’s a note even higher up . On the roof is an altar, 4 tiles, and +100 health . Below, to the right of the grate, break through the wooden wall to find the chest . Reward: 200 gold, 5 ore, +100 Sorrow’s Watch . |
19. Wind of Change
We’ll see a vision when we place the wolf statue next to the fresco. We’ll learn about the relationship between the three gods and how they came to blows. Together with the team, we’ll discuss how this can be used against Solas later. We’ll go meditate to commune with Solas himself.
20. Siege of Weisshaupt
Dragon Age: The Veilguard Walkthrough
Let’s plan an attack on one of the gods. When we teleport to Weisshaupt, the portal will collapse behind us. We fight demons in the courtyard. We run after Mila, a girl, and inspect the slain demon in the room. We’ll find a hiding place behind his body.
Outer wall. We’ll see a huge mask and a flying dragon. We’ll follow the fortress wall to the right, destroying the demon squads. After victory, we’ll enter the Grey Wardens’ headquarters. They have an ancient dragon trap, but the First Warden won’t cooperate again. We’ll have to strike him down.
First wall. There’s a memento lying against the wall to the east . To the left of the growth-covered exit, around the corner, is a staircase. Climb it and search the chest (1) above the exit . (You can’t return to this location; grab all the chests right away.)
The main gate wall. Here we’ll engage in a large-scale battle on the fortress wall. On the large platform, quickly destroy the growths to free the ballista. One growth is hidden inside a pit in the center. In the far left corner is a chest (2) . Use the ballista to fire at the enemies and break through the stone wall. On the next platform, among several ballistas, lies the memento . Inside the building, jump down below.
Scaffolding on the first wall. We’re walking along the ravine above the abyss.
A courtyard near the front gate. In the southeastern dead end there is a chest (3) .
City streets. We’ll meet our allies on the balcony. Climb the wooden fence outside. A large, level 33 Unyielding Wall demon will attack in the square. We break through the wall.
Bell tower ruins. There’s still a battle going on in the ruins. In the western dead end, we break through the planks; hidden behind them is a chest (4), a memento . A little further up, we look for a hanging weight, throw it down with a griffin or a blade, and climb up to find a chest (5) .
Corrupted streets. We make our way through the filth. On the right, on the building, there’s a chest entangled in filth. Below, through the breach in the wall, you need to shoot the red growth under the chest, then remove the growth above and examine the chest (6) . A little further, in the eastern dead end, we pick up the memento . Below, we’ll find ourselves trapped in filth, but a girl named Mila will help us.
The stairs at the entrance to the library. To the east, we pass through a side corridor and examine a memento, a chest (7) , on the balcony . Together with the girl, we run to the large gates and fight them off for a few minutes. Behind the gates, we hide from the crowd of ghouls.
Main Library Hall, West Wing. There’s a memorabilia in the small side streets . Take the elevator up into the building, break through the filth growths, and destroy the red growths outside the windows and under the ceiling. Break through the boards in the central column to find a chest (8) . In the corner is a “Donation Letter .” On the table in the large hall is a note titled “Silverite Wings .” In the eastern dead end is a chest (9) and a memorabilia . In the southern dead end are “Rewritten Reports . ”
A wall platform with a trap. After destroying everything, we can open the doors to the roof. Outside, we’ll find a dragon trap.
We’ll lure the dragon with a dagger, and it’ll fall into the trap. The First Guardian will want to finish the dragon himself, but the goddess will kill him instead. She’ll summon an archdemon from the dragon’s body.
Boss: Archdemon Razikal . This is a huge serpent that attacks from the abyss. You must dodge its attacks in time. Once you defeat the first serpent, the goddess will summon two more. While the serpents are gone, you must fend off the smaller demons. At the end, three serpents will appear at once.
Once we defeat the archdemon, the goddess will become vulnerable, and Lucanis will be able to strike her with his blade. He will leave a cut on her face, but he won’t be able to completely kill her. After that, the corruption will begin to grow, and we’ll have to retreat. We’ll discuss our failure at the base.
21. After the storm
At the base, you need to talk to all the companions who need help: Davrin, Lucanis, Nev. While meditating, talk to Solas. Later, you’ll need to talk to Davrin again.
| Waiting Stone (Harding)
Deep Paths. Harding will venture into the underground mines to meet the dwarven oracle. Along the way, we’ll avoid falling rocks and descend via the elevator. Kal-Sharok’s outpost. We’re fighting off earth monsters. We’ll be met by the dwarf Stalgard, and then follow him through the settlement. Halde Vaskar. In the corridors, we destroy the red growths and small enemies. The second elevator is malfunctioning. Inside, look at the ceiling, move the rock platform, and the elevator will turn on. Mine tunnel. We remove the growths near the rails, extend three platform rocks, and climb them to the suspended platforms. Destroy the growths above, and we can enter the tunnel. We do the same in the second section. At the top, on the suspended platform, there’s a chest . Below, an enraged ogre will attack. In the dead ends, there’s a note and a chest . Lyrium Sanctuary. Climb up to the balcony on the right to find “Foreman’s Journal 1 , ” a memento . On the main path is “Foreman’s Journal 2.” We’ll reach the stone oracle statue, which will tell us that Harding has mastered the magic of the titans, the ancestors of the dwarves. We’ll be attacked by a Stone Wrath construct . Speak with the oracle again. We’ll be transported to Harding’s house. Reward: blue item . |
| Deal with the Demon (Bellara)
Arlatan Forest. Floating Islands. Bellara and I will find ourselves in the upper buildings of the forest. Kill the monsters in the hall. Take the crystal with us, build a bridge ahead to the side, and grab the chest . Balcony path. The demon boss, Burning Wrath, will attack . Find the crystal, insert it, and continue along the bridge. In the corridors of the ruins, in the corner, there’s a “Bloodstained Note .” Kill the ghosts to get a memento . Elven Temple. We’ll find two missing Wanderers trapped in crystals. They were captured by Sirian, Bellara’s brother. It turns out he didn’t die, but fell under the influence of the demon Anaris. He will disappear, leaving us to fight ghosts and the boss, Poisonous Anguish . During the fight, Bellara will break two artifacts and free the captives. Reward: +100 Veil Wanderers . |
| Lesson about Dragons (Taash)
Hall of Valor. Hunters Conversing About Two Dragons. |
| Lighthouse. Music Room. In the circular hall, a round side door will open at the bottom. Inside the music room, take the first firefly and place it near the door. The second firefly is outside the building, on the upper balcony; bring it into the room. Through the portal, you’ll reach the library balcony. In the center, activate the astrolabe ( you’ll get a discount in the workshop ). |
Halls of the necropolis
| A Walk Among the Tombstones (Emmrick)
The Vault of the Precious. We return to the crypts; the skeletal assistants there have dug a wide tunnel, allowing us to enter through the far door. Gardens of Memory. We’ll find ourselves in an underground cemetery. Follow Emmrik, lighting all the candles in front of the crypts. Along the way, he’ll tell us his entire life story. Finally, ring the bell to summon the guardian spirits. Reward: blue item, 150 gold . |
| Gardens of Memory. In the new area of the necropolis, go to the western wall and activate the bell near it. Afterward, watch where the firefly flies and activate the next one. You need to ring five bells in the correct order. After ringing, a door in the western wall will open, revealing a chest . One crypt contains a fog portal, through which you can reach a balcony with a chest .
Waterfalls. You need to bring a firefly to the gate in the center. To do this, activate three bowls of green fire in the water room . After this, one bowl will break, and take the firefly from it . Examine the skeleton behind the open grate and take the memento . In the wide part of the corridor, there’s a large cube in the center. Use Emmrik’s ability on it to get a firefly . Head to the western path and open the far grate. Inside is a skeleton and a chest . In the southwest, follow the cliff, pull out a rock platform, and climb up it. On the upper platform is a talking skeleton, a recording , and a ladder. Haunted Courtyard. Activate the glowing coffin in the courtyard, and a firefly will emerge, revealing five braziers . Light them in the same order to obtain the firefly . Backtrack a bit and you’ll be able to unlock the grate in the side wall; inside is a chest . Trail of Sighs. In the southern room, there’s a coffin with purple torches; activate the firefly inside. Afterward, you need to collect all the bones hidden near the purple torches within 1:45 seconds: 1) The head next to the statue. 2) In the large hall, under the side arches. 3-4) In the upstairs hall, in two different corners. 5) In the upstairs hall, jump onto the side balcony; inside are the bones and a memento . If we collect everything, we’ll get the firefly . In the large hall, unlock the grate; behind it are two large chests and a memento . |
| Ghosts: Beyond the Veil (Necropolis Halls)
Wing of the Lost Watcher. Kill the undead watchman, Lost Explorer, level 30. Reward: 400 gold, +250 Sorrow’s Watch . |
| Ghosts: Shadows of Wealth (Necropolis Halls)
Crossroads. Elvhenan Refuge. Kill a level 35 skeleton troop : 1 plant mage, 3 skeletons in cube helmets. Reward: 400 gold, +250 Sorrow’s Watch . |
Canals of Treviso
| Bloodbath (Lukanis)
Treviso. In the large market, we speak with an agent and learn about the Venatori hideout. From the locked door, go right, climb the boxes, and enter a hole in the wall hidden behind the greenery. Climb onto the balcony above and grab the memento . Climb the greenery-covered trellis and read three notes at the top . Coin Streets. We go through the market to the bank. Inside, we fight the level 30 mage Aquila . He’ll gradually retreat through several rooms, but don’t chase him; you’ll have to kill all the enemies here, not just him. After defeating him, inside the bank, examine the coin bags. On the roof, activate the zipline and slide down to the church. Pick up the memento at the entrance . The mission itself will begin. Inside the building, climb the ladder. Search the attic to the side for a chest . We circle the roof and find another chest in another part of the attic . On the open roof, climb to a separate corner and meet “Raven” Illario. He also wants to participate in the mission, but Lucanis won’t let him. The Corrupted Church. Inside, kill a group of enemies and grab a chest in the dead-end corridor . In the courtyard, kill the warrior Faustus . A little further on, there are a couple of warriors with shields: Decimus, Nonus . Enter the building from the west, shoot the stairs above, climb up, exit onto the balcony, and grab the chest . In the main hall is the boss Zara Renata, level 36. She’s a sorceress in a blood pool. She attacks directly, summons warriors, and then drains their life. You need to constantly attack the sorceress to prevent her from healing. Once defeated, Lucanis will attempt to interrogate the sorceress, but Illario will kill her. It seems he’s the Venatori spy, but we won’t be able to catch him. Reward: 400 gold, blue item, +100 Antivan Crows . |
| Statues, Art and Antham (Canals of Treviso)
A “Perfumed Note” will appear at the Raven base , revealing the plans of the Antaam warriors. Head to the Heart and Center district, break down the barricade in the western dead end, and open the doors to the art gallery. Inside, Mistress Trella will thank you for saving her. Inside, destroy the magical wall to find a chest . Reward: 200 gold, 5 crystals, +100 Antivan Ravens . We go to the market leader. After that, we eavesdrop on three conversations in different parts of the market. The art seller will tell us that the Antaam warriors forcibly took his goods and carried them off. We go to the Flooded Quarter and kill a group of enemies. Afterwards, we search the ground and find a “Torn Note .” We return. It turns out the merchant lied. We go to another area, kill the enemies, and pick up the “Burnt Note .” We teleport to the Raven base. Reward: 200 gold, 5 crystals, +100 Antivan Ravens . |
| Spies Among Us (Treviso Channels)
A note, “From Chance Candide’s Diary,” will appear at the Raven base. It tells us that the Venatori have found our secret conduits. Speak with Chance Candide. You need to search three locations in the Flooded Quarter; you’ll find a note in each. Return and tell her about it. Reward: 200 gold, 5 crystals, +100 Antivan Ravens . |
| Gates of Deep Sorrow (Canals of Treviso)
From the Raven base, roll down to the northern roof. Destroy the large corruption node; a level 25 Desmal boss will attack from it . It’s best to attack with fire. Reward: 6 Ethereal Echoes, +50 Grey Wardens , Essence of the Champion (this unlocks the area at the Crossroads). |
| Just right for Raven (Lukanis)
At the Voronov base we buy a gift for Lucanis. |
| Coin Streets. Search the large building to the east; inside the empty halls there’s one sentry and two large chests . In the street, in the water, extend three rock platforms, jump across them, and grab a chest inside the building . Higher up, behind the bookshelves, open the exit to the upper balcony; there’s a huge chest there, a memento . |
Port city
| A place of solitude. From the “Waterspout,” head to the side bank. There’s a white wall here that can be opened with a dagger. Inside is a wolf statue and a crystal . Insert the crystal, and a bridge will appear to the island. Take the statue there ( +1 skill point ).
Temple courtyard. Enter from the north and jump from the balcony into the courtyard. Inside, smash the red crystals and kill the enemies. Under the grate, burn the spikes with fire breath. Next, place a ghostly island, jump, and grab the chest and a memento . Razikal Alley. We examine the ghost near the large statue. Climb onto the broken columns on the side and jump up them to the upper window. Inside is a chest, a memento . |
22. The Case of the “Cobbled Swan”
We’re transported to Port City and heading to meet with Nev. The Order of Thread is constantly under attack from Venatori fanatics. We need to rescue their leader, Damas, who has been captured by the enemy.
We descend to the shore and head to the cave with the red crystal. In the Thread Market, we fight some fanatics. Climb to the upper platforms and destroy the red crystals. You can grab two chests here by pulling levers and freezing the mechanisms, but the third chest is out of reach for now.
We’ll find Damas, who’s been controlled by blood magic. Boss: Makal Damas, level 24. Once we defeat him, the rescued bandit leader will give us incriminating evidence against the fanatic Bataris. We’ll choose whether to negotiate with the Threads or not.
23. Boiler
Hossberg Marshes. We’re heading to find the Cauldron building. We’re descending into the caves, slaying demons. Next on the path: Swampy Road, Abandoned Village. In the ruins around the swamp, we’re destroying the red growths on the roofs.
Castle gates. There are two chests along the way . Use your ally’s abilities at the gate to get a spark and open the way inside.
Castle grounds. Destroy the enemies, then use your allies to activate four points in different locations. Climb higher in the courtyard and shoot the red growth on the left wall with a ballista.
Inner courtyard. Activate the statue at the southern wall of the courtyard, shoot four tiles, and gain +100 health . There’s a chest on the upper platform near the ballista . Inside the building, descend the catwalks, grab the spark , and use it to ascend. Insert it into the recess, lowering a ladder. Find the chest at the top. Return to the castle and climb higher. Use the griffin to hit the hanging weight and climb up into the building.
Cauldron. Enter the vault where the urns containing the ashes of all the griffins are. In a dead end, examine the chest . Proceed to the large hall with the dragon skeleton. Fight off the monsters that appear. Climb the elevated areas and destroy the red growths. After defeating them all, we can destroy the growth in the center.
Boss: Darkspawn Horde . Hide from the horde of skeletons in the dragon skeleton, and the Grim Weeper will appear. She created an army using the blood of a fallen archdemon. Fight against the horde of demons. During this time, the Weeper will manage to escape.
Hossberg Marshes
| The Little Dragon Spreads Its Wings (Taash)
Hossberg Marshes. Ancient Crossroads. Together with Taash, we go through the caves to the dragon. In conversation, we choose Taash’s culture. Corrupted Grove. In the northern dead end, there’s a white growth above; use the griffin on it. Under the growth, climb up to the high ground on the right, look left, and shoot the red growth. We’ll be able to climb up; there’s a chest at the top . |
| Hut in the Middle of the Filth (Hossberg Marshes)
In the village, Doctor Flynn will ask you to find medicinal plants. The shore of solitude. There’s a memento along the way . Explore the hut; inside is a recording and a memento . Nearby, search the lake for plant spots. Destroy the red growths, go through the infected building, and grab the chest behind it . A swampy road. After sliding down the rope, we’ll find the dead healer and take his herbal supplies. We’ll unlock a direct route to the village, through the rocks with a ladder. Reward: +200 Grey Wardens . |
| Saved Lives (Hossberg Marshes)
In the village, we’ll receive a task to find three missing guards. We’ll also search three locations in the village to find three notes . Abandoned village. We search the buildings; there’s no one inside. There’s a large corruption growth in the center of the ruins; destroy all its red appendages. Once we’ve cleared everything out, we can proceed to the southern dead end behind the bars. Inside is a dying guardian, a chest, and a memento . Reward: +50 Grey Wardens . |
| Gate of Pale Reflections (Hossberg Marshes)
Shore of Solitude. Destroy the large knot of corruption in the center of the lake. Inside is the level 35 boss, Amarell the Unraveled . Reward: +50 Grey Wardens, Huge Chest .
Destroy and Conquer (Crossroads) Atim Heights. We pass through the misty archway and find ourselves in a memory. We fight against the recruits. We fire a ballista at the stone blockage in the gate. Inside the castle, we kill more recruits. Reward: Wolf Statue . Atim Heights. From the castle, continue along a new path. Activate the large wolf statue in front of the hut. Beyond the hut, climb the mountains and shoot the red growths above. Activate the large statue, shoot four tiles, and gain +100 health . We slide down the rope and descend into the mines below, where we’ll find a memento . Use the boss’s essence to unlock the gate. Inside, there’s a red eye on the wall. Kill the Undead Horde boss here . Then, the level 42 undead boss, Defender’s Fall, will attack . |
| Grey Gold (Hossberg Marshes)
Later in the village of Lavendell we take on a new task. Castle territory. You must defeat three mercenary squads. Reward: 200 gold, 5 ore, +100 Grey Wardens . |
Canals of Treviso
| Accomplices to a Dangerous Crime (The Treviso Canals)
At the Raven base, you’ll be asked to search for spies among their ranks. On Coiners’ Street, you’ll find a “Hastily Scratched Note” against a round wall . Follow the trail of scattered papers and explore three more locations. In the dark basement, you’ll find a “Folded Note . ” The Grand Market. Here you need to solve a puzzle with four braziers. They must be lit with fire breath or a click. The order is indicated by small red candles standing nearby. Solution: 1 candle, 2 candles, 3 candles, 4 candles . After this, a room will open in the dark basement, inside of which is the “Torn Note .” A couple in love, made up of ravens and Venatori, met here. We go to another location to the west and decide the couple’s fate: turn them in or leave a note to warn them. If we leave the note in the basement, the lovers will escape. |
| Statues, Art and Antham (Canals of Treviso)
At the Raven base, we’ll be tasked with destroying barrels of the Gaathlok substance. We’ll go to three locations, kill all the enemies, and blow up the barrels with fire. Reward: 300 gold, materials . |
Other tasks
| Black Shop (Mayak)
Lighthouse. Once we’ve upgraded the Overseer’s Workshop to level 8, we’ll receive a quest from him. We’ll travel to Port City. A shop with a unique purple label has now opened in the city center. Inside, you’ll find the “Lamp Golem’s Message,” a variety of items, a gift for Harding , and nine memorabilia . |
| Just right for a spy (Harding)
In the Port City we buy a gift for the gnome girl. |
| House of the Dead (Emmrick)
Blackthorn Estate. We’ll travel to a separate estate with the necromancer. Enter the building and search all the rooms. Glass display cases can be broken to loot resources. Guest room. In the west wing, we’ll find a skeletal ghost. Kill the ghosts that appear around it. Master bedroom. There’s a second skeleton in the east roof. Shadow. We go down to the basement, grab the spark from the side , and unlock the doors. We fight off a crowd of undead. In the library, in the corner, we climb a little higher and find a chest . We’ll meet Johanna Hezenkoss, Emmrik’s colleague. It was she who decided to seize power in the city of the Watchers. After she leaves, we fight the ghosts. Afterwards, we look for candles on the statues : the first one is near the cliff to the south, the second one is behind a column to the north. This will create a bone bridge; we climb up it, grabbing a chest along the way . Main Hall. When we return upstairs to the mansion, Johanna will retrieve her hand and leave us with the level 30 boss, Unstoppable Ego. Reward: chest, +100 Sorrow’s Watch . |
| Restored Communications (Harding)
We go with Harding to the Hall of Valor. There she will hear a voice. |
| Secrets of the Qunari (Taash)
Shatan’s house. Taash and I are going to see our mother. We’ll join in the conversation. |
Crossroads
| The Regrets of the Dread Wolf (Crossroads)
You need to find five wolf statues (not bonuses, but rewards for memories). To do this, you need to kill strong bosses in Corruption nodes in all locations. Place the statues in the library at the lighthouse. Once you’ve seen all the Wolf memories, go to the Crossroads and talk to the witch. A fourth boat will appear in the north; sail on it. Nest of the Ancients. In the temple ruins, we’ll encounter the defeated goddess Mythal. We’ll ask her for help in the battle with two gods. We must persuade her in conversation, or we’ll have to defeat her in combat. Correct answers: 1. Filth – You fought against filth. 2. Other gods – They betrayed you. 3. We are worth helping – Create a safe place. We’ll receive the Mythal statuette . It will later help us against the other gods. (Completing this side quest will affect the ending.) Reward: Light of Mythal blade, memento, and a huge chest . |
| Source of Corruption (Crossroads)
1. Merged City, east (to get there, you need to defeat the boss in the Treviso Canals). Along the path near the crypts, you’ll be attacked by skeletons of Ratera’s followers. In the dungeon, take the firefly, insert it, and kill General Ratera behind the bars . Enter the crypt and take the chest . At the end of the crypt, we’ll find a cave with a large red eye, hidden in a filth on a cliff. On the throne is the level 32 boss, Felassan’s Betrayal . It’s best to attack with Necrosis, and be sure to bring a healer. During the fight, the boss will heal a couple of times near the eye, and the battle will drag on for quite a while. Reward: +100 Sorrow’s Watch, Huge Chest . 2. Elvhenan’s Refuge (to get through, you need to defeat the boss in the Hossberg Marsh area). Inside, there’s a red eye on the wall, and the boss is a level 37 Pillar Breaker . He’s a large knight with a shield; it’s best to attack with cold. Reward: +100 Sorrow’s Watch, Huge Chest . 3. Atim Heights (to get there, you need to defeat the boss). Elvhenan (to get there, you need to defeat the boss in the Hossberg Marshes location). Inside, there’s a red eye on the wall, and the boss is Defender’s Fall . Reward: +100 Sorrow’s Watch, a huge chest . There’s a locked door on the lighthouse island where you need to insert three essences. Inside is a memento . A level 50 Reanimated Dragon boss will attack in the arena . If you completed the Wolf’s side quest, the goddess Mythal, in the form of a light dragon, will help you a little in the fight. During the fight, you’ll be alone with the dragon twice in the dark, and your allies won’t be able to heal you. For these dangerous moments, save up your final spell and cast it immediately in the dark. Once defeated, the Overseer will appear and inform you that the corruption has been stopped and the Crossroads is healing. Reward: valuable items, +200 Sorrow’s Watch . Nearby is a memento, a huge chest . In the southern dead end is a note, “Calm Before the Storm,” and a strange ring floating in the air, “Second Circle.” |
24. Chance of Victory in
Dragon Age: The Veilguard. How to defeat dragons
We’re talking to the team at the base. We need to help the Grey Wardens. We’ll plan how to finish off the second dragon.
25. Fire and Ice
Hossberg Marshes. Taash will lure the dragon with his horn and his fiery breath. He’ll fall into our Grey Warden ambush.
Boss: Corius the Jelly . We’re fighting a wounded ice dragon. It’s best to attack with fire magic. Dodge its rams and shots. When it breathes a stream of ice, you need to either run behind it or jump over it in time by pressing the spacebar. If purple marks appear on the dragon’s body, aim for them to inflict more damage. Once the dragon is defeated, it will summon a fire dragon to aid it. The goddess Ghilan’nain will also summon a support squad of ghouls.
Boss: Corius the Jelly, Viranus the Heatmaw . We’re fighting two dragons at once. Once we’ve reduced them to 1/6 health, Viago will come to our aid and fire a ballista at the bosses from the top. From now on, keep an eye on the red ballista icon. Once it reaches full strength, press Tab and select the dragon target from above. The dragon must remain motionless at this point, so the ballista doesn’t miss.
Once we’re victorious, Ghilan’nain will attempt to revive the dragons. We’ll fire a ballista at her and pierce her. But once we’ve surrounded the goddess, another god, Elgar’nan, will come to her aid. Together, they’ll disappear from the battlefield. Later, at headquarters, we’ll discuss how to capture the gods themselves.
| Something Sinister (Hossberg Marshes)
At the Sentinel Stronghold, speak with Evka and Antoine. We circle their base and speak with the three sentries standing near the forges. After this, the Darkspawn will attack. Fight off the first location, inspect the second location, and finish off the enemies in the third location. Reward: purple item, 2 flames, 300 gold, +300 Grey Wardens . |
| Preparations (Emmrick)
Necropolis Halls. We return to the Gardens of Remembrance with Emmrik. He’ll ask you to pick flowers from the graves. Along the way, we learn that he’s preparing to become a lich—a sentient undead—to serve in the Watch. Finally, we place flowers on the graves of Emmrik’s parents. Reward: blue item, 150 gold . |
| Echoes of the Past (Davrin)
Hossberg Marshes. At the Guardian base, we learn that the Weeper is the mage Issei of the Guardian Order, who was forced by the First Guardian to poison all the griffins hundreds of years ago. |
| Titan’s Heart (Harding)
Anderfels, Isana Negat. Together with the dwarf girl, we set out to search for the missing expedition. In the building, we examine the abandoned items by the fire. There’s a memento against the wall nearby . We head into the mines, pushing aside the rocks in our path. In the grotto, we fight the undead and free a captive dwarf from the red rock. There’s a chest nearby (1) . Lyrium Cave, Ancient Mine. Loot small chests in the dead ends. Kill the Cruel Envy Demon ghost and free the second dwarf. Old mines. Climb to the upper levels, where you’ll find a “Hand-Drawn Map .” Go up the wooden bridges, collecting chests, a “Scratched Warning , ” and a chest (2) . Depression. We’ll free the third dwarf, it turns out to be Stalgard. Lyrium Vein, Heart. We’ll descend into the cave, where we’ll discover that lyrium is the petrified blood of titans. And now we’ve descended into the titan’s body. Inside the heart, Harding will encounter his redstone counterpart, and they’ll engage in combat. Meanwhile, we’ll need to fend off the skeletons. Finally, we’ll kill the boss, Wrath of Stone . Let’s climb up to Harding and help her win. Choose her fate: Almost the Wrath of the Titans / Remember Who You Are. Harding will become a Veilguard Legend (she will definitely survive the game’s final battle). |
| Faithful Friend (Davrin)
Arlatan Forest. Hidden Grove. Davrin and I head into the forest to the east and enter the door. Eldrin, the elf, lives in a clearing here; we need to help him feed the deer. We explore the area, collecting three berry nodes, three roots, and one branch. A passage by the cliff. At the dead end, look to the right, climb up the cliffs, and cross over a log. There’s a memento in the upper clearing . Place the berries and hide. The sick deer will come out to feed. The griffin will help it. Return the other way and grab the chest above the gate . Eldrin’s reward: 150 gold . |
| Hunting the Sparkfang (Taash)
Arlatan Forest. Forest thicket. In the northwest of the forest, we’ll go dragon hunting with Taash. We pass through a cave, inside it is the “Correspondence of the Veiled Wanderers .” Climb higher, there’s a memento, a chest . Enchanted Courtyard. Above are two chests, a memento . In the courtyard, in the western corner, read “Antaam’s Note .” Open the gate, and you’ll see a dragon behind it. We approach it through “Dangerous Passage.” Burnt Village. Boss is the dragon Sparktooth . It’s best to attack with cold. The dragon will fly to the upper platform twice to shoot. Reward: materials, +200+100 Lords of Fortune, memento, huge chest . |
| Chasing Clues (Nev)
Port town. We go to the tavern and talk to Nev and the leader of the Threads. |
Port city
| The sounds died down (Port city)
The quest is on the southern bulletin board. We go to the neighboring tavern and look for the missing street performers. Clues: 1) read “Tattered Schedule” on the corner of the table , 2) examine the wine on the table, 3) examine the blood stains outside, 4) the abandoned wine, 5) there’s a note downstairs near the guards . Aula’s observation deck. We cross the river in boats and find a campfire among the rocks on the observation deck. We descend to the water and find a dead Venatori. We enter the cave and read the “Fragment of a Leaflet . ” Slums. In another area, climb onto the rooftops and kill a group of enemies. In the next tavern, inspect the tables, then drop down into the secret compartment in the corner to find the performers. Reward: +100 Shadow Dragons . |
| Hidden Treasure (Port City)
A task on the central bulletin board. Find a note in several search zones with a clue to the next location. Solutions: 1. In the building in the north of the zone, near the save point. 2. In the southeast of the zone, on boxes and barrels. 3. In the southwest, before the bridge, climb to the top of the tower. 4. In the newspaper office, on the table to the right of the entrance. Catacombs. A new door will open in the central corridor; kill the mercenary squad behind it. Behind the door are 4 notes and 2 chests . Reward: 125 gold, +100 Shadow Dragons . |
| Desperate in the Port City (Port City)
In the city center, descend into the dungeon. A new hall, the Forgotten Sanctuary, will open near the cable car. Inside are two notes and a huge chest . The ghost boss, Despair, will appear . Reward: +250 Shadow Dragons . |
| Last Rites (Port City)
The task is on the northern notice board. You need to destroy the ritual site. At the “Mooring Crossing,” kill the enemy squad; only then can you destroy the red crystals on three sides. The defenseless crystals are hidden in dark dead ends or under the ceiling. Near the building in the center, read the “Message . ” Port Parthenius. Kill a squad of enemies. On the piers, you need to destroy two chains of crystals. On the left, break the hanging load, and on the right, go around the locked door and through the ship. Free the cultists’ victim. Reward: +100 Shadow Dragons . |
| Nothing can break a hardened soul (Port City)
After completing all the quests in the city, we can begin rescuing Serpent. Head to the Venatori Temple courtyard, kill the enemy squad, and destroy the crystals. You’ll find Serpent under the red dome. Reward: 400 gold, 2 materials, +250 Shadow Dragons . |
26. Uninvited Guests
We need to help the Veilwalkers. We’ll teleport to our allies’ camp and head into the forest in search of the Venatori.
A shady grove. We read a note near the tents . We climb the stairs into the building. Then we walk along the rocks near the lake. We move the flat stones out of the way. We pass the “Broken Bridge.”
Jagged ruins. At the top of the cliff, we reach the laser, aim it at the receiver in the center, and jump across the islets to the entrance to the upper tower.
A mysterious tower. Inside, kill the demons and speak with the wanderer Galadar. Above the gate are three symbols ; place the same symbols on the columns at the sides.
A ransacked camp. We fight the Venatori. There’s a chest in the northeast corner of the camp . Go to the blue waterfall, grab the crystal, and there’s a chest behind the force field in the dead end . Return to the bridge, place the crystal, and proceed to the cave.
Restored ruins. Pick up a chest in the tunnel along the way . There’s another chest in the large hall . To the east, explore the dead end called “Old Street,” burn the thorns with fire breath, and grab a chest behind them . On the way back, climb a hidden cliff with greenery. You’ll find a bonfire with skeletons around it, along with the recording “The End is Near .” Before this cliff, look up and blow up the red barrels. A wall will collapse beneath them, revealing a chest and a memento .
In the southern room, there’s a locked gate with four symbols above it , one of which has fallen. Enter this combination on the pillars. After opening the gate, talk to the surviving Dalish woman. We learn that the remaining residents have been kidnapped. Search the building for clues: 1) two Venatori bodies against the wall, 2) cages by the entrance, 3) a note under the canopy, 4) chests under the adjacent canopy. Finally, talk to Strife.
| Hummingbird’s Cry (Bellara)
Together with Bellara we go into the forest to talk to Brother Sirian. |
| Gryphon’s Predilections (Davrin)
We’ll have a picnic in the forest with Davrin and the griffin. |
| Inner Demons (Lucanis)
A port town. We’ll talk to the “crows” in the tavern. We’ll enter Lucanis’s inner world to negotiate with his demonic double. We’ll go through several rooms of the underwater prison, speak with the sentient beings, and destroy the crystals. In the end, the doubles will agree to work together. Choose your objective: Save Katarina / Get even with Illario. |
| Clear Head (Nev)
A port town. Nev and I are going for a walk on the far shore. We’ll collect stones in three places. We’ll go to the pier, throw stones into the water, and discuss our plans. Spillway. We examine two memories on the platform. At the end, we choose Nev’s meaning in life: You inspire its inhabitants / You will protect the Port City. |
| Mercenary Plans (Port City)
In the east of the city, we explore the docks and see a man locked in a cage. We kill the surrounding enemy group, and then we can free the prisoner. Warehouse. Inside is “Note” , on the top floor there are 2 notes . Low tide beach. We kill another group of enemies and free the prisoner. |
| Buregon Kataranda (Hall of Valor)
In the hall, we’ll discuss the dragon attacking the coast. We’ll travel to the “Looping Coast” and examine the wrecked boat. We’ll burn the piles of gold near the boat to find the treasure. Dragon Beach. We examine the shipwreck near the cliff and search four piles of earth in the clearing. On the shore, we examine the boat and see a bird carry off the treasure. Cliff tops. We climb three hills and explore the nests. We’ll find treasure in the last spot. Dragon Beach. We’ll be able to summon the level 35 dragon boss, Buregon Katarand . He’s vulnerable to necrosis. He’ll defend himself with an electric shield twice during the fight. The battle takes place in shallow water, where the boss will emit electricity; it’s best to stand on a thin strip of land. Reward: Materials, +200 Lords of Fortune, and a huge chest . |
27. Dark Bonds
We’re returning to the Lighthouse to meet with the Veilwalkers. We’ll plan an operation to rescue the Dalish from Venatori captivity.
28. Blood of Arlathan
Dragon Age: Vilgard Walkthrough
We’ll set out on the mission with Nev. We’ll disguise ourselves as dead fanatics to sneak in undetected. We’ll make our way through the forest, with small resources along the way. We’ll slide down the slope and onto the zipline.
Temple of the Sun. In the lower clearing, go to the eastern dead end and search the chest . On the western rise, there’s a “Short Message .” We pass by enemies gathered for the ceremony. In the eastern dead end, there’s a “Crumpled Note.” A chest is hidden behind a high wall . Next, we pass the guard and cross the bridge. The god Elgar’nan will show the fanatics his new dragon. Everyone will be affected by magic, but our squad will be able to resist.
A ruined aqueduct. After leaving the ceremony, we’ll descend into the canal where the prisoners are locked. We’ll kill the guard squads.
Temple Gardens. Climb the buildings and destroy the red crystals. First, you need to climb the walls and drop down into a locked circular room, which contains the starting crystal. Inside, grab the blue crystal, carry it to another indentation, and break the red crystal behind the door. At the top, break the crystal behind the left wall, then all the others. In the southeast corner, at the top, grab the chest .
Echoes of the islands. We descend through the rubble into the courtyard.
Courtyard of Offerings. Boss: Steel Golem, Bloodcrafting .
Sacred Halls. In the upper rooms, read “The Waterlogged Journal.” At the fork, go right first, grab the chest . On the left, when we approach the gate, we’ll enter an illusion. Run through the forest and corridors, but we’ll keep coming back. We need to explore all three possible routes. After that, ask Solas for help; he’ll dispel the god’s spells. A hidden path will open on the left; inside, break through the red growths and take the crystal to the bridge.
Temple Library. There’s a chest behind a broken column to the side. Kill the enemies in the square, then break the red crystals one by one: in the air, on the floor, and behind the stone corner. A squad of enemies and a Blood Creature will hinder us . Grab the chest behind the red gate and free the prisoners.
| Forgotten and Defiled (Davrin)
Hossberg Marsh. Lotus Cave. Together with Davrin, we’ll descend into the cave where the Weeper resides. At the entrance, you’ll need to defeat the boss, Na-Tan, the Corrupted Guardian . Darkwater Outpost. There’s a memento , a note , along the way . We navigate the islets and piers, fighting off the undead, and pick up another note . Approaching the Corrupted City. In the courtyard, there’s a ballista and several raised platforms with a chest on them . We smash the growths and enter the building. Inside, there’s another chest, a memento . In this hall, we’ll find the First Guardian, possessed by the Corruption. If you hit him earlier, there’s no way to convince him otherwise; you’ll have to finish him off. Darkspawn Dungeon. We cross the fel bridge, which will collapse beneath us. In the dungeon, we take the memento, a chest . We go around the grate and destroy the enemy squad. Cape Garel. Use the griffin to destroy the growth and climb the fallen ladder. There’s a chest at the top . In the fortress courtyard, destroy several marked growths. Read the note in the northern dead end . The Corrupted Library. Find the area with the Weeper and destroy the growths around it. The boss is Issei, level 38. During the fight, the Weeper will retreat to the area with the cages; destroy the growths there first. The griffin will finish off the enemy. Free the remaining griffins and choose their fate: Return to the Guardians or Become Guardians of Nature. Reward: 400 gold, +100 Grey Wardens , Davrin – Veilguard Legend .
Native Nest (Davrin) If you chose the “Return to the Wardens” fate, you’ll see griffins training on the Grey Wardens’ Field. |
| Slaughter of Souls (Emmrik)
Blackthorn Estate. Together with Emmrik, you need to sneak into the estate where Hezenkoss has gathered many guests. To get there unnoticed, climb the stairs on the left to the balcony. Inside, in the western warehouse, you can climb up one level to find a chest around the corner . From the inner balcony, inspect the guest hall and overhear a conversation about a book. Library. Search all the books on the tables. Go up to the top floor, and you’ll find a ghostly tome on the northeast table. The skeletal assistant will take the book into the hall, where the guest will translate it. Servants’ Wing. Skeleton Manfred will bring us a key; we unlock the large doors. Inside, we interrogate the ancient skeleton. Inside the tomb, we go to the southern dead end and search the chest . A secret passage. A combination of three symbols is written on the western wall ; you need to activate them using the correct levers. The lever for the second symbol is behind the bars. In the large room, search the walls to find a hidden door. Inside, you ‘ll find a huge chest and a firefly . Carry the firefly to the bars to open them. Entering the three symbols will yield two chests and resources . Continue beyond the bars to find two notes . Hezenkoss Workshop. Fighting off undead hordes. Upper Lab. We’ll find a huge golem with a soul lantern, but we won’t have time to turn it off. Khezenkoss will turn it on, ascend to the hall, and begin draining the souls of all the guests. Main Hall. Boss: Hezenkoss . You need to attack the mistress herself, who’s flying above the hall. Necrosis is best. She’ll summon skeletons and ghosts. At the end, the skeleton, Manfred, will sacrifice himself to disable the golem’s lantern. Emmrik will release all the souls from the lantern. Later in the crypt, choose the necromancer’s fate: Become a lich / Recover Manfred. Reward: 600 gold, +100 Sorrow’s Watch .
Testament (Emmrick) If you chose Emmrik’s “Become a Lich” fate, he’ll invite you to his ritual. We’ll witness the necromancer die and become a lich. Emmrik is a Veilguard Legend . |
| Through the Shadows (Bellara)
Arlatan Forest. Restore the bridge to the west and open a new area, “Cliff Walkway.” Aim the first laser to the left to open the side door, then aim the second laser forward. Return and aim the first laser forward, creating a bridge. The ancient capital. We follow a narrow path, collecting a recording and resources. The Great Hall. There are numerous artifacts here, and we need to stop the ritual. Destroy the three crystals, kill the guards that appear, and repeat this three times. The large artifact in the center will fall; descend through the gap in the floor beneath it. There’s a chest on the way . Floating ruins. We walk along the bridges, killing ghosts. Lower hall. Take the blue crystal, insert it into the lower left laser, and aim it back at the receiver above the arch, creating a bridge. Cross the top, drop the ladder, and aim four lasers at the receivers ahead. Descend, insert the crystal into the lower right laser, and aim it forward toward the center. Five lasers will open the gate. Loot the chest just beyond the gate and return to your brother. Ritual Pit. Bellara will convince her brother to stop the demon summoning ritual, and he will agree. But the demon will still manifest and attack us. Boss: Anaris . You need to destroy three orbs on three pillars before hitting the boss. Reward: 400 gold, +100 Veilwalkers . Later, at the lighthouse, we speak with Bellara and choose what to do with the artifact archive: Liberate the Archive / Save the Archive. Bellara is a Veilguard Legend .
Forest of Spirits (Bellara) If you chose the “Save the Archive” fate, go through the pass in the northern forest to light three braziers. There’s a blue crystal at the bottom left; break through the boards behind it to find a chest . Take the crystal to the door on the right. Conduct a funeral for Bellara’s brother. Reward: +100 Veilwalkers . |
| Eternal Hymn (Harding)
If you chose the “Remember Who You Are” fate, Harding and I will meet the dwarves. We’ll push aside rocks along the way in the snowy mountains. There’s a chest in the dead end before the doors. We’ll speak with Stalgard. Reward: blue item, 150 gold. |
| Lair of the Dragon King (Taash)
Taash will find her mother kidnapped at home. We follow the trail together. On the sandy shore, we inspect the boat with the scent, then continue on, burning down more barricades along the way. From the castle, we’ll enter a new area. Descend into the gorge. At the top, you can ride a rope to grab a chest. Descend along the wooden platforms. At the bottom, there’s a group of enemies and a chest . Tidal Flats. On the shore, you’ll see a cave shaped like a shark’s mouth. There’s a locked grate in one dead end; to open it, you need to quickly light four braziers: 1) Near the large skeleton, stand on the rock platform, raise it, and follow the bones to the tower. 2) Near the seashore, dig up a mound of earth. 3) Climb the fortress wall, pull out the rock platforms on the left, and jump onto the left wall. There’s a recording and a bonfire there. 4) In front of the grate, you’ll find a chest behind the grate . To the east of the ruined stairs, there’s a statue with +100 health . Climb the cliff. The main staircase into the cave is destroyed; slightly to the left, we climb the fortress walls. On the platform with enemies, we search the bushes to find a memento . We climb higher along the beams. Inside the tower, there’s a chest and a note . In the upper clearing, there’s a chest in the corner . Another chest is visible behind the stone wall. In its center, we look for a small gap. Look through it, but not too close, and we can set fire to the red barrel. We go back a little and grab the chest through the blown-up wall . Descending into the cave. Inside are lava fields, between which we navigate islands and bridges, fighting enemy squads. We cross the roof of a wooden house and enter the fortress. Lava Caves. Boss: Cutter . This is a Qunari traitor with two axes. It’s best to attack with electricity. Once we defeat him, we can grab the chest . Jump across the platforms to the other side of the fortress; there’s a memento along the way . On the far platform, fire the mortar, destroy the wall behind, return there, and enter to grab the chest . Go through the hall and unlock the main gate. There’s a plaque and a recording in the room . The Dragon King will trap us in a cage. The captive mother will free us by pulling the lever, but the King will kill her for it. We descend to the street and cross over to the neighboring castle. Halfway up the beam, you can jump up to grab a memento, a chest, at the top of the tower. Down below, on the main path, there’s a chest in the room . Lair of the Dragon King. Boss: Kaltenzan . Weak to fire. After defeating him, loot the body of Taash’s mother. Reward: resources, gold item, +100 Lords of Fortune . Taash is a Veilguard Legend .
Words of Fire (Taash) If you chose the Qunari culture, you’ll meet arriving Qunari ships on the shore. Translator Karash will translate the ancient tablet. Together with Taash, we’ll climb to the top of the cliff. Reward: 150 gold . |
| Don’t Turn Off the Lights (Nev)
Port City. In the north of the city, we’ll visit the memorial to the fallen. Near the central monument, there are three artifacts instead of candles. Activating them will grant +250 Shadow Dragons .
The Case of the Returning Cultist (Nev) We talk to Nev at the tavern and go look for the cultist Elia together. On the shore near the rocks, we examine the dead man and read the “Thread Report .” We make our way through the market, fighting off enemies. An abandoned warehouse. A new door has opened in the market. Inside, you need to freeze the mechanism and cross the bridge. At the top, pull the lever and descend through the hatch in the floor. Nosensky Corridor. We search all the platforms under the bridge and ride the zipline. Kill a squad of enemies on the far tower. Follow the path on the left and reach a dead end on the right. On the inside of the collapsed tunnel, we can find a chest . Luskan Sanctuary. Inside, we climb higher, jump across the chasm, and grab onto the wooden platform. We read the inscription on the wall . We slide out the rock platforms to reach the chest . Further into the sanctuary, we proceed past the trapped bodies. Boss: Blood Shield . Elia is protected by a shield with red crystals. Destroy them one by one, then kill the enemy squad. Repeat three times, ending with the Bloodcrafting golem. After that, you can imprison Elia. Reward: 400 gold, +100 Shadow Dragons . Later, at the lighthouse, we talk to her. Nev is a Veil Guardian Legend . |
| Something’s Coming (Hossberg Marshes)
A new area has opened up in the south of the location; we’ll head there to destroy the taint vent. In the courtyard, we’ll destroy the growths; they’re on different balconies and only vulnerable on one side. Once we’ve destroyed them all, we’ll fire a ballista from the balcony, piercing the large taint node. Corruption release. We destroy a few more growths. Once everything is cleared, we plant charges in front of the wall fragment, run back, and blow it up. We return to headquarters. We’ll see that the flowers have blossomed without the Corruption. Reward: +400 Grey Wardens . |
| Ghosts: Scared? (Necropolis Halls)
Hossberg Marsh. Ancient Crossroads. Boss: Scarecrow, level 40. He constantly summons numerous ghosts; ignore them and only attack the boss. A dead end will open nearby, revealing a huge chest. Reward: 400 gold, +250 Sorrow’s Watch . |
| Ghosts: Deadly Fun (Necropolis Halls)
Port City. Port Roof. Boss: Level 40 Death . A tiny lamp golem will attack us, frequently using all types of magic. Reward: Red item, 500 gold, +250 Sorrow’s Watch . |
Rivain Coast
| Destruction Errors (Rivain Coast)
We’ll encounter a ghost on the starting shore. You’ll need to deal with demons in several locations along the coast: 1) Clifftops, 2) Gorge Descent, 3) Tidal Flats. Reward: 200 gold . |
| Sometimes the Dead Talk (Rivain Coast)
Climb the cliff. In the upper ruins, examine the skeleton near the chest. The Spirit of Adventure will appear. Follow his clues to find the treasure: 1) Tidal Flats. Head to the shore near the dragon skeleton. A squad of skeletal sailors will appear; kill them. Near a small rock, facing the sea, examine the seated skeleton. 2) Cliff tops. There are enemies at the bottom, and a skeleton sits near the waterfall to the north. 3) Winding Coast. In the southwest corner, right by the sea, kill a squad of skeletons. Examine the hidden door in the rock. The ghost will open it. Inside are a recording , a memento, two chests, and a huge chest . |
| The Greyguard’s Last Resort (Rivain Coast)
(The location for the quest will only open after Taash’s personal quest). The bottom of the cave. Inside the lava cave, on the broken house, we destroy the growth with the griffin. Quickly destroy three more growths, one on the side and one on the roof of the house. After that, we can destroy the filth inside the house; behind it, we’ll find the first statue with the inscription . Lava Caves. Near the middle tower, descend the stairs. Activate the ghostly platform above the lava. Walk across it to find a chest , a recording, and the second statue . The bottom of the cave. From the castle, we descend along the wide eastern path. From the lava, we raise two rock platforms, from which we examine the third statue . Lava Caves. There’s a growth high on the wall in the eastern tower. Remove it with the griffin, then destroy two growths on different floors. Behind the larger growth is the fourth statue . Inside the fortress, go to the western hall where there are four rotating statues. The level 42 boss, Sharkjaw Fury, will attack . After defeating him, read the riddle on the floor. Reward: +50+100 Fortune Lords, +50 Grey Wardens . |
| Treasures of Sharkmouth Mountain (Rivain Coast)
We’ll get this quest by examining any one of the four statues in Shark’s Mouth. You need to visit all the statues and memorize their descriptions to unlock the door to the treasure. Face north and rotate the statues from left to right: Ryan Red (Onion) – to the right (east). Cruach the Wolf (Hammer) – left (west). Ifean (Shield) – down (south). Deon the Silent (Blade) – forward (north). If we enter the combination correctly, we’ll go down the stairs a little further south and enter the tower that opens. Inside are two chests, one of which is a huge chest . Reward: +50 Grey Wardens, +100 Lords of Fortune . |
29. Words of the Wolf
Solas will tell you that the other two gods have everything ready, and now they’re just waiting for the eclipse to perform the ritual and destroy the Veil with a new dagger. We’ll discuss with the team where to find the gods.
30. For the love of Treviso
We travel to Treviso through the Crossroads. We speak with Viago. They have an unknown contact; he will meet us in the square. There, we will be met by “The Butcher” Daatrata. He will succumb to the voice of the gods, allowing us to learn their plans. But in doing so, the butcher will fall under the power of the gods.
Flooded Quarter. We run through the market to the water, jump across the chasms, and engage in battle. Boss: Corrupted Butcher . Once we defeat him, Governor Ivenchi will stop us. It turns out he made a deal with the gods.
31. Legacy and Legends
Let’s go meet the Inquisitor, she will tell us more about Solas.
32. Dragon Age One : Vilgard. All side quests
We’ll gather the entire squad at the lighthouse. Nev will tell us that the gods will be performing a ritual on the Island of Stone Tears. We’ll plan an attack on them. We’ll need to create a lot of distractions, after which we can slip through the island’s naval blockade undetected.
| Horns and Galla in “Ephesus” (Taash)
Conversation with Bellara and Taash in the Hall of Fame tavern. |
| A Time to Kill (Treviso)
At the lighthouse, we’ll receive a message from the “ravens.” We need to eliminate Governor Ivenchi. From the ravens’ headquarters, we’ll descend to the Antaam Garrison and kill a squad of enemies inside the building. At the exit, we’ll meet a boy named Yakov, who will help us. There are several squads of enemies in the courtyard. Boss: Ryan Evenchi . In the courtyard, between the barrels, we’ll fight the governor and his warriors. Once we defeat him, we can hand over the contract to Yakov. The “Crows” will take over. Return to their headquarters. Reward: 500 gold, +350 Antivan Crows . |
| A Murder of Crows (Lucanis)
From the Crows’ HQ, head to Illario’s house. Open the door to a new area of this location. Go through the attic and enter the left window on the other side to grab a chest . Kill the Venatori troops in the courtyard of the mansion. Reach the boat and cross the river. The basement of the Lellamorte estate. We’ll come to a gate under the bridge, break the boards on the right, and go through a cave. There’s a souvenir along the way . Dellamorte’s Estate. Enter the mansion’s rooms; in the center, behind some hidden furniture, is a chest , “Family Matters .” Search the side rooms and go up to the second floor. There are three memorabilia and a chest in the rooms there . The northern room with the fireplace contains a “Family Tree.” Pass through the library and take the chest from the balcony . In the far southern room are two recordings and a memorabilia . Opposite this room, Lucanis will open the large doors, and inside you’ll find the captive old woman, Katarina. Descend into the basement and enter the theater. Boss: Illario, level 45. The traitor will address the crows, but we will interrupt his speech. In battle, he attacks with two hooks and is assisted by Venatori mages. After defeat, choose Illario’s fate: He is dear to you, spare him / His actions are indefensible. Lucanis will become First Claw of the Crows. Reward: +100 Antivan Crows , Lucanis – Veilguard Legend . |
33. When plans come together
Point of No Return . (This quest will trigger the final quest chain, after which all side quests will become unavailable. Failure to complete your companions’ and allies’ personal quests will leave them weak in the final battle.)
We need to meet Morrigan at the Cobbled Swan. During our conversation, we’ll see that the planets have accelerated, and an eclipse is about to occur. The god will immediately begin his ritual.
34. Black Sun
Let’s talk to the team, then go talk to Varric.
35. Island of the Gods
We’ll land on the enemy island. Choose who will lead the distraction squad: Harding or Davrin (the character will be unavailable for several missions). We’ll head to the ritual site with our squad.
Outer Bank. We fight demons on the sandy shore.
Inner Bay. Cross the river on a log. On the other bank, go to the dead end on the right and search the chest .
A camp on the outer bank. The area will be bombarded with arrows; avoid the fire. An “illegible note” is by the northern wall . Climb the middle path through the cave. The boss on the way is a level 45 warrior, Issbakun . Read the “Orders” near the gate .
Approaching the fortress. We’ll see the 2nd squad in the distance. You can go down to the eastern island near the shore; there’s a chest on it . The main route is through the cave; there are stairs down under the bridge where you’ll find a chest and a recording .
Fortress entrance. Inside the building, on the right, under the third waterfall, grab the chest . We pass through several buildings, and inside, take the elevator up.
Ruins on a cliff. We emerge into the forest and fight several enemy squads. There’s a memento in a dead-end corridor . In the cave, we pick up the recording and climb up the rope. Beyond the gate, we’ll see a dragon flying past. We take the elevator up and enter the fortress courtyard at the top.
Guardhouse. We fight large demons in the courtyard. The second squad will open the gate for us from the other side. We proceed through the building.
Elven Ruins. There are fel growths and even more enemies here. On the southern shore, descend under the cliff, raise two rock platforms in the water, and grab the chest .
Fortress. Inside, we destroy four red clots of corruption. Each one is on its own balcony; we climb up there, fighting off enemies. There are two records in the southern dead ends . There’s a memento in the eastern corridor .
The Inner Sanctum. A barrier created by blood magic stands in the way. We choose who will destroy it: Nev or Bellara . The sent hero will be retrieved by the god from the mirror.
The upper platform of the fortress. Select two other companions. On the smoky platform, follow the red shoots and destroy the growths of corruption. Behind the large growth, we’ll see the god attempting to capture Harding. In the fog, we fight large demons. All our companions will be captured, entangled in tentacles. We’ll enter the battle alone.
Boss: Gilannaya’s Shield of Corruption . The goddess is under a red protective field. To break the shield, run into dead ends, destroying the red corruption growths. Small and large demons will hinder us. By destroying the growths, we’ll free two companions.
When the goddess grabs us, two companions will attempt a stealthy attack from behind. Harding/Davrin will die, but Lucanis will be able to stab the goddess with the dagger. The goddess will die. If you haven’t completed all of Lucanis’s tasks, he will also die after his attack. Once the dagger is in our hands, Solas will seize control, send us into the Fade, and escape from there.
36. Dungeon of the Gods
Dragon Age: The Veilguard Walkthrough
In the shadow realm, we go looking for a way out. At the starting point, we go around three dead ends, collecting three memorabilia in each one , after which a chest in the center will open . The main path is in the northeast.
We climb the stairs ever higher, listening to the stone statues of our companions. Near the circular island in the center, we need to bypass all the statues, after which a new corridor will appear. Here we’ll meet the living Varric. It turns out that Varric died in the prologue, and we only saw an illusion of him cast by Solas. The real Varric will show us the way to the exit.
At the lighthouse, we learn that the returned Solas has gathered his army against the remaining god, Elgaranan. But we must stop both gods to preserve the Veil.
37. The Dragon and the Dire Wolf
At the lighthouse, we go around to all the surviving companions again. If you started a romance with one of the companions and completed all of that companion’s side quests, you’ll only now see the love scene .
We’re preparing for battle with the gods. The enemy has captured the city of Minrathous, and we need to break through its defenses. We’re choosing who will do what (Davrin / Emmrik / Lucanis / Nev / Taash):
- Deal with magical protection (Nev / Emmrik).
- Kill the chief mage (Lucanis).
- Fight the large golem (Taash / Davrin).
The two remaining companions will go with us. When the battle begins, we’ll see the successes of the other squads first. Weaker allies and companions will perish.
38. The Last Gambit
We’ll find ourselves in Pluvairi Square with our squad. We’ll make our way through the demon-infested streets. After defeating them all, we’ll be able to crawl through the red growth in the wall. Inside, we’ll witness our squad of assassins attack the chief mage.
Upper City Market, Shop Quarter. Tarquin and the Serpent will survive or perish, depending on their strength. We’ll witness Solas’s battle with large fel tentacles. We’ll speak with him and agree to defeat Elgaranan together. Solas will promise not to destroy the Veil himself.
Talsian’s Chamber. Together with Solas, we fight our way through alleys swarming with demons. There’s a chest in the southern dead end . The Haven building contains a chest and resources , a “Discarded Journal .” In Urthemiel’s Alley, you need to quickly reach the mage on the high ground and neutralize him.
In the next courtyard, we’ll find the filth where our partner is imprisoned. Solas will give us a dagger to slay the dragon. Solas himself will transform into a huge wolf and attack the archdemon’s dragon.
Approaching the refuge. Boss: Elgar’nan’s Wrath golem . We’ll try to free our partner from the tentacles, but we’ll be stopped by a large steel golem. Once we defeat it, we’ll rescue our partner, Nev/Bellara. Witch Morrigan will help us escape the danger.
39. Last Breath
We’ll find ourselves in a temporary shelter on a narrow street. We can honor the fallen in the room on the right. We can speak with the surviving companions. We can visit the shop and workshop.
We learn that the Veil will collapse with the death of the second god, which is why Solas so readily entrusted us with the lyrium dagger. We’ll figure out how to switch the dagger so Solas won’t succeed. We can speak with each character individually. The favorite character has a special dialogue option.
40. The Dire Wolf Shows Its Fangs
Dragon Age: Vilgard. All Endings
We choose which companion to send: Fight on the front lines, participate in the siege ( Nev / Davrin / Emmrik ). We select two companions for our squad. We move on to the Archon’s Palace. If we send a weak companion to the front lines, they will die.
Embassies. At the top of the fortress, we’ll see a battle between a dragon and a wolf. We’ll go higher, killing the large demons. In the tower building, we’ll grab the chest and climb the landing. On the roof, we’ll finish off the demons, then move along the ledges and reach the cliff by the throne room.
Entrance to the throne room. We defeat large demons in the building. Above, an infected companion will save Solas from the grasp of tentacles. In the throne room, we’ll meet the god Elgar’nan himself.
Boss: Elgar’nan . He moves quickly, leaving behind copies that attack with a stream of energy. Necrosis is the best attack. Dodge at the right time, run up to the boss, and strike.
Once we defeat him, we’ll see that the wolf hasn’t yet defeated the dragon, and the god remains invulnerable. We rejoin the fight. The boss will cast darkness. We dodge his spear attacks in time. We need to survive for a couple of minutes. The infected ally will sit on the throne and begin to control the tentacles to save the wolf. After that, Solas will finish off the dragon.
Boss: Elgar’nan . He’ll now attack with fire magic and a sword. It’s best to attack him with cold magic. Dodge his combo a few times, and after he lands a strong blow, you can approach and strike him back. Finally, we’ll defeat the second god.
Endings
Only Solas will remain, and he’ll try to destroy the Veil again. He’ll take the blue dagger from us and turn our remaining companions to stone. We choose a solution:
- But I want to fight you – bad ending.
- Let’s try it your way. – normal ending.
- [More details] You don’t have to do this – good ending.
- Bad ending
We will fight Solas one-on-one. The dagger will be stained with our blood and Solas’s. We will both be drawn into the Veil. This will charge the Veil with the energy of the remaining god, and the barrier will remain in place, but at the ultimate cost.
- Normal ending
We’ll trick Solas into performing the ritual with a fake dagger. This will weaken him, and we can take his blood to charge the Veil with his divine energy. Solas will find himself alone behind the Veil.
- Good ending
If you’ve completed the side quests at the Crossroads, you’ll be able to use the essence of the goddess Mythal. The Lady Inquisitor and the witch Morrigan will come to convince Solas. Using the statuette, they’ll summon the goddess Mythal herself, who will persuade Solas to leave the Veil. The god will willingly go beyond the Veil, accompanied by his companion, the Inquisitor.
Character and faction endings
After the story’s conclusion, we’ll see the fate of the side factions and characters. Each will have its own slide, depending on the path chosen:
The Grey Wardens destroyed the remnants of the corruption.
Dorian Pavus fought to liberate Minrathous from the Venatori.
The caretaker stands guard over the new heroes.
The Antivan crows liberated Treviso from the invaders.
The Veil Wanderers, after the death of the gods, revived Arlathan.
Emmrik explores worlds beyond mortal existence.
Nev is defending the Port City with all his might.
Lucanis is a killer and a demon who strives for justice.
Bellara, an elven historian, helped her people regain what was lost.
Taash managed to rediscover the strength in his heritage.
Davrin, the griffins have reunited with the Grey Wardens.